
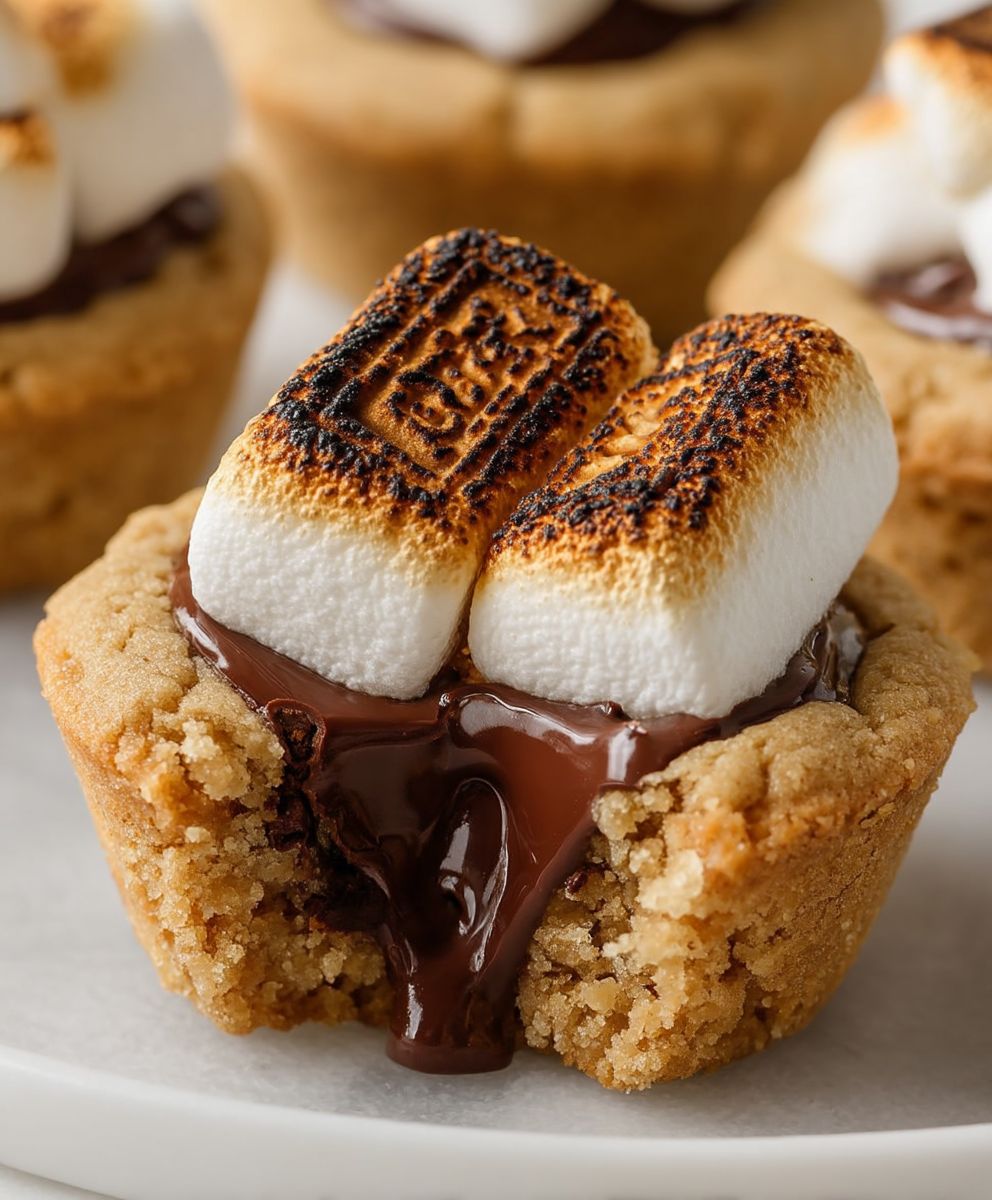
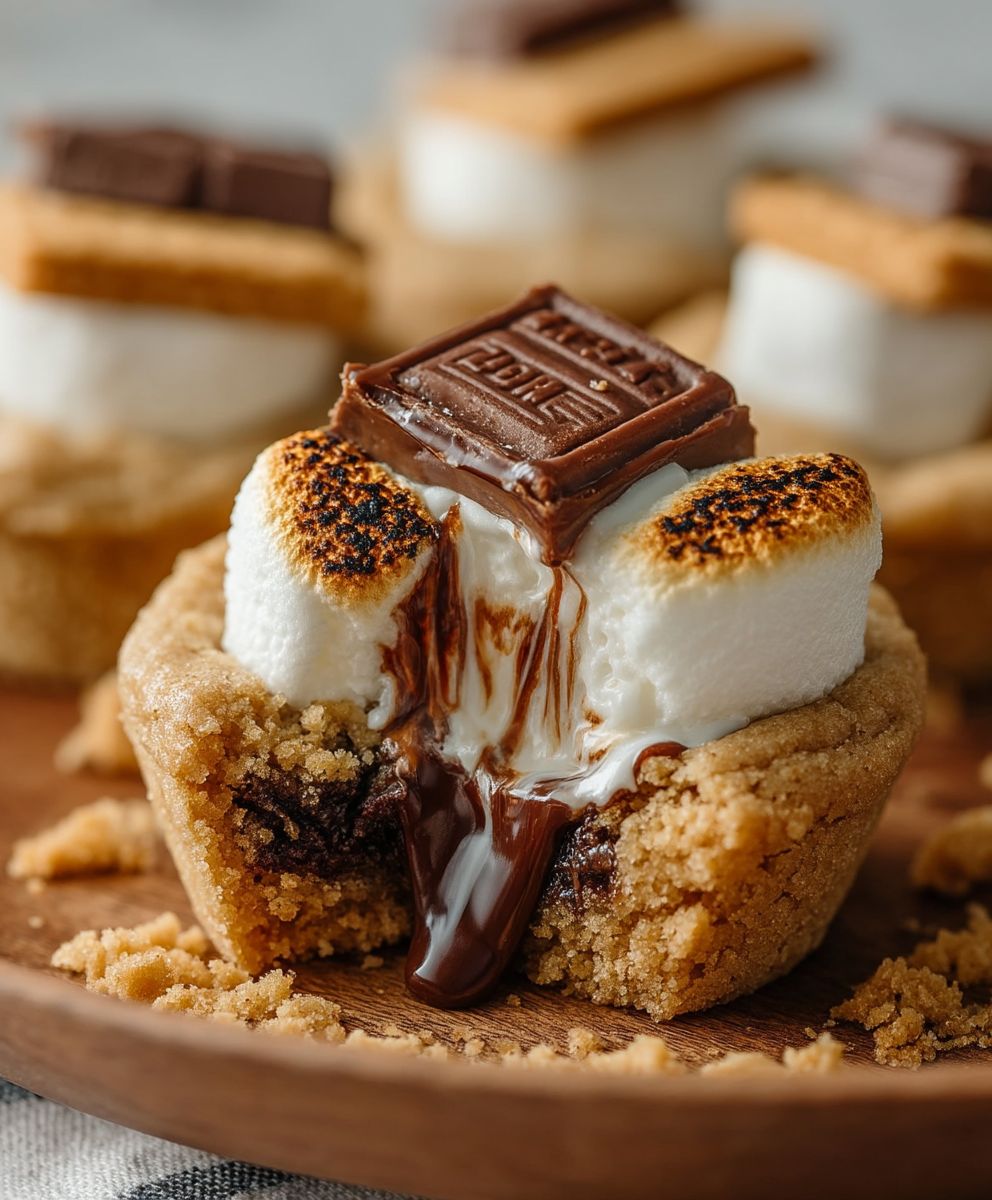
Smores Cookie Cups: the miniature dessert that packs a mighty punch of campfire nostalgia! Imagine sinking your teeth into a buttery, soft cookie base, yielding to a gooey, melted chocolate center, all crowned with a perfectly toasted marshmallow. Is your mouth watering yet? Mine certainly is! These delightful treats capture the essence of summer evenings spent around a crackling fire, without the need for a campfire or even a tent.
The history of smores is deeply rooted in American camping culture, with the first recorded recipe appearing in a Girl Scout guidebook in the 1920s. Since then, the simple combination of graham crackers, chocolate, and marshmallows has become a beloved tradition. But let’s be honest, sometimes you crave that iconic flavor without wanting the mess of a traditional smore. That’s where these Smores Cookie Cups come in!
People adore smores for their irresistible combination of textures and flavors: the crisp graham cracker, the smooth chocolate, and the fluffy, slightly caramelized marshmallow. These cookie cups offer all of that in a convenient, single-serving package. They’re perfect for parties, potlucks, or simply satisfying your sweet tooth on a cozy night in. Plus, they’re incredibly easy to make, making them a winner in my book. Get ready to experience the magic of smores in a whole new way!
Ingredients:
- For the Cookie Dough:
- 1 cup (2 sticks) unsalted butter, softened
- 3/4 cup granulated sugar
- 3/4 cup packed brown sugar
- 2 large eggs
- 1 teaspoon vanilla extract
- 2 1/4 cups all-purpose flour
- 1 teaspoon baking soda
- 1 teaspoon salt
- 1 cup graham cracker crumbs (about 14 full graham crackers, finely crushed)
- 1 cup semi-sweet chocolate chips
- For the Marshmallow Filling:
- 1 (10 ounce) bag mini marshmallows
- 1/4 cup heavy cream
- 1 tablespoon butter
- 1/2 teaspoon vanilla extract
- For the Topping:
- 1/2 cup semi-sweet chocolate chips
- 1 tablespoon shortening (or coconut oil)
- Mini marshmallows (for garnish, optional)
- Graham cracker crumbs (for garnish, optional)
Making the Cookie Dough
- Cream the Butter and Sugars: In a large bowl (or the bowl of a stand mixer), cream together the softened butter, granulated sugar, and brown sugar until light and fluffy. This usually takes about 3-5 minutes. Make sure to scrape down the sides of the bowl occasionally to ensure everything is evenly mixed. The mixture should be pale and airy.
- Add Eggs and Vanilla: Beat in the eggs one at a time, mixing well after each addition. Then, stir in the vanilla extract. Don’t overmix at this stage, just combine until the eggs are fully incorporated.
- Combine Dry Ingredients: In a separate medium bowl, whisk together the all-purpose flour, baking soda, and salt. This ensures the baking soda and salt are evenly distributed throughout the flour.
- Add Dry Ingredients to Wet Ingredients: Gradually add the dry ingredients to the wet ingredients, mixing on low speed until just combined. Be careful not to overmix, as this can result in tough cookies. Overmixing develops the gluten in the flour, which we want to avoid for a tender cookie.
- Stir in Graham Cracker Crumbs and Chocolate Chips: Gently fold in the graham cracker crumbs and chocolate chips until they are evenly distributed throughout the dough. I like to use a rubber spatula for this step to avoid overmixing.
- Chill the Dough (Optional but Recommended): Cover the bowl with plastic wrap and chill the dough in the refrigerator for at least 30 minutes. This will help prevent the cookies from spreading too much during baking and will also enhance the flavor. You can chill it for longer, even overnight, if you prefer. If you chill it overnight, you might need to let it sit at room temperature for a few minutes to soften slightly before scooping.
Forming and Baking the Cookie Cups
- Preheat Oven and Prepare Muffin Tin: Preheat your oven to 350°F (175°C). Grease a 24-cup mini muffin tin very well. You can also use mini muffin liners if you prefer, but greasing is essential to prevent the cookie cups from sticking.
- Scoop the Dough: Using a small cookie scoop or a spoon, scoop about 1 tablespoon of cookie dough into each muffin cup.
- Shape the Cups: Use your fingers or the back of a small spoon to press the dough evenly into the bottom and up the sides of each muffin cup, creating a well in the center. You want the dough to be relatively thin and even to ensure it bakes properly.
- Bake the Cookie Cups: Bake for 10-12 minutes, or until the edges are golden brown and the centers are set. Keep a close eye on them, as baking times can vary depending on your oven.
- Cool Slightly: Remove the muffin tin from the oven and let the cookie cups cool in the tin for about 5 minutes. This will allow them to firm up slightly, making them easier to remove.
- Remove from Muffin Tin: Carefully remove the cookie cups from the muffin tin and transfer them to a wire rack to cool completely. You can use a small offset spatula or a knife to gently loosen the edges if they are sticking.
Making the Marshmallow Filling
- Melt Marshmallows: In a medium saucepan over low heat, combine the mini marshmallows, heavy cream, and butter.
- Stir Constantly: Stir constantly until the marshmallows are completely melted and the mixture is smooth. Be careful not to burn the marshmallows. Low and slow is the key here!
- Add Vanilla: Remove from heat and stir in the vanilla extract.
Assembling the S’mores Cookie Cups
- Fill the Cookie Cups: Spoon the marshmallow filling into each cooled cookie cup, filling them almost to the top.
- Chill (Optional): For easier handling, you can chill the filled cookie cups in the refrigerator for about 15-20 minutes to allow the marshmallow filling to set slightly. This will make dipping them in chocolate easier.
Making the Chocolate Topping
- Melt Chocolate and Shortening: In a microwave-safe bowl, combine the semi-sweet chocolate chips and shortening (or coconut oil).
- Microwave in Intervals: Microwave in 30-second intervals, stirring well after each interval, until the chocolate is completely melted and smooth. Be careful not to overheat the chocolate, as it can burn easily.
Dipping and Decorating
- Dip the Cookie Cups: Dip the top of each marshmallow-filled cookie cup into the melted chocolate, allowing the excess chocolate to drip off.
- Decorate (Optional): Immediately sprinkle with mini marshmallows and graham cracker crumbs, if desired. You can also add a drizzle of extra melted chocolate for a more decadent look.
- Set the Chocolate: Place the dipped cookie cups on a parchment-lined baking sheet and let the chocolate set completely. You can speed up the process by placing them in the refrigerator for about 10-15 minutes.
- Enjoy! Once the chocolate is set, your S’mores Cookie Cups are ready to enjoy! Store them in an airtight container at room temperature for up to 3 days.
Conclusion:
So there you have it! These S’mores Cookie Cups are truly a must-try for anyone who loves the classic campfire treat but wants a convenient, less messy, and utterly adorable way to enjoy it. The combination of the buttery, slightly salty cookie base, the gooey melted chocolate, and the perfectly toasted marshmallow is simply irresistible. It’s a flavor explosion in every single bite, and I guarantee they’ll disappear faster than you can say “pass the graham crackers!”
But why are these cookie cups so special? It’s the perfect balance of textures and flavors. The soft, chewy cookie provides a comforting foundation, while the melted chocolate adds a rich, decadent sweetness. And of course, the toasted marshmallow brings that signature smoky, caramelized flavor that defines the s’more experience. Plus, they’re incredibly easy to make, even for beginner bakers. No complicated techniques or fancy equipment required!
Looking for serving suggestions? These S’mores Cookie Cups are fantastic on their own, warm from the oven. They’re also amazing with a scoop of vanilla ice cream on top – the cold ice cream against the warm cookie and marshmallow is pure bliss. For a more decadent treat, drizzle them with a little melted chocolate or caramel sauce. They’re also perfect for parties, potlucks, or any occasion where you want to impress your friends and family with a delicious and crowd-pleasing dessert.
And don’t be afraid to get creative with variations! Try using different types of chocolate, like dark chocolate or white chocolate, for a unique twist. You could also add a sprinkle of sea salt on top for a salty-sweet flavor combination. For a more sophisticated version, try using gourmet marshmallows, like vanilla bean or salted caramel. Or, if you’re feeling adventurous, add a layer of peanut butter between the cookie and the chocolate for a Reese’s-inspired S’mores Cookie Cup. The possibilities are endless!
These S’mores Cookie Cups are also a fantastic activity to do with kids. They’ll love helping you press the cookie dough into the muffin tins, adding the chocolate, and of course, toasting the marshmallows. It’s a fun and delicious way to spend time together in the kitchen, and you’ll create memories that will last a lifetime. Just be sure to supervise them closely when using the broiler or kitchen torch.
I truly believe that this recipe will become a new favorite in your household. It’s simple, satisfying, and guaranteed to bring a smile to everyone’s face. So, what are you waiting for? Gather your ingredients, preheat your oven, and get ready to bake up a batch of these irresistible S’mores Cookie Cups.
I’m so excited for you to try this recipe! Once you do, please come back and share your experience in the comments below. Let me know what you thought of the recipe, what variations you tried, and any tips or tricks you discovered along the way. I love hearing from you and seeing your creations! Happy baking! I hope you enjoy this S’mores Cookie Cups recipe as much as I do!
Smores Cookie Cups: Easy Recipe & Baking Tips
Mini cookie cups filled with gooey marshmallow, topped with chocolate and graham crackers – s'mores in a bite!
Ingredients
Instructions
Recipe Notes
- Chilling the cookie dough is recommended to prevent spreading and enhance flavor.
- Greasing the mini muffin tin very well is essential to prevent sticking.
- Be careful not to overmix the cookie dough, as this can result in tough cookies.
- When melting the marshmallows, use low heat and stir constantly to prevent burning.
- You can use coconut oil instead of shortening for the chocolate topping.
- Get creative with your toppings! Try adding a drizzle of extra melted chocolate or other candies.

Leave a Comment