
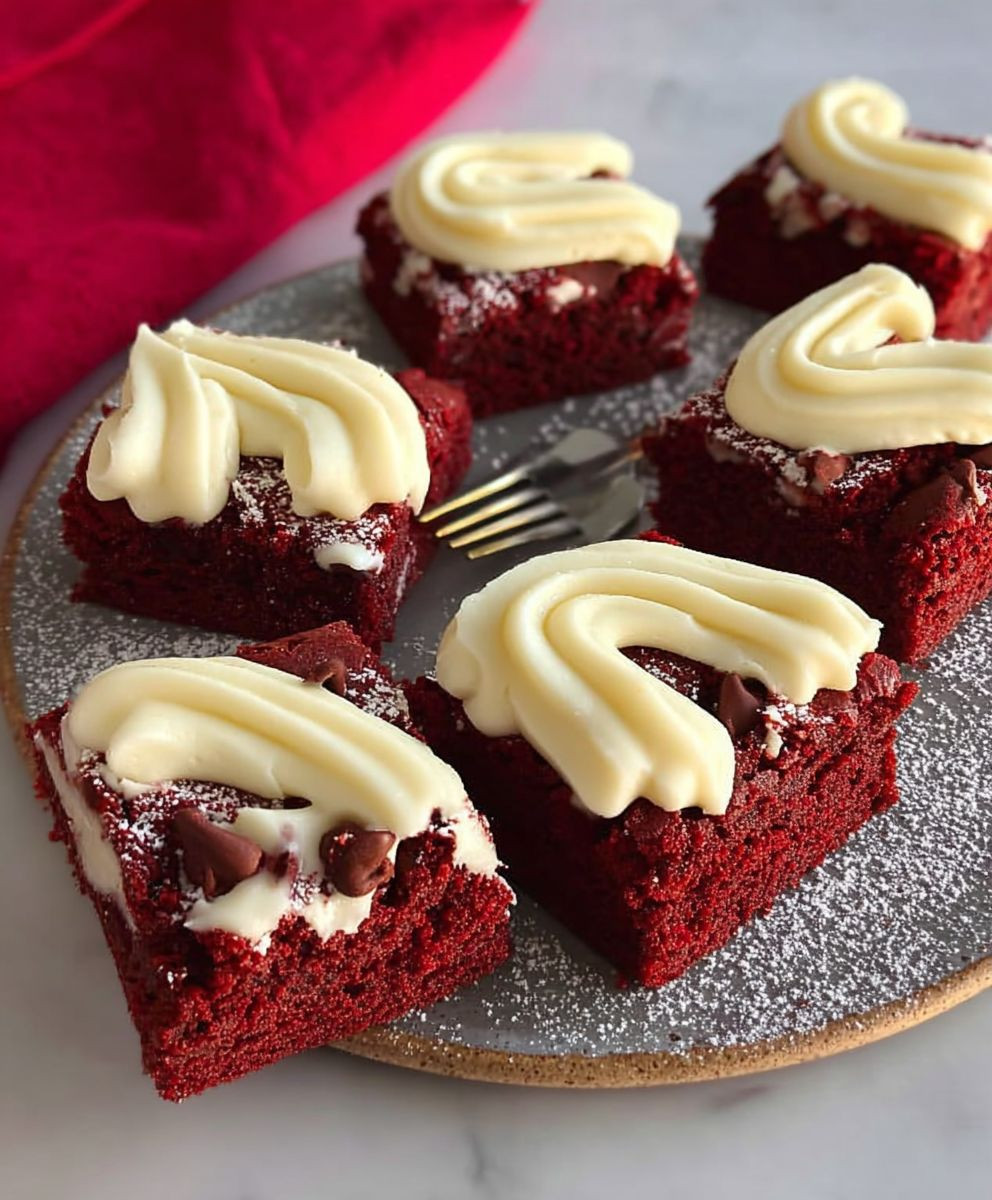
Red Velvet Brownies: Prepare to fall head over heels for the most decadent, fudgy, and utterly irresistible treat you’ll bake all year! Imagine the classic, comforting taste of a red velvet cake, but intensified and transformed into a chewy, brownie masterpiece. These aren’t your average brownies; they’re a symphony of flavors and textures that will have everyone begging for the recipe.
The allure of red velvet, with its subtle cocoa notes and vibrant hue, has captivated taste buds for generations. While its exact origins are debated, many believe it gained popularity during the Great Depression, when bakers used beet juice to enhance the color and moisture of cakes. Today, the distinctive red color is often achieved with food coloring, but the essence of red velvet – its delicate tang and velvety smooth texture – remains a timeless classic.
What makes these Red Velvet Brownies so beloved? It’s the perfect marriage of rich chocolate flavor, a hint of tanginess from buttermilk (or a clever substitute!), and that signature fudgy texture that melts in your mouth. They’re incredibly easy to make, requiring minimal ingredients and effort, making them ideal for a quick weeknight dessert or a show-stopping treat for special occasions. Get ready to experience brownie perfection!
Ingredients:
- 1 cup (2 sticks) unsalted butter, melted
- 2 cups granulated sugar
- 4 large eggs
- 1 tablespoon red food coloring
- 1 teaspoon white vinegar
- 1 teaspoon vanilla extract
- 1 cup all-purpose flour
- ¾ cup unsweetened cocoa powder
- ½ teaspoon baking powder
- ¼ teaspoon salt
- 1 cup semi-sweet chocolate chips
Preparing the Red Velvet Brownie Batter
- Melt the Butter: First things first, let’s melt that butter! You can do this in a saucepan over low heat, stirring constantly to prevent burning. Alternatively, microwave it in a microwave-safe bowl in 30-second intervals, stirring in between, until completely melted. Set it aside to cool slightly. We don’t want to cook the eggs later!
- Combine Butter and Sugar: In a large mixing bowl, pour in the melted butter and add the granulated sugar. Using a whisk or an electric mixer, cream together the butter and sugar until the mixture is light and fluffy. This usually takes about 2-3 minutes with an electric mixer. The mixture should become noticeably lighter in color and texture.
- Incorporate the Eggs: Now, crack in the eggs one at a time, mixing well after each addition. Make sure each egg is fully incorporated before adding the next. This helps to create a smooth and emulsified batter. Overmixing at this stage isn’t a huge concern, but avoid beating it excessively.
- Add the Red Velvet Magic: This is where the red velvet color comes in! Add the red food coloring, white vinegar, and vanilla extract to the batter. Mix until everything is evenly combined and the batter has a vibrant red hue. The vinegar helps to activate the red food coloring and also adds a slight tang that complements the chocolate flavor.
- Dry Ingredients Time: In a separate medium-sized bowl, whisk together the all-purpose flour, unsweetened cocoa powder, baking powder, and salt. Whisking ensures that the dry ingredients are evenly distributed and that there are no lumps of cocoa powder.
- Combine Wet and Dry: Gradually add the dry ingredients to the wet ingredients, mixing on low speed or with a spatula until just combined. Be careful not to overmix the batter, as this can lead to tough brownies. Mix until there are no streaks of flour remaining, but don’t keep mixing once everything is incorporated.
- Chocolate Chip Finale: Finally, gently fold in the semi-sweet chocolate chips. Distribute them evenly throughout the batter. You can use other types of chocolate chips if you prefer, such as milk chocolate or dark chocolate. You could even add chopped nuts for extra texture and flavor!
Baking the Brownies
- Prepare the Baking Pan: Preheat your oven to 350°F (175°C). Grease and flour a 9×13 inch baking pan. Alternatively, you can line the pan with parchment paper, leaving an overhang on the sides. This makes it easy to lift the brownies out of the pan after baking.
- Pour in the Batter: Pour the brownie batter into the prepared baking pan and spread it evenly with a spatula. Make sure the batter reaches all the corners of the pan.
- Bake to Perfection: Bake in the preheated oven for 25-30 minutes, or until a toothpick inserted into the center comes out with moist crumbs attached. Be careful not to overbake the brownies, as they will become dry and crumbly. The baking time may vary depending on your oven, so keep an eye on them.
- Cool Completely: Once the brownies are baked, remove them from the oven and let them cool completely in the pan before cutting. This is important because the brownies will continue to set as they cool. If you try to cut them while they are still warm, they will be messy and difficult to handle. I know it’s tempting, but patience is key!
Cutting and Serving
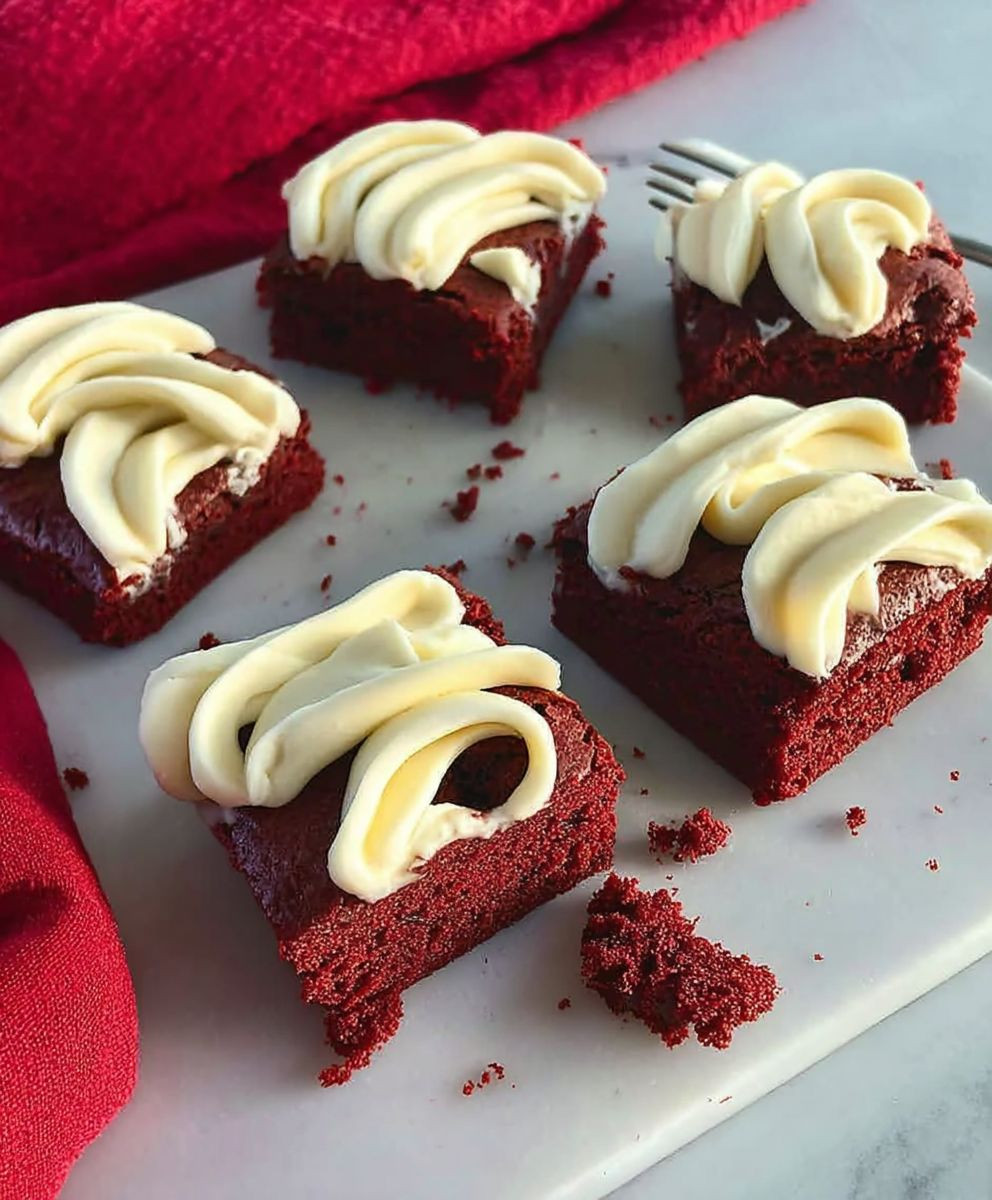
- Cutting the Brownies: Once the brownies are completely cool, you can cut them into squares. Use a sharp knife to cut clean lines. If you lined the pan with parchment paper, you can lift the brownies out of the pan and cut them on a cutting board.
- Serving Suggestions: Serve the red velvet brownies as is, or with a scoop of vanilla ice cream, a dollop of whipped cream, or a dusting of powdered sugar. They are also delicious with a cup of coffee or tea.
Tips and Tricks for the Best Red Velvet Brownies
- Use High-Quality Ingredients: The quality of your ingredients will affect the taste and texture of your brownies. Use good-quality butter, cocoa powder, and chocolate chips for the best results.
- Don’t Overmix the Batter: Overmixing the batter can lead to tough brownies. Mix until just combined, and then stop.
- Don’t Overbake the Brownies: Overbaking the brownies will make them dry and crumbly. Bake until a toothpick inserted into the center comes out with moist crumbs attached.
- Let the Brownies Cool Completely: Letting the brownies cool completely before cutting them will make them easier to handle and prevent them from crumbling.
- Add a Cream Cheese Swirl: For an extra touch of red velvet flavor, add a cream cheese swirl to the batter before baking. To do this, mix together 4 ounces of softened cream cheese, 2 tablespoons of sugar, and 1 egg yolk. Drop spoonfuls of the cream cheese mixture over the brownie batter and swirl with a knife or toothpick.
- Store Properly: Store leftover brownies in an airtight container at room temperature for up to 3 days or in the refrigerator for up to 1 week.
- Experiment with Flavors: Feel free to experiment with different flavors and add-ins. Try adding chopped nuts, dried fruit, or different types of chocolate chips.
Troubleshooting
- Brownies are too dry: You may have overbaked the brownies. Be sure to check them frequently while baking and remove them from the oven as soon as a toothpick inserted into the center comes out with moist crumbs attached. Also, make sure you are not overmeasuring the flour. Spoon the flour into your measuring cup and level it off with a knife, rather than scooping it directly from the bag.
- Brownies are too gooey: You may have underbaked the brownies. Bake them for a few more minutes, until a toothpick inserted into the center comes out with moist crumbs attached.
- Brownies are too tough: You may have overmixed the batter. Mix until just combined, and then stop.
- Brownies are not red enough: You may need to add more red food coloring. The amount of food coloring needed will depend on the brand and type of food coloring you are using. Start with 1 tablespoon and add more as needed until you achieve the desired color. Gel food coloring typically provides a more vibrant color than liquid food coloring.
Variations
- Red Velvet Blondies: Omit the cocoa powder for a red velvet blondie version.
- Red Velvet Cupcakes: Pour the batter into cupcake liners and bake for 18-20 minutes. Top with cream cheese frosting.
- Red Velvet Cookies: Drop spoonfuls of the batter onto a baking sheet and bake for 10-12 minutes.
Nutritional Information (Approximate, per serving)
Note: Nutritional information is an estimate and may vary based on specific ingredients and portion sizes.
- Calories: 350
- Fat: 20g
- Saturated Fat: 12g
- Cholesterol: 75mg
- Sodium: 150mg
- Carbohydrates: 40g
- Sugar: 30g
- Protein: 4g
Conclusion:
And there you have it! These Red Velvet Brownies are more than just a dessert; they’re an experience. The fudgy texture, the subtle tang of buttermilk, and that iconic red hue all combine to create a treat that’s both comforting and utterly irresistible. I truly believe this recipe is a must-try for anyone who loves brownies, red velvet cake, or just wants to bake something special.
Why is this recipe a winner? Well, beyond the incredible flavor, it’s surprisingly simple to make. You don’t need any fancy equipment or advanced baking skills. Just follow the steps, and you’ll be rewarded with a batch of decadent brownies that will impress your friends and family. Plus, the red velvet flavor is a delightful twist on the classic brownie, making it perfect for holidays, birthdays, or any occasion that calls for a little extra indulgence.
But the fun doesn’t stop there! Feel free to get creative with serving suggestions and variations. For a truly decadent experience, serve these brownies warm with a scoop of vanilla ice cream and a drizzle of chocolate sauce. Or, if you’re feeling adventurous, try adding a swirl of cream cheese frosting on top for an extra layer of tangy sweetness. You could even sprinkle some chopped pecans or walnuts over the batter before baking for added texture and nutty flavor.
Another great variation is to add white chocolate chips to the batter. The creamy sweetness of the white chocolate complements the red velvet flavor beautifully. If you’re a fan of coffee, try adding a teaspoon of instant espresso powder to the batter to enhance the chocolate flavor and add a subtle mocha note. And for a festive touch, you can decorate the cooled brownies with red and white sprinkles or edible glitter.
These Red Velvet Brownies are also fantastic for gifting. Wrap them individually in cellophane bags and tie them with a ribbon for a thoughtful and homemade present. They’re sure to be a hit with anyone who receives them!
I’m so confident that you’ll love this recipe. It’s become a staple in my own kitchen, and I can’t wait for you to experience the joy of baking and enjoying these delicious brownies.
So, what are you waiting for? Preheat your oven, gather your ingredients, and get ready to bake a batch of these amazing Red Velvet Brownies. I promise you won’t regret it!
And most importantly, I’d love to hear about your experience! Once you’ve tried the recipe, please come back and share your thoughts in the comments below. Did you make any variations? What did your friends and family think? I’m always eager to learn from your baking adventures and see how you’ve made this recipe your own. Happy baking!
Red Velvet Brownies: The Ultimate Recipe for Decadent Treats
Decadent and fudgy red velvet brownies with a hint of tang and plenty of chocolate chips. These easy-to-make brownies are a guaranteed crowd-pleaser!
Ingredients
Instructions
Recipe Notes
- Use high-quality ingredients for the best flavor.
- Don’t overmix the batter.
- Don’t overbake the brownies.
- Let the brownies cool completely before cutting.
- For an extra touch of red velvet flavor, add a cream cheese swirl to the batter before baking. To do this, mix together 4 ounces of softened cream cheese, 2 tablespoons of sugar, and 1 egg yolk. Drop spoonfuls of the cream cheese mixture over the brownie batter and swirl with a knife or toothpick.
- Store leftover brownies in an airtight container at room temperature for up to 3 days or in the refrigerator for up to 1 week.
- Experiment with different flavors and add-ins. Try adding chopped nuts, dried fruit, or different types of chocolate chips.
Leave a Comment