
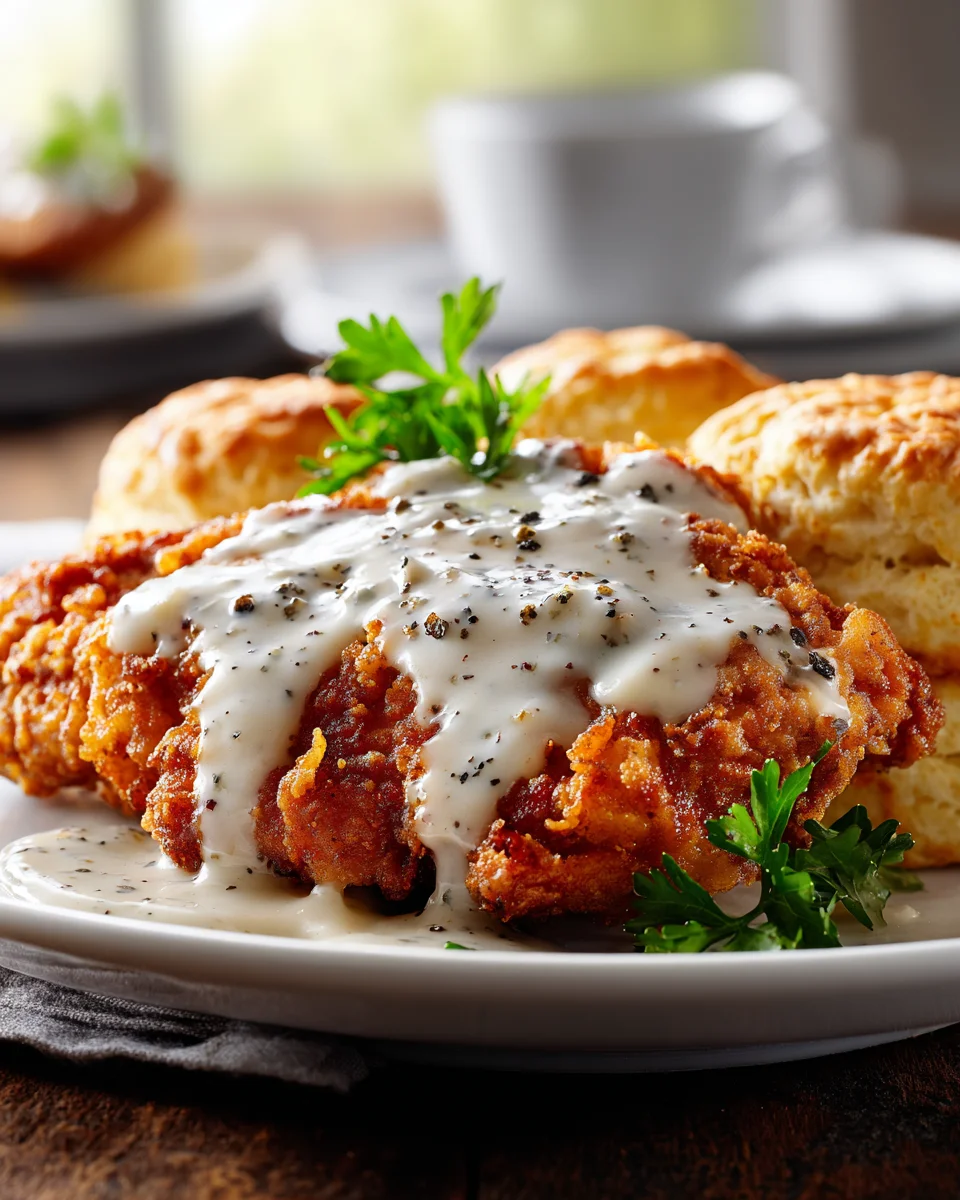
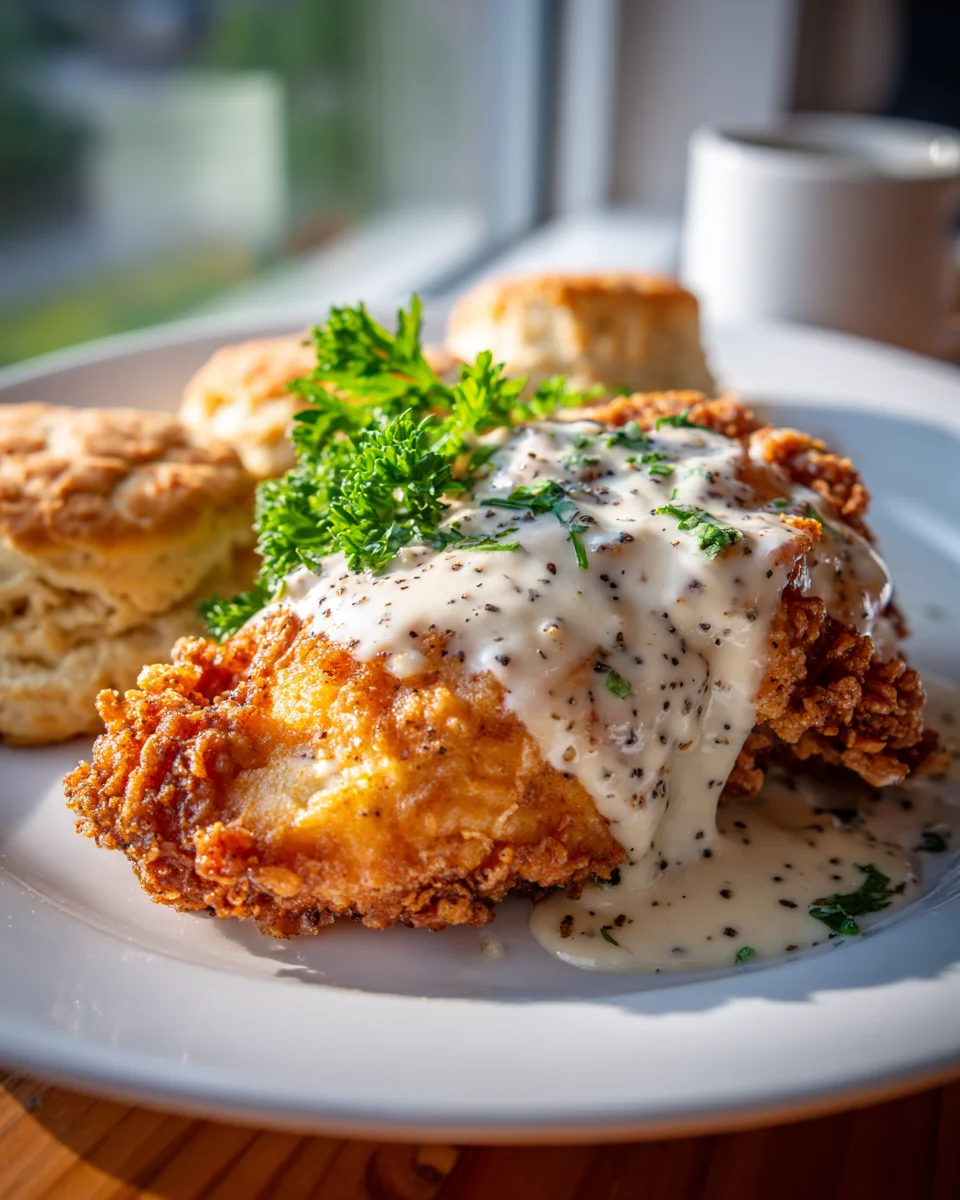
Texas Roadhouse Country Fried Chicken With Cream Gravy
Oh my goodness, friends, if there’s one dish that screams comfort and pure, unadulterated deliciousness, it’s this one! I’m so excited to share my take on the legendary Texas Roadhouse Country Fried Chicken With Cream Gravy. What makes this recipe so incredibly special? It’s that perfect balance: an unbelievably crispy, golden-brown crust that gives way to tender, juicy chicken underneath, all brought together by a rich, velvety, and utterly irresistible cream gravy. You’ll absolutely adore making this because it brings that beloved restaurant experience right into your own kitchen.
Imagine biting into that perfectly seasoned crunch, followed by succulent chicken, then dipping it into that warm, savory gravy – it’s pure bliss! This dish isn’t just a meal; it’s an experience, a taste of home-style Southern comfort food perfected. Get ready to impress your family and yourself with this fantastic creation!
Ingredient Notes
Recreating the magic of Texas Roadhouse’s Country Fried Chicken with Cream Gravy at home starts with understanding the key players in your ingredient list. I’ve found that using quality ingredients makes all the difference, but I also have some handy substitutions up my sleeve for when you’re in a pinch!
- Chicken: For that authentic Texas Roadhouse experience, I prefer boneless, skinless chicken breasts. You can also use boneless, skinless chicken thighs if you prefer darker meat; they tend to stay even juicier. Pounding the chicken breasts to an even ½-inch thickness ensures even cooking and tenderness.
- All-Purpose Flour: This is the backbone of our crispy coating and our creamy gravy. I always use unbleached all-purpose flour. There isn’t really a direct substitution here for the texture we’re aiming for.
- Buttermilk: Essential for tenderizing the chicken and helping the breading adhere beautifully. If you don’t have buttermilk on hand, don’t worry! I often make my own by adding one tablespoon of white vinegar or lemon juice to a measuring cup and then filling the rest with regular milk (any fat percentage works) until it reaches one cup. Let it sit for 5-10 minutes until it slightly curdles.
- Eggs: Our binding agent! I use large eggs to create the perfect wet dredge.
- Seasonings: This is where the flavor truly comes alive. My go-to blend for the flour mixture includes salt, freshly ground black pepper, garlic powder, onion powder, paprika, and a pinch of cayenne pepper for a subtle warmth without being overtly spicy. Feel free to adjust the cayenne to your heat preference.
- Vegetable Oil for Frying: You’ll need enough oil to submerge the chicken halfway for even frying. I typically use canola or vegetable oil due to their high smoke point and neutral flavor. Avoid olive oil as it has a lower smoke point.
- Milk or Cream for Gravy: For the iconic creamy gravy, whole milk works wonderfully for a rich texture. For an even more decadent gravy, I sometimes use a mix of whole milk and heavy cream. Skim or low-fat milk can be used, but the gravy won’t be as rich or thick.
- Butter: Just a little bit of unsalted butter helps create the roux for our gravy, adding a lovely richness.
Step-by-Step Instructions
Alright, let’s get down to business! Follow these steps closely, and you’ll be enjoying a plate of homemade Texas Roadhouse Country Fried Chicken with Cream Gravy in no time. I always find it helpful to set up my dredging station before I start the frying process.
- Prepare the Chicken:
- First, take your boneless, skinless chicken breasts (or thighs) and pat them thoroughly dry with paper towels. This is crucial for the breading to stick.
- If using chicken breasts, place each breast between two pieces of plastic wrap and pound them to an even ½-inch thickness using a meat mallet or a heavy rolling pin. This ensures even cooking.
- Set Up Your Dredging Station:
- Prepare three shallow dishes or bowls.
- In the first bowl, whisk together the buttermilk and eggs. I also like to add a dash of hot sauce here for extra flavor, but it’s optional!
- In the second bowl, combine 2 cups of all-purpose flour with your chosen seasonings: 2 teaspoons salt, 1 teaspoon black pepper, 1 teaspoon garlic powder, 1 teaspoon onion powder, ½ teaspoon paprika, and ¼ teaspoon cayenne pepper. Whisk well to ensure the seasonings are evenly distributed.
- The third bowl will contain another 1 cup of plain all-purpose flour. This is for our double dredge!
- Breading the Chicken:
- Working one piece at a time, first dredge the chicken in the plain flour (bowl 3), shaking off any excess. This helps the wet mixture adhere.
- Next, dip the floured chicken into the buttermilk-egg mixture, letting any excess drip off.
- Finally, place the chicken into the seasoned flour mixture (bowl 2), pressing firmly to ensure it’s completely coated. Give it another light shake to remove loose flour. I always press it down really well to get that thick, craggy coating.
- Place the breaded chicken on a wire rack set over a baking sheet and repeat with the remaining chicken. Let the breaded chicken rest for about 10-15 minutes at room temperature. This helps the breading adhere better during frying.
- Fry the Chicken:
- Pour about 1-2 inches of vegetable oil into a large, heavy-bottomed skillet (cast iron works beautifully for this) or a Dutch oven. Heat the oil over medium-high heat to 350°F (175°C). Use a thermometer to monitor the temperature; it’s key for crispy chicken that’s cooked through.
- Carefully place 2-3 pieces of chicken into the hot oil, being careful not to overcrowd the pan. Overcrowding will drop the oil temperature and lead to soggy chicken.
- Fry for about 4-6 minutes per side, or until the chicken is golden brown and cooked through, reaching an internal temperature of 165°F (74°C). The exact time will depend on the thickness of your chicken.
- Remove the cooked chicken from the oil and place it on a clean wire rack set over a baking sheet to drain excess oil. Sprinkle with a little extra salt immediately if desired. Keep warm in a low oven (around 200°F / 93°C) while you fry the remaining chicken.
- Make the Cream Gravy:
- Once all the chicken is fried, carefully pour off most of the frying oil from the skillet, leaving about 2-3 tablespoons of chicken drippings and any flavorful browned bits at the bottom.
- Return the skillet to medium heat. Add 2 tablespoons of unsalted butter to the drippings and let it melt.
- Whisk in 2 tablespoons of all-purpose flour into the drippings and butter, creating a roux. Cook and whisk constantly for 1-2 minutes, until the flour mixture turns a light golden color and smells nutty.
- Gradually pour in 2 cups of milk (or milk and cream mixture), whisking continuously to prevent lumps.
- Bring the gravy to a simmer, whisking frequently. It will thicken as it heats. Season generously with salt and freshly ground black pepper to taste. You might also add a pinch of garlic powder or onion powder if you like.
- Cook until the gravy reaches your desired consistency – I like mine thick enough to coat the back of a spoon. If it gets too thick, whisk in a splash more milk.
- Serve:
- Serve the hot Country Fried Chicken immediately, generously smothered with the warm cream gravy. I love serving mine with mashed potatoes and green beans, just like at Texas Roadhouse!
Tips & Suggestions
Achieving that perfect Texas Roadhouse Country Fried Chicken isn’t just about following the steps; it’s also about a few insider tricks I’ve picked up along the way. Here are my best tips for making this dish truly shine:
- Pound it Thin and Even: I cannot stress this enough! Pounding your chicken breasts to an even ½-inch thickness ensures two things: faster cooking and more consistent results. No one wants one end of the chicken overcooked while the other is still raw.
- Season Liberally: Don’t be shy with your seasonings. I always make sure my flour dredge is well-seasoned, but sometimes I’ll even give the chicken a light sprinkle of salt and pepper before it hits the plain flour, just for an extra layer of flavor.
- The Double Dredge is Key: While I used a slightly modified “double dredge” in the instructions (plain flour first, then wet, then seasoned flour), a traditional double dredge for extra crispy chicken involves going from wet to seasoned flour, then back to wet, then back to seasoned flour. For this recipe, the plain flour pre-coat works wonders for adhesion, but experimenting with a full double dredge can give you an even thicker crust!
- Let it Rest: After breading, letting the chicken rest on a wire rack for 10-15 minutes allows the breading to hydrate and adhere better. This significantly reduces the chances of your beautiful coating falling off in the hot oil.
- Mind the Oil Temperature: This is probably the most critical tip. If your oil is too cold, the chicken will absorb too much oil and become greasy. If it’s too hot, the breading will burn before the chicken is cooked through. A thermometer is your best friend here; aim for a consistent 350°F (175°C).
- Don’t Overcrowd the Pan: Frying in batches is essential. Overcrowding lowers the oil temperature dramatically, leading to soggy, less crispy chicken. Give each piece room to breathe and fry properly.
- Crispy Chicken, Smooth Gravy: When making the gravy, whisk, whisk, whisk! Continuous whisking when adding the milk to the roux is your secret weapon against lumpy gravy. Start with a smaller amount of milk, whisk until smooth, then add the rest gradually.
- Adjust Gravy Consistency: If your gravy is too thick, whisk in a little more warm milk. If it’s too thin, let it simmer gently for a few more minutes, whisking occasionally, to allow it to reduce and thicken.
- Serve Immediately: Country fried chicken is truly at its best fresh from the pan. While it can be reheated, that initial crispness is fleeting. Serve it hot and smothered in that glorious cream gravy!
Storage
While Texas Roadhouse Country Fried Chicken is undeniably best enjoyed fresh, I understand that sometimes you might have leftovers or want to prepare components ahead of time. Here’s how I handle storage to keep things as delicious as possible:
- Refrigeration (Cooked Chicken):
- Once the chicken has cooled completely to room temperature (within two hours of cooking), store it in an airtight container in the refrigerator.
- It will maintain its best quality for 3-4 days. Note that the crispness of the breading will soften significantly in the refrigerator.
- Refrigeration (Cream Gravy):
- Allow the gravy to cool completely before transferring it to an airtight container.
- Refrigerate for up to 3-4 days. The gravy may thicken considerably in the fridge.
- Reheating Cooked Chicken:
- To best restore some crispness, I recommend reheating the chicken in an oven or air fryer.
- Oven: Preheat your oven to 375°F (190°C). Place the chicken on a wire rack set over a baking sheet and heat for 15-20 minutes, or until heated through and the coating feels a bit crisper.
- Air Fryer: Reheat at 350°F (175°C) for 8-10 minutes, flipping halfway, until heated through and crispy.
- Avoid microwaving fried chicken if you want to retain any semblance of crispiness, as it will make the coating soggy.
- Reheating Cream Gravy:
- Gently reheat the gravy in a saucepan over low-medium heat, whisking frequently.
- If it’s too thick, add a splash of milk or water, whisking until it reaches your desired consistency. Be careful not to bring it to a rolling boil too quickly, as it can separate.
- Freezing:
- While you can freeze cooked Country Fried Chicken, I generally don’t recommend it if you’re prioritizing that fresh-fried texture. The breading tends to get quite soft and can be difficult to fully crisp up again.
- If you do choose to freeze, allow the cooked chicken to cool completely, then wrap individual pieces tightly in plastic wrap and then aluminum foil. Store in a freezer-safe bag or container for up to 2-3 months.
- Thaw in the refrigerator overnight before reheating using the oven or air fryer method.
- I do not recommend freezing the cream gravy, as dairy-based sauces often separate when thawed.
Final Thoughts
Well, there you have it! We’ve journeyed together through the steps to create a truly iconic meal right in your own kitchen. There’s just something incredibly satisfying about mastering the art of the perfect fried chicken, and this Texas Roadhouse Country Fried Chicken With Cream Gravy recipe delivers on every front.
From the moment that crispy, golden crust gives way to the tender, juicy chicken, all enrobed in that rich, velvety cream gravy – it’s a symphony of textures and flavors that screams comfort. This isn’t just a meal; it’s an experience, a taste of homestyle deliciousness that brings warmth to any table. It’s a guaranteed crowd-pleaser and a fantastic way to treat yourself and your loved ones to a restaurant-quality dish without ever leaving home.
So, I truly hope you give this Texas Roadhouse Country Fried Chicken With Cream Gravy a try. I promise, the effort is more than worth it for the incredible flavors and the sheer joy it brings. Happy cooking!
Recreate Texas Roadhouse Country Fried Chicken At Home!

Experience the comfort of Texas Roadhouse with this homemade Country Fried Chicken and Cream Gravy recipe. Enjoy crispy, golden-brown chicken paired with a rich, velvety gravy that will impress your family and friends.
- Prep Time: 15 mins
- Cook Time: 30 mins
- Total Time: 45 minutes
- Yield: 4 servings 1x
- Category: Dinner
- Method: Frying
- Cuisine: American
Ingredients
- 4 boneless, skinless chicken breasts or thighs
- 2 cups unbleached all-purpose flour
- 1 cup buttermilk
- 2 large eggs
- 2 teaspoons salt
- 1 teaspoon freshly ground black pepper
- 1 teaspoon garlic powder
- 1 teaspoon onion powder
- ½ teaspoon paprika
- ¼ teaspoon cayenne pepper
- Vegetable oil for frying
- 2 cups whole milk or a mix of whole milk and heavy cream
- 2 tablespoons unsalted butter
Instructions
- Prepare the Chicken: Pat the chicken dry with paper towels. Pound chicken breasts to an even ½-inch thickness.
- Set Up Your Dredging Station: Prepare three shallow dishes. In the first bowl, whisk together buttermilk and eggs. In the second bowl, combine 2 cups of flour with salt, black pepper, garlic powder, onion powder, paprika, and cayenne pepper. In the third bowl, place another 1 cup of plain flour.
- Breading the Chicken: Dredge chicken in plain flour, dip in buttermilk-egg mixture, then coat in seasoned flour. Place on a wire rack and let rest for 10-15 minutes.
- Fry the Chicken: Heat 1-2 inches of vegetable oil in a skillet to 350°F (175°C). Fry chicken for 4-6 minutes per side until golden brown and cooked through. Drain on a wire rack and keep warm.
- Make the Cream Gravy: Pour off most oil, leaving 2-3 tablespoons in the skillet. Add butter and let it melt. Whisk in flour to create a roux, then gradually add milk, whisking to prevent lumps. Simmer until thickened, seasoning with salt and pepper.
- Serve: Serve the hot Country Fried Chicken smothered in cream gravy.
Nutrition
- Serving Size: 1 piece with gravy
- Calories: 600
- Sugar: 2 g
- Sodium: 800 mg
- Fat: 30 g
- Saturated Fat: 10 g
- Unsaturated Fat: 15 g
- Trans Fat: 0 g
- Carbohydrates: 50 g
- Fiber: 2 g
- Protein: 30 g
- Cholesterol: 150 mg
Keywords: Pound chicken to an even thickness for consistent cooking. Season liberally and avoid overcrowding the pan while frying to maintain oil temperature.
Leave a Comment