
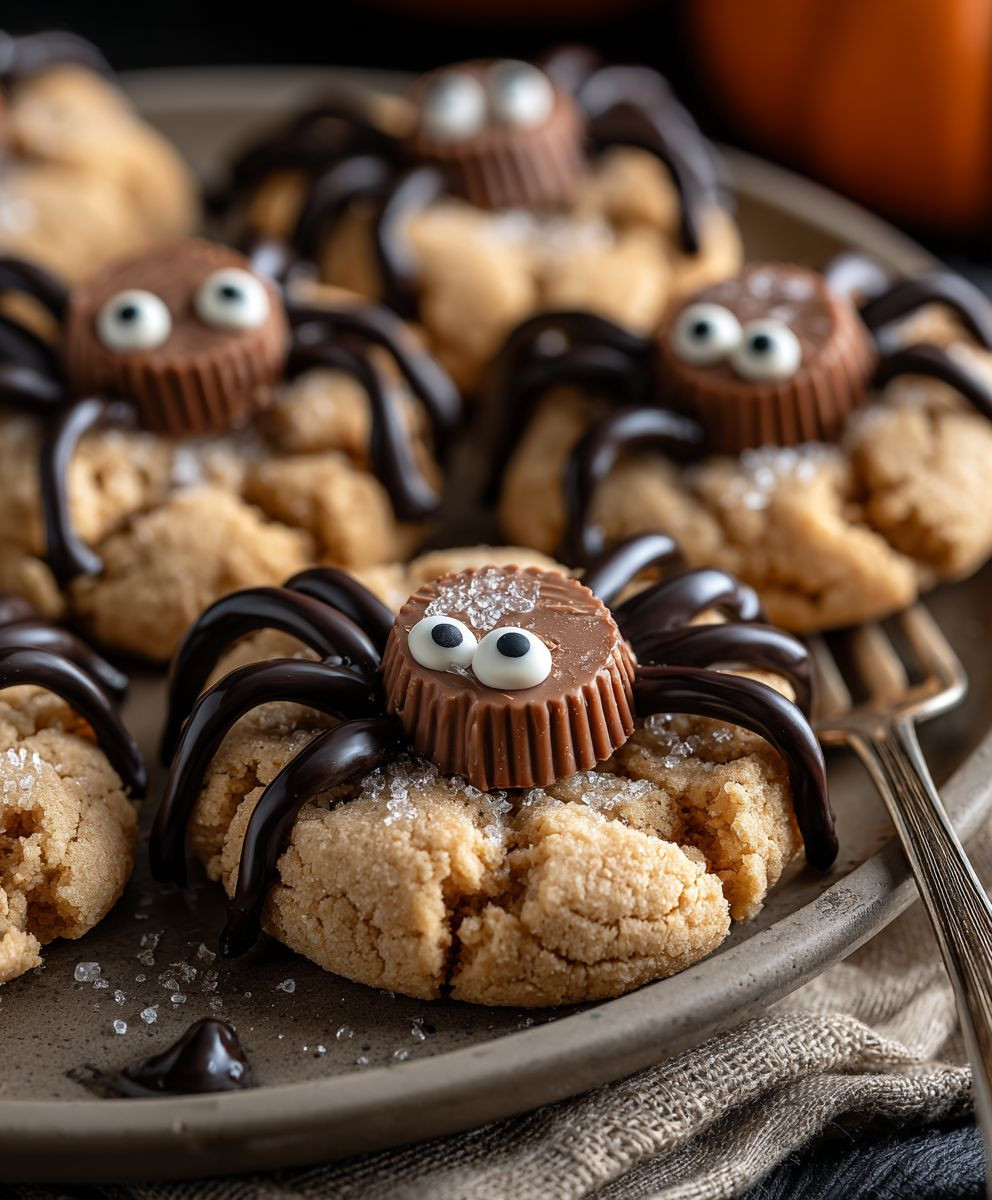
Peanut Butter Spider Cookies: Get ready to sink your teeth into these delightfully spooky and utterly delicious treats! Imagine a classic, chewy peanut butter cookie transformed into an adorable, edible spider – perfect for Halloween or any occasion that calls for a touch of whimsy. These aren’t just cookies; they’re a conversation starter, a guaranteed crowd-pleaser, and a fun activity to get the kids involved in!
While the exact origins of decorating cookies to resemble spiders are shrouded in mystery, the combination of peanut butter and chocolate has a long and beloved history in American baking. Peanut butter cookies themselves have been a staple for generations, offering a comforting and familiar flavor. Adding the spider element elevates them to a festive and playful treat.
What makes these Peanut Butter Spider Cookies so irresistible? It’s the perfect marriage of textures and tastes. The soft, slightly crumbly peanut butter cookie base provides a nutty sweetness, while the chocolate legs and candy eyes add a delightful crunch and visual appeal. They’re incredibly easy to make, requiring minimal ingredients and baking time, making them a convenient option for busy bakers. Plus, who can resist the charm of a cute, edible spider? They’re guaranteed to bring a smile to everyone’s face!
Ingredients:
- 1 cup (2 sticks) unsalted butter, softened
- 1 cup granulated sugar
- 1 cup packed brown sugar
- 2 large eggs
- 1 teaspoon vanilla extract
- 1 cup creamy peanut butter
- 2 1/2 cups all-purpose flour
- 1 teaspoon baking soda
- 1 teaspoon baking powder
- 1/2 teaspoon salt
- Chocolate frosting (store-bought or homemade)
- Mini chocolate chips
- Pretzel sticks, broken in half
- Candy eyes
Preparing the Dough:
Alright, let’s get started with these adorable Peanut Butter Spider Cookies! First things first, we need to cream together the butter and sugars. This is a crucial step for achieving that perfect, soft cookie texture.
- In a large bowl, or the bowl of your stand mixer, cream together the softened butter, granulated sugar, and brown sugar until light and fluffy. This usually takes about 3-5 minutes. Don’t rush this step! The more air you incorporate, the better the cookies will be. I like to use my stand mixer with the paddle attachment, but a hand mixer works just fine too. Just make sure your butter is properly softened – not melted!
- Next, beat in the eggs one at a time, mixing well after each addition. This ensures that each egg is fully incorporated into the batter. We don’t want any eggy pockets in our cookies!
- Stir in the vanilla extract and peanut butter. Make sure the peanut butter is well combined. I prefer using creamy peanut butter for this recipe, but you can experiment with chunky peanut butter if you want a little extra texture.
- In a separate bowl, whisk together the flour, baking soda, baking powder, and salt. This step is important to ensure that the dry ingredients are evenly distributed throughout the dough. Nobody wants a bite of cookie that’s overly salty or has a weird baking soda taste!
- Gradually add the dry ingredients to the wet ingredients, mixing until just combined. Be careful not to overmix the dough! Overmixing can lead to tough cookies. Mix until the flour is just incorporated, and then stop. A few streaks of flour are okay.
- Cover the dough with plastic wrap and chill in the refrigerator for at least 30 minutes. This chilling time is essential! It allows the gluten in the flour to relax, which prevents the cookies from spreading too much in the oven. It also makes the dough easier to handle. I usually chill mine for an hour, but 30 minutes will do in a pinch.
Baking the Cookies:
Now that our dough is chilled, we’re ready to bake these little spider masterpieces!
- Preheat your oven to 375°F (190°C). Line baking sheets with parchment paper. Parchment paper is your best friend when it comes to baking cookies. It prevents them from sticking to the baking sheet and makes cleanup a breeze.
- Roll the dough into 1-inch balls. You can use a cookie scoop for this to ensure that all the cookies are the same size. This will help them bake evenly.
- Place the dough balls on the prepared baking sheets, leaving about 2 inches between each cookie. They will spread a bit as they bake.
- Bake for 8-10 minutes, or until the edges are lightly golden brown. Keep a close eye on them! Every oven is different, so baking times may vary. You want the cookies to be set but still soft in the center.
- Remove the cookies from the oven and let them cool on the baking sheets for a few minutes before transferring them to a wire rack to cool completely. This prevents them from breaking apart while they’re still warm and soft.
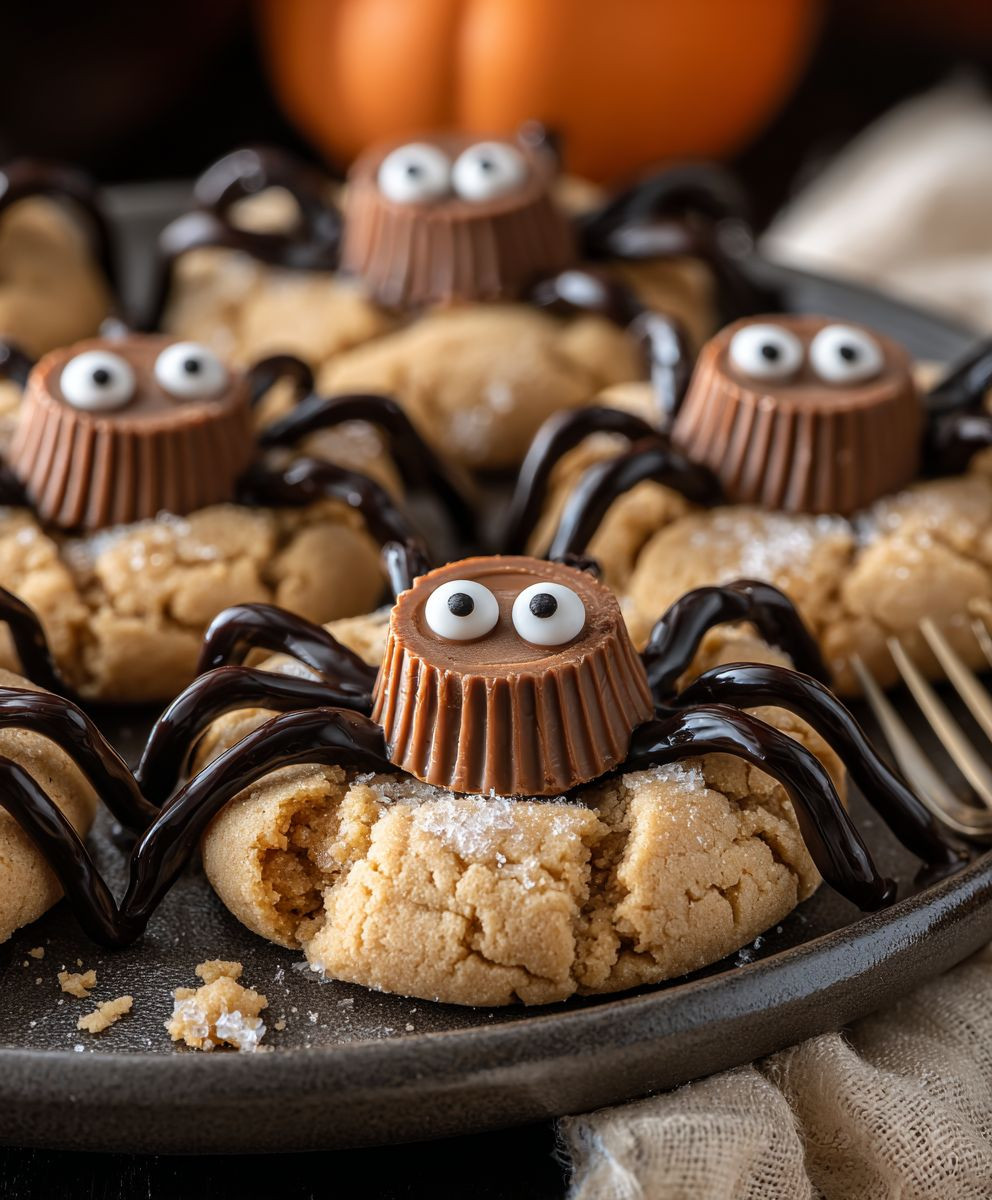
Decorating the Spider Cookies:
This is the fun part! Time to turn our peanut butter cookies into creepy crawly spiders!
- Once the cookies are completely cool, frost the tops with chocolate frosting. You can use store-bought frosting or make your own. I like to use a piping bag for this, but you can also just spread the frosting on with a knife.
- Immediately place mini chocolate chips on the frosting for the spider’s body. I like to use a generous amount of chocolate chips to create a nice, round body.
- Insert pretzel stick halves into the sides of the cookie to create the spider’s legs. Use 8 pretzel legs per spider. I find it easiest to gently press the pretzel sticks into the cookie while the frosting is still soft.
- Attach candy eyes to the front of the cookie using a dab of frosting. You can use as many eyes as you like! Some people like to use two eyes, while others prefer to use more for a more whimsical look.
- Let the frosting set completely before serving. This will prevent the chocolate chips and pretzel legs from falling off.
Tips and Tricks for Perfect Spider Cookies:
Here are a few extra tips to ensure your Peanut Butter Spider Cookies are a smashing success:
- Don’t overbake! Overbaked cookies will be dry and crumbly. You want them to be slightly soft in the center.
- Use quality ingredients. The better the ingredients, the better the cookies will taste.
- Chill the dough. This is a crucial step for preventing the cookies from spreading too much.
- Get creative with the decorations! Use different colored frosting, different types of candy eyes, or even add sprinkles.
- Store the cookies in an airtight container at room temperature. They will stay fresh for several days.
Variations:
Want to mix things up a bit? Here are a few variations you can try:
- Chocolate Peanut Butter Spider Cookies: Add 1/4 cup of cocoa powder to the dry ingredients for a chocolatey twist.
- White Chocolate Spider Cookies: Use white chocolate chips instead of mini chocolate chips for the spider’s body.
- Nutella Spider Cookies: Use Nutella instead of peanut butter in the dough.
- Gluten-Free Spider Cookies: Use a gluten-free all-purpose flour blend in place of the regular flour.
Troubleshooting:
Having trouble with your cookies? Here are a few common problems and how to fix them:
- Cookies are spreading too much: Make sure you chilled the dough for long enough. You can also try adding a tablespoon or two of flour to the dough.
- Cookies are too dry: Don’t overbake them! Also, make sure you’re using enough butter and sugar in the dough.
- Cookies are too tough: Don’t overmix the dough!
- Pretzel legs are falling off: Make sure the frosting is still soft when you insert the pretzel legs. You can also use a dab of melted chocolate to help secure them.
I hope you enjoy making these Peanut Butter Spider Cookies as much as I do! They’re perfect for Halloween parties, bake sales, or just a fun afternoon treat. Happy baking!
Conclusion:
So, there you have it! These Peanut Butter Spider Cookies are more than just a cute Halloween treat; they’re a delightful combination of textures and flavors that will have everyone, from kids to adults, reaching for seconds (and maybe even thirds!). The soft, chewy peanut butter cookie base, the rich chocolate ganache, and the playful spider decoration create a truly unforgettable experience.
But why is this recipe a must-try? It’s simple: it’s incredibly easy to make, even for novice bakers. The ingredients are readily available in most pantries, and the steps are straightforward and clearly outlined. Plus, the visual appeal of these cookies is undeniable. They’re guaranteed to be a hit at any Halloween party or spooky gathering. Forget store-bought cookies this year; impress your friends and family with these homemade delights!
Beyond the ease and visual appeal, the taste is what truly sets these cookies apart. The peanut butter cookie is perfectly balanced – not too sweet, not too salty, just pure peanut butter goodness. The chocolate ganache adds a touch of decadence, complementing the peanut butter beautifully. And the pretzel legs provide a satisfying crunch that contrasts perfectly with the soft cookie base. It’s a symphony of flavors and textures that will tantalize your taste buds.
Looking for serving suggestions? These cookies are fantastic on their own, of course, but they also pair well with a cold glass of milk, a warm cup of coffee, or even a scoop of vanilla ice cream. For a more festive presentation, arrange them on a platter with other Halloween treats, such as candy corn, chocolate-covered pretzels, and gummy worms.
And if you’re feeling adventurous, why not try some variations? You could use different types of chocolate for the ganache, such as dark chocolate, white chocolate, or even milk chocolate. You could also add a sprinkle of sea salt to the cookies for a salty-sweet twist. Or, for a nuttier flavor, try adding chopped peanuts or pecans to the cookie dough. Another fun variation is to use different types of pretzels for the spider legs, such as pretzel sticks or mini pretzels. Get creative and experiment with different flavors and textures to create your own unique version of these Peanut Butter Spider Cookies!
Don’t be intimidated by the spider decoration; it’s much easier than it looks! Just a few simple steps and you’ll have adorable little spiders crawling all over your cookies. And remember, even if your spiders aren’t perfect, they’ll still taste delicious! It’s all about having fun and enjoying the process.
I truly believe that this recipe will become a new family favorite. It’s a fun and festive way to celebrate Halloween, and it’s a guaranteed crowd-pleaser. So, what are you waiting for? Gather your ingredients, preheat your oven, and get ready to bake some spooky and delicious Peanut Butter Spider Cookies!
I’m so excited for you to try this recipe! Once you’ve made them, please come back and share your experience in the comments below. I’d love to hear what you think, what variations you tried, and how much everyone enjoyed them. Happy baking!
Peanut Butter Spider Cookies: A Spooky & Delicious Treat
Peanut butter cookies become spooky spiders with chocolate frosting, mini chips, pretzel legs, and candy eyes! A fun Halloween treat.
Ingredients
Instructions
Recipe Notes
- Creaming the butter and sugar well is crucial for a soft cookie texture.
- Chilling the dough prevents excessive spreading.
- Don’t overbake the cookies; they should be slightly soft in the center.
- Get creative with decorations!
- Store in an airtight container at room temperature.
- If cookies are spreading too much, chill the dough longer or add a tablespoon or two of flour.
- If cookies are too dry, don’t overbake them and ensure you’re using enough butter and sugar.
- If cookies are too tough, don’t overmix the dough.
- If pretzel legs are falling off, make sure the frosting is still soft when you insert them, or use a dab of melted chocolate to secure them.


Leave a Comment