
No Bake S’mores Icebox Cake
Oh, prepare yourself for something truly magical! I’m so excited to share my go-to recipe for the ultimate summer treat: the No Bake S’mores Icebox Cake. What makes this dessert so incredibly special, you ask? Well, for starters, it’s a “no-bake” wonder, meaning you get all the deliciousness without ever having to turn on your oven. Perfect for those sweltering days when you still crave something sweet and satisfying!
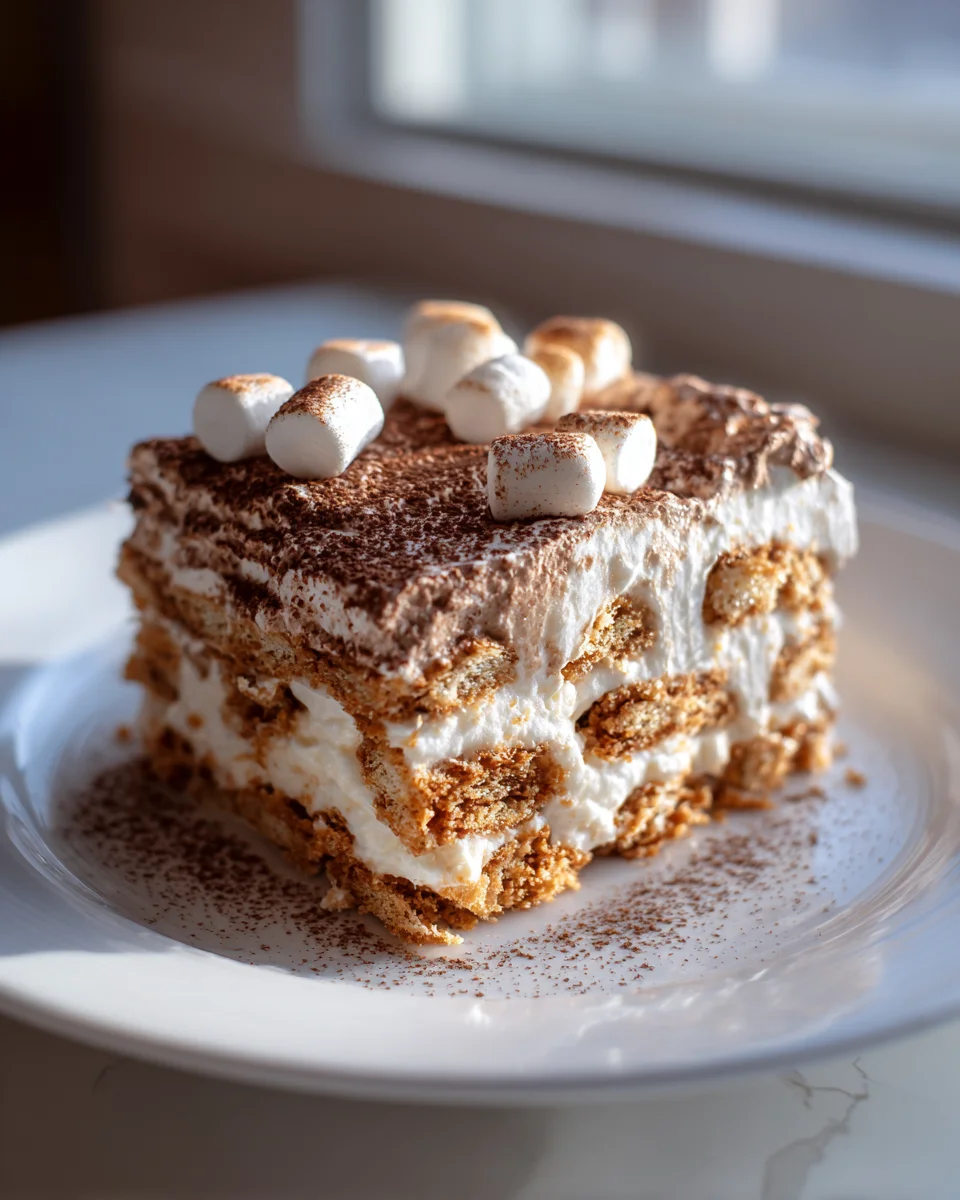
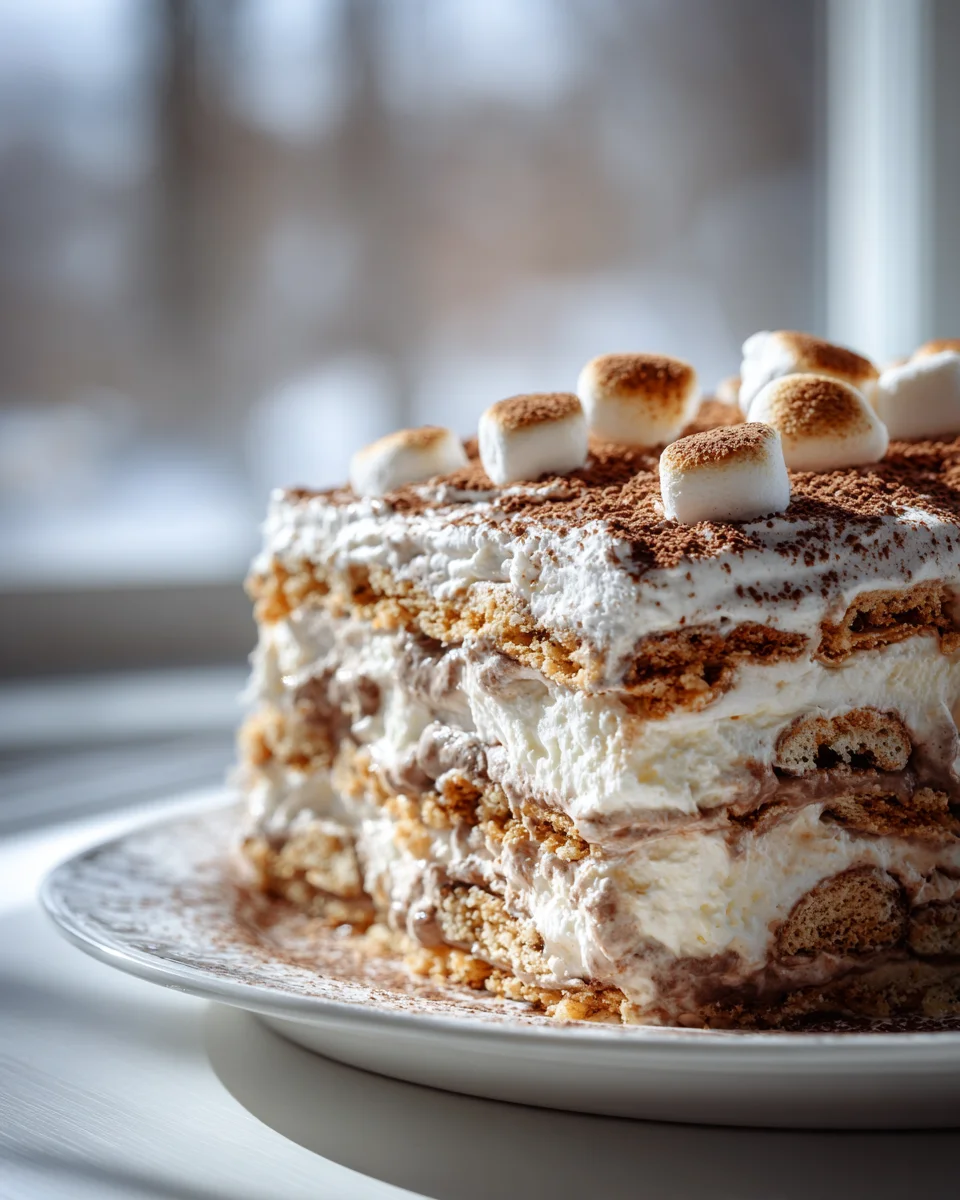
You are absolutely going to adore this recipe because it masterfully combines the nostalgic flavors of a campfire s’more – gooey marshmallow, rich chocolate, and crunchy graham crackers – into an elegant, chilled cake. It’s incredibly easy to put together, making it a fantastic stress-free option for potlucks, parties, or just a delightful weeknight treat. Imagine layers of crisp graham crackers, velvety chocolate pudding or ganache, and luscious marshmallow fluff, all coming together in a chilled symphony of flavor and texture that practically melts in your mouth. The best part? As it chills, the graham crackers magically soften to create a tender, cake-like consistency that’s simply irresistible. Trust me, this No Bake S’mores Icebox Cake is a guaranteed crowd-pleaser that will have everyone asking for seconds!
Ingredient Notes
Creating the perfect No Bake S’mores Icebox Cake relies on a few simple yet essential ingredients. I love how these components come together to mimic that classic campfire treat without any actual camping required!
- Graham Crackers: These are the foundation of our icebox cake, providing that crisp, slightly sweet, biscuity base that softens beautifully when chilled. I usually go for the honey or plain variety, but cinnamon graham crackers could add a lovely subtle spice.
- Substitution: If you can’t find graham crackers, digestive biscuits (especially the plain or chocolate-covered kind) or even vanilla wafers can work. Just be aware that the texture and flavor will be slightly different, but still delicious!
- Whipped Topping (like Cool Whip): This is key for the airy, creamy layers that bind the cake together. It holds its shape really well, which is crucial for an icebox cake.
- Substitution: You can absolutely use homemade whipped cream! Just whip 2 cups of heavy cream with 1/2 cup of powdered sugar and 1 teaspoon of vanilla extract until stiff peaks form. Be aware that homemade whipped cream might not be quite as stable as store-bought whipped topping, so the cake might be a little softer.
- Marshmallow Fluff/Creme: This is where that distinctive gooey, sweet marshmallow flavor comes in! It mixes wonderfully with the whipped topping to create a delightful marshmallow cloud.
- Substitution: While marshmallow fluff is ideal, if you’re in a pinch, you could gently melt regular marshmallows with a tiny bit of water or milk until smooth, then let it cool slightly before folding it into your whipped topping. However, marshmallow fluff gives the best texture.
- Chocolate Fudge Sauce: A good quality chocolate fudge sauce or syrup is essential for those rich chocolate layers. It drizzles well and provides a lovely contrast to the marshmallow.
- Substitution: You can melt semi-sweet chocolate chips with a tablespoon or two of cream or coconut oil for a homemade chocolate sauce. Nutella, warmed slightly, also makes an amazing substitute for a hazelnut twist!
- Mini Marshmallows: These are primarily for garnish and to truly drive home the s’mores theme. I love how they add a fluffy, chewy finish.
- Substitution: You can chop up larger marshmallows, or even use a mixture of mini and regular-sized marshmallows for visual interest. For an extra touch, you can lightly toast them before serving!
- Optional additions: A sprinkle of sea salt can really enhance the chocolate flavor, and chocolate shavings or chopped chocolate bars can add extra texture.
Step-by-Step Instructions
Making a No Bake S’mores Icebox Cake is incredibly simple and satisfying. The hardest part, I promise, is waiting for it to chill! Here’s how I put mine together:
- Prepare Your Pan: First, I grab an 8×8 or 9×5 inch baking dish (depending on how tall I want my layers). To make serving super easy, I like to line the pan with parchment paper, leaving an overhang on the sides. This creates “handles” that let me lift the entire cake out of the pan once it’s set, making for beautiful, clean slices.
- Create the Marshmallow Cream: In a large mixing bowl, I gently fold together the whipped topping and the marshmallow fluff. I use a spatula to mix them until they’re just combined and smooth. Be careful not to overmix, as you want to keep that airy volume from the whipped topping. This forms our delicious marshmallow cream layer.
- Layer the Graham Crackers: Now for the fun part! I start by arranging a single layer of graham crackers at the bottom of the prepared pan. I usually need to break some crackers to fit them snugly and cover the entire base. Don’t worry if there are small gaps; they’ll get filled in with the cream.
- Add the Marshmallow Cream Layer: Next, I dollop about a third of the marshmallow cream mixture over the graham crackers. Using an offset spatula or the back of a spoon, I carefully spread it out evenly from edge to edge, making sure the cracker layer is completely covered.
- Drizzle with Chocolate Sauce: Over the marshmallow cream, I generously drizzle about a quarter of the chocolate fudge sauce. I like to do a zig-zag pattern, ensuring every slice will get a bit of chocolatey goodness.
- Repeat the Layers: I repeat this layering process two more times: another layer of graham crackers, then marshmallow cream, then chocolate sauce. Make sure you use about a third of the crackers and cream each time.
- The Final Topping: For the very top layer, I arrange the final graham crackers (if any are left, otherwise just proceed) and then spread the remaining marshmallow cream over them. I then drizzle with the last bit of chocolate fudge sauce, creating an appealing pattern. Finally, I scatter the mini marshmallows generously over the top.
- Chill, Chill, Chill!: This is the most crucial step for any icebox cake. I cover the pan tightly with plastic wrap and refrigerate it for at least 4 hours. Honestly, overnight is even better! This allows the graham crackers to soften and absorb moisture from the cream, transforming them into a cake-like consistency, and lets all the flavors meld beautifully.
- Serve and Enjoy: Once thoroughly chilled, I use the parchment paper handles to lift the cake out of the pan. I then remove the parchment paper and place the cake on a cutting board. Using a sharp knife (wiped clean between slices for neatness), I cut the cake into squares and serve immediately. Sometimes, if I’m feeling fancy, I’ll lightly toast the mini marshmallows on top with a kitchen torch just before serving for an authentic s’mores look and taste!
Tips & Suggestions
Having made my fair share of icebox cakes, I’ve picked up a few tricks that really elevate this No Bake S’mores Icebox Cake from good to absolutely fantastic!
- The Power of the Chill: I can’t stress this enough – don’t rush the chilling time! It’s the magic behind an icebox cake. The longer it chills (up to 24 hours), the softer and more “cake-like” the graham crackers become. This is what truly transforms layers of crackers and cream into a cohesive dessert. Patience is a virtue here!
- Achieving Soft, Not Soggy: To prevent your graham crackers from becoming overly soggy, make sure your marshmallow cream mixture isn’t too thin. If using homemade whipped cream, ensure it’s whipped to stiff peaks for better stability. Also, don’t drench the crackers in chocolate sauce; a good drizzle is perfect.
- Elevate Your Chocolate: While chocolate fudge sauce is great, consider adding some chopped chocolate bars (milk, dark, or even white chocolate) between layers for extra texture and intense chocolate flavor. You could also sprinkle a pinch of flaky sea salt on the chocolate layers to really make the flavors pop.
- Toasted Marshmallow Topping: For that authentic campfire s’mores vibe, use a kitchen torch to lightly toast the mini marshmallows on top just before serving. It adds a wonderful smoky aroma and a slightly crispy, gooey texture that is irresistible. If you don’t have a torch, a quick blast under the broiler for about 30 seconds (watch it like a hawk!) can work, but be very careful not to burn them.
- Customize Your Layers: Feel free to experiment with the number of layers. If you’re using a wider, shallower pan, you might have fewer, thicker layers. If you’re using a smaller, deeper pan, you can create more, thinner layers. Just adjust your ingredient distribution accordingly.
- Clean Cuts: For neat slices, I always run my knife under hot water and wipe it clean between each cut. This prevents the cream and chocolate from sticking to the blade and keeps your cake looking pretty for serving.
Storage
One of the best things about a No Bake S’mores Icebox Cake is how well it stores, making it a fantastic make-ahead dessert for parties or just to have on hand for a sweet craving!
- Refrigerator Storage: I always store my icebox cake in the refrigerator. After the initial chilling period, I make sure it’s covered tightly with plastic wrap or in an airtight container. This prevents it from absorbing any unwanted odors from the fridge and keeps it fresh. It will last beautifully for about 3-4 days in the refrigerator. The crackers continue to soften slightly over time, but it remains delicious.
- Freezing (Not Recommended): While technically you could freeze this cake, I generally don’t recommend it. The texture of the whipped topping and marshmallow fluff can become a bit icy and watery once thawed, and the graham crackers might become too mushy. This cake truly shines when served chilled from the fridge.
- Prep Ahead: If you’re planning for an event, I suggest assembling the cake the day before. It gives it plenty of time to chill and for all those s’mores flavors to marry perfectly. Just remember to add any optional toasted marshmallow topping or fresh garnishes right before serving.
Final Thoughts
So there you have it! My absolute favorite way to capture the magic of a campfire treat without needing to light a single flame. The No Bake S’mores Icebox Cake truly is a game-changer. I love how effortlessly it brings together those nostalgic flavors – the rich chocolate, the sweet, gooey marshmallow, and the satisfying crunch of graham crackers – all in a beautifully layered, chilled dessert. It’s perfect for those warm evenings when you crave something sweet and indulgent but don’t want to turn on the oven. I promise you, once you taste this incredible No Bake S’mores Icebox Cake, you’ll understand why it’s become my go-to for easy entertaining or just a special treat for myself. Give it a try; I know you’ll love it as much as I do!
No Bake S’mores Icebox Cake: Easy, Gooey, & Delicious!

This No Bake S’mores Icebox Cake combines the nostalgic flavors of a campfire s’more into an elegant, chilled dessert. It’s incredibly easy to make and perfect for summer gatherings or a delightful weeknight treat.
- Prep Time: 15 mins
- Cook Time: 0 mins
- Total Time: 15 minutes
- Yield: 8 servings
- Category: Dessert
- Method: No Bake
- Cuisine: American
Ingredients
- Graham Crackers
- Whipped Topping (like Cool Whip)
- Marshmallow Fluff/Creme
- Chocolate Fudge Sauce
- Mini Marshmallows
- Optional additions: sea salt, chocolate shavings or chopped chocolate bars
Instructions
- Prepare Your Pan: First, grab an 8×8 or 9×5 inch baking dish and line it with parchment paper, leaving an overhang on the sides.
- Create the Marshmallow Cream: In a large mixing bowl, gently fold together the whipped topping and the marshmallow fluff until just combined and smooth.
- Layer the Graham Crackers: Arrange a single layer of graham crackers at the bottom of the prepared pan, breaking some to fit snugly.
- Add the Marshmallow Cream Layer: Dollop about a third of the marshmallow cream mixture over the graham crackers and spread it out evenly.
- Drizzle with Chocolate Sauce: Generously drizzle about a quarter of the chocolate fudge sauce over the marshmallow cream in a zig-zag pattern.
- Repeat the Layers: Repeat the layering process two more times with another layer of graham crackers, marshmallow cream, and chocolate sauce.
- The Final Topping: For the top layer, arrange the final graham crackers and spread the remaining marshmallow cream over them, then drizzle with the last bit of chocolate fudge sauce and scatter mini marshmallows on top.
- Chill, Chill, Chill!: Cover the pan tightly with plastic wrap and refrigerate for at least 4 hours, preferably overnight.
- Serve and Enjoy: Lift the cake out of the pan using the parchment paper handles, cut into squares, and serve immediately.
Nutrition
- Serving Size: 1 square
- Calories: 250
- Sugar: 20 g
- Sodium: 150 mg
- Fat: 10 g
- Saturated Fat: 5 g
- Unsaturated Fat: 3 g
- Trans Fat: 0 g
- Carbohydrates: 35 g
- Fiber: 1 g
- Protein: 2 g
- Cholesterol: 10 mg
Keywords: Don't rush the chilling time; the longer it chills, the softer and more cake-like the graham crackers become. Ensure the marshmallow cream mixture isn't too thin to avoid sogginess, and consider adding chopped chocolate bars for extra texture.
Leave a Comment