
Savory Cheese & Herb Hot Cross Buns
Oh, prepare yourselves for a delightful twist on a classic! My kitchen has been buzzing with excitement over these Savory Cheese & Herb Hot Cross Buns, and let me tell you, they are an absolute game-changer. Forget everything you thought you knew about hot cross buns, because we’re flipping the script from sweet to gloriously savory!
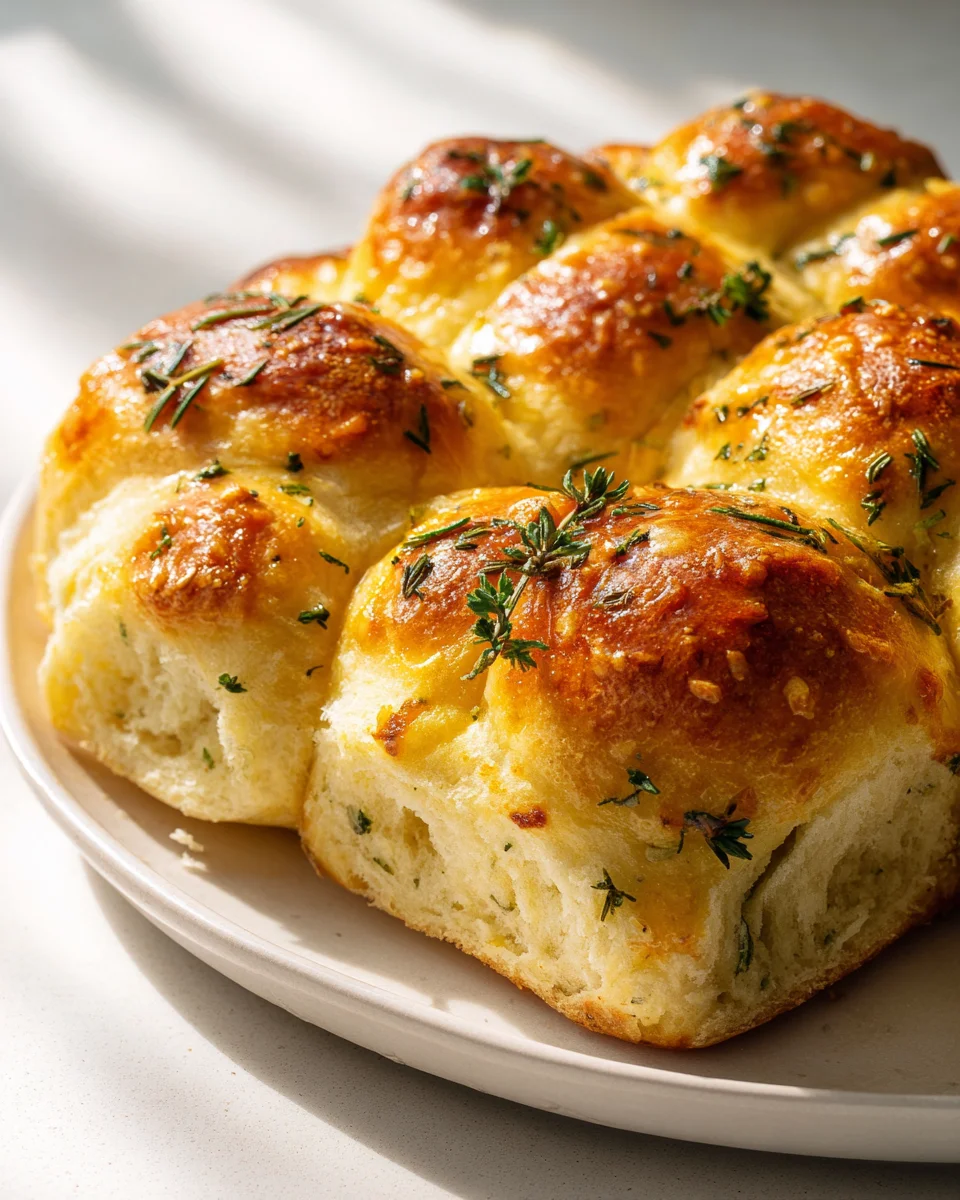
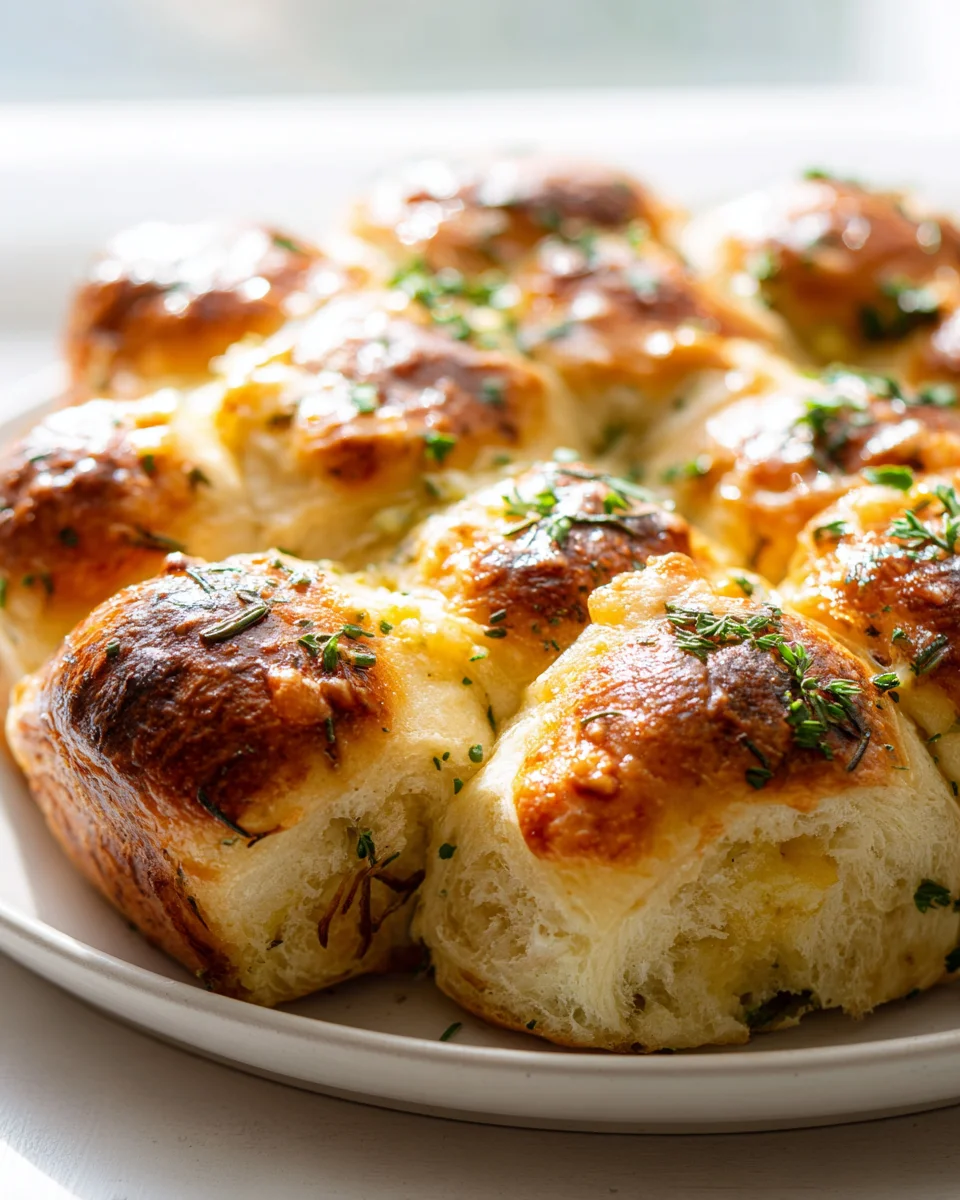
What makes these beauties so incredibly special, you ask? Well, it’s all about that harmonious blend of rich, melt-in-your-mouth cheese – perhaps a sharp cheddar or a tangy Parmesan – perfectly married with fragrant herbs like chives, thyme, or rosemary, all nestled within a wonderfully soft, fluffy bun. And yes, they still sport that iconic “cross,” but instead of a sweet glaze, ours is a savory flourish, a testament to their unique character. This isn’t just a bun; it’s a comforting, flavorful experience designed to surprise and delight.
You are absolutely going to adore these for so many reasons. They’re fantastic for a lazy weekend brunch, a sophisticated addition to your breakfast table, or simply as a satisfying snack any time of day. Imagine serving them warm, slathered with a little butter, alongside a hearty bowl of beef stew or a vibrant salad. Each bite delivers an explosion of cheesy, herbaceous goodness that is both familiar and excitingly new. Get ready to bake a batch that will disappear almost as quickly as they come out of the oven – they’re just that irresistible!
Ingredient Notes
Creating these Savory Cheese & Herb Hot Cross Buns is a true delight, and the quality of your ingredients makes all the difference in achieving that perfect balance of fluffy texture and robust flavor. Here’s what I’ve found works best, along with some great substitutions to keep in mind.
- Strong Bread Flour: I always recommend using strong bread flour for these buns. Its higher protein content develops more gluten, giving you that wonderfully chewy, yet tender crumb that’s characteristic of a great yeasted bun. If you don’t have strong bread flour, an all-purpose flour will work, but you might find the texture a little softer.
- Active Dry Yeast: This is the powerhouse that gives our buns their lift. Make sure your yeast is fresh and active by proofing it first in warm milk with a pinch of sugar. If you prefer, instant yeast can be used directly with the dry ingredients without prior proofing, which is a convenient shortcut.
- Warm Milk: Full-fat milk is my preference as it contributes to a richer flavor and softer crumb. It needs to be lukewarm (around 105-115°F or 40-46°C) to activate the yeast without killing it. For a dairy-free alternative, unsweetened almond or oat milk works beautifully, just ensure it’s also warmed appropriately.
- Grated Cheese: This is where the savory magic truly happens! I love a sharp cheddar or a good Gruyère for their distinct, savory bite and excellent melting qualities. For a tangier note, try a mature Parmesan. You could even combine a few different types, like cheddar with a little smoked Gouda, for added complexity. Ensure it’s finely grated so it distributes evenly throughout the dough without clumping.
- Fresh Herbs: Fresh herbs are non-negotiable for that aromatic freshness. Rosemary, thyme, and finely chopped chives are my go-to choices, providing earthy, peppery, and oniony notes respectively. Feel free to experiment with other savory herbs like oregano, sage, or even a hint of dill. If fresh herbs aren’t available, use about one-third the amount of dried herbs, crushing them slightly before adding to release their flavor.
- Unsalted Butter: Melted butter adds richness and tenderness to the dough. If you only have salted butter, simply reduce the amount of added salt in the recipe. For a dairy-free option, a good quality plant-based butter substitute works wonderfully.
- Egg: A single egg helps to bind the dough, adds richness, and contributes to a beautiful golden crust. For an egg wash, a separate egg yolk whisked with a splash of milk creates that lovely shine.
- Salt & Pepper: Don’t forget these flavor enhancers! A good pinch of sea salt and freshly ground black pepper will really bring out the savory notes of the cheese and herbs.
Step-by-Step Instructions
Making these Savory Cheese & Herb Hot Cross Buns is a rewarding process, and I’m excited to guide you through each step to ensure you get perfectly fluffy, flavorful results. Take your time, and enjoy the journey!
- Activate the Yeast: In a large mixing bowl, gently warm your milk until it’s lukewarm (like a comfortable bath, not hot). Stir in a pinch of sugar (this helps “feed” the yeast) and then sprinkle over your active dry yeast. Let it sit for 5-10 minutes until it becomes foamy and bubbly, indicating the yeast is active and ready to go. If it doesn’t foam, your yeast might be old, or your milk too hot/cold, and you should start again.
- Combine Wet and Dry Ingredients: To your activated yeast mixture, whisk in the melted butter and the egg. In a separate, even larger bowl, combine your strong bread flour, salt, freshly ground black pepper, and your beautifully fragrant fresh herbs and grated cheese. Mix these dry ingredients thoroughly to ensure everything is evenly distributed.
- Form the Dough: Gradually pour the wet ingredients into the dry ingredients, mixing with a wooden spoon or your hands until a shaggy, cohesive dough forms. It might seem a little sticky at first, which is perfectly normal.
- Knead the Dough: Turn the dough out onto a lightly floured surface. Knead for about 8-10 minutes until the dough becomes smooth, elastic, and no longer excessively sticky. This process develops the gluten, which is essential for that lovely chewy texture. If you have a stand mixer with a dough hook, you can use it on medium-low speed for about 6-8 minutes.
- First Rise (Bulk Fermentation): Lightly grease a clean bowl with a little oil. Place the dough in the bowl, turning it once to coat the entire surface. Cover the bowl tightly with plastic wrap or a clean kitchen towel. Let it rise in a warm, draft-free place for 1 to 1.5 hours, or until it has doubled in size. This is crucial for flavor development and texture.
- Shape the Buns: Once doubled, gently punch down the dough to release the air. Turn it out onto a lightly floured surface and divide it into 12 equal pieces. I find a kitchen scale helps here for uniformity. Roll each piece into a smooth, round bun. Arrange the buns on a baking sheet lined with parchment paper, leaving a little space between each as they will expand further.
- Second Rise (Proofing): Cover the buns loosely with plastic wrap or a clean towel and let them rise again in a warm place for another 30-45 minutes, or until they look puffy and have nearly doubled in size. While they are proofing, preheat your oven to 375°F (190°C).
- Prepare the “Cross” Paste: In a small bowl, whisk together about 1/4 cup all-purpose flour with 2-3 tablespoons of cold water until you have a smooth, thick paste. Transfer this paste to a piping bag fitted with a small round nozzle, or a Ziploc bag with a tiny corner snipped off.
- Add the Cross and Bake: Once the buns have proofed, carefully pipe a cross onto the top of each bun using the flour paste. Then, brush the tops of the buns with an egg wash (one egg yolk whisked with a tablespoon of milk) for a beautiful golden sheen. Bake for 18-22 minutes, or until the buns are deep golden brown on top and sound hollow when tapped on the bottom.
- Glaze (Optional, but Recommended): While the buns are still warm from the oven, you can brush them with a light savory glaze. I like to melt a tablespoon of butter with a tiny sprinkle of sea salt and a pinch of dried herbs (like rosemary or thyme) and brush it over the warm buns for extra flavor and shine.
- Cool and Serve: Transfer the Savory Cheese & Herb Hot Cross Buns to a wire rack to cool slightly before serving. They are absolutely divine warm from the oven!
Tips & Suggestions
Making these Savory Cheese & Herb Hot Cross Buns is a joy, and I’ve picked up a few tricks over the years to ensure they turn out perfectly every time. Here are my best tips and some delicious serving suggestions:
- Don’t Rush the Rise: Patience is truly a virtue when it comes to yeast doughs. Allowing the dough to rise fully in a warm, draft-free spot is critical for achieving a light, airy texture and developing excellent flavor. If your kitchen is cool, try placing the bowl in a slightly warm (but not hot) oven that has been turned off, or near a warm window.
- Kneading is Key: Don’t skip or cut short the kneading process. Proper kneading develops the gluten, which is what gives these buns their structure and chewiness. A well-kneaded dough will be smooth, elastic, and spring back when gently poked. If you’re new to kneading, watch a quick video online – it makes a huge difference!
- Customize Your Cheese & Herbs: This recipe is incredibly adaptable! Feel free to experiment with your favorite hard or semi-hard cheeses. A combination of a sharp cheddar and a nutty Parmesan is fantastic, or try adding some smoked cheese for a deeper flavor. For herbs, beyond rosemary and thyme, consider finely chopped dill, oregano, or even a touch of chilli flakes for a subtle kick. Fresh is always best, but if using dried, remember to use less (about a third of the amount).
- For a Crispier Crust: If you enjoy a slightly crispier crust, you can place a shallow pan of hot water in the bottom of your oven during the first 10 minutes of baking. The steam helps create a beautiful crust.
- Serving Suggestions: These savory buns are incredibly versatile!
- They make a fantastic accompaniment to a hearty bowl of soup or stew, perfect for dipping.
- Serve them alongside a Sunday roast or any beef dish as a flavorful bread roll.
- They’re wonderful for a savory breakfast or brunch, perhaps with scrambled eggs or a side of crispy beef bacon.
- Slice them in half and toast lightly, then spread with a little cream cheese or a savory jam.
- Pack them in lunchboxes for a wholesome and satisfying snack.
- Make-Ahead Option: You can prepare the dough the day before. After the first rise, punch down the dough, shape the buns, and then place them on your parchment-lined baking sheet. Cover tightly with plastic wrap and refrigerate overnight. The next morning, take them out, let them come to room temperature and proof for about an hour (they will likely have risen some in the fridge), then proceed with piping the cross and baking.
- Achieving the Perfect Cross: Don’t make your flour paste too thin, or it will run. It should be thick enough to hold its shape when piped. If you don’t have a piping bag, a small zip-top bag with a tiny corner snipped off works just as well.
Storage
Once you’ve baked a batch of these glorious Savory Cheese & Herb Hot Cross Buns, you’ll want to make sure they stay fresh and delicious for as long as possible. Here are my tried-and-true methods for storing them, whether you plan to enjoy them tomorrow or in a few weeks.
- Room Temperature: For immediate enjoyment, these buns are best stored at room temperature for up to 2-3 days. Once they have completely cooled, place them in an airtight container or a large zip-top bag. While they are at their absolute peak on the day they are baked, a quick warm-up will revive them wonderfully.
- Refrigeration: While not my first choice as refrigeration can sometimes dry out bread, if you need to extend their shelf life slightly beyond a few days, you can store them in an airtight container in the refrigerator for up to 5 days. Be sure to bring them to room temperature and warm them thoroughly before serving, as the cold can make them a bit dense.
- Freezing for Longer Storage: This is my preferred method for keeping these buns fresh for longer!
- Cool Completely: Ensure the buns are completely cooled to room temperature before freezing. Freezing warm buns will create condensation and make them soggy.
- Wrap Individually: For best results and easy retrieval, I recommend wrapping each bun individually in plastic wrap, then placing them all into a large freezer-safe zip-top bag or an airtight container. This prevents freezer burn and makes it easy to grab just one or two at a time.
- Freeze: Store in the freezer for up to 2-3 months.
- Reheating Instructions:
- From Room Temperature: Pop them into a preheated oven (300°F/150°C) for about 5-7 minutes, or until warmed through. You can also toast them lightly in a toaster or under the grill (broiler) after slicing them in half.
- From Frozen: There’s no need to thaw! You can reheat frozen buns directly in a preheated oven (325°F/160°C) for about 10-15 minutes, or until soft and warmed through. For a quicker method, you can microwave a single bun for 30-60 seconds, but be careful not to overcook, as this can make them chewy. For best texture, I always recommend the oven for reheating from frozen.
- Reviving Stale Buns: If your buns have become a bit stale, don’t despair! A quick spritz with a little water (just a light mist) before reheating in the oven can work wonders, bringing back some of their original freshness and softness.
Final Thoughts
And there you have it! I truly hope you’re as excited as I am to bring these incredible Savory Cheese & Herb Hot Cross Buns to life in your own kitchen. This isn’t just another bread recipe; it’s a delightful, savory twist on a beloved classic, transforming it into something utterly irresistible. The moment these golden-brown beauties emerge from your oven, filling your home with their inviting aroma, you’ll understand why they are an absolute must-try.
The harmonious blend of sharp cheese and fragrant herbs, baked into a soft, fluffy bun with that signature cross, makes these Savory Cheese & Herb Hot Cross Buns perfect for any occasion. Whether you’re serving them up for a special brunch, a comforting snack, or alongside a warm bowl of soup, I promise they’ll be a hit. Don’t hesitate to give this unique and utterly delicious recipe a go – your taste buds will thank you!
Must-Try Savory Cheese & Herb Hot Cross Buns Recipe!

Experience a delightful twist on a classic with these Savory Cheese & Herb Hot Cross Buns. Bursting with rich cheese and fragrant herbs, they are perfect for any occasion.
- Prep Time: 30 mins
- Cook Time: 22 mins
- Total Time: 52 minutes
- Yield: 12 servings
- Category: Baking
- Method: Baking
- Cuisine: International
Ingredients
- Strong Bread Flour
- Active Dry Yeast
- Warm Milk
- Grated Cheese (sharp cheddar or Gruyère)
- Fresh Herbs (rosemary, thyme, chives)
- Unsalted Butter
- Egg
- Salt
- Pepper
- All-purpose flour (for cross paste)
- Cold water (for cross paste)
- Egg yolk (for egg wash)
- Milk (for egg wash)
- Dried herbs (optional, for glaze)
Instructions
- In a large mixing bowl, gently warm your milk until it's lukewarm. Stir in a pinch of sugar and then sprinkle over your active dry yeast. Let it sit for 5-10 minutes until it becomes foamy and bubbly.
- To your activated yeast mixture, whisk in the melted butter and the egg. In a separate bowl, combine your strong bread flour, salt, freshly ground black pepper, fresh herbs, and grated cheese. Mix these dry ingredients thoroughly.
- Gradually pour the wet ingredients into the dry ingredients, mixing until a shaggy dough forms.
- Turn the dough out onto a lightly floured surface. Knead for about 8-10 minutes until the dough becomes smooth and elastic.
- Lightly grease a clean bowl with oil. Place the dough in the bowl, cover it, and let it rise in a warm place for 1 to 1.5 hours, or until it has doubled in size.
- Once doubled, gently punch down the dough and turn it out onto a lightly floured surface. Divide it into 12 equal pieces and roll each piece into a smooth bun. Arrange the buns on a baking sheet lined with parchment paper.
- Cover the buns loosely and let them rise again in a warm place for another 30-45 minutes, or until puffy. Preheat your oven to 375°F (190°C).
- In a small bowl, whisk together about 1/4 cup all-purpose flour with 2-3 tablespoons of cold water until you have a smooth paste. Transfer this paste to a piping bag.
- Once the buns have proofed, carefully pipe a cross onto the top of each bun using the flour paste. Brush the tops with an egg wash.
- Bake for 18-22 minutes, or until the buns are deep golden brown and sound hollow when tapped.
- While the buns are still warm, brush them with a light savory glaze made from melted butter, sea salt, and a pinch of dried herbs.
- Transfer the buns to a wire rack to cool slightly before serving.
Nutrition
- Serving Size: 1 bun
- Calories: 200
- Sugar: 1 g
- Sodium: 150 mg
- Fat: 8 g
- Saturated Fat: 4 g
- Unsaturated Fat: 3 g
- Trans Fat: 0 g
- Carbohydrates: 28 g
- Fiber: 1 g
- Protein: 6 g
- Cholesterol: 30 mg
Keywords: Ensure your yeast is fresh for the best rise. Feel free to customize the cheese and herbs to your liking. For a crispier crust, place a shallow pan of hot water in the oven during the first 10 minutes of baking.
Leave a Comment