
Mummy Brownies: A Spooktacular Halloween Treat
Mummy Brownies! Just the name conjures up images of deliciously spooky Halloween fun, doesn’t it? This recipe isn’t just about creating a visually stunning dessert; it’s about crafting a truly unforgettable treat that’s perfect for sharing with family and friends during the autumnal festivities. I’ve perfected this recipe over the years, and I’m thrilled to share my secrets with you.
While the concept of Mummy Brownies is relatively modern, drawing inspiration from the classic Halloween imagery of mummies and bandages, the core of the recipe relies on the timeless appeal of the humble brownie. Brownies themselves boast a rich history, evolving from simple chocolate cakes into the decadent squares we know and love today. Their versatility is key to their enduring popularity; they can be fudgy, chewy, cakey – the possibilities are endless!
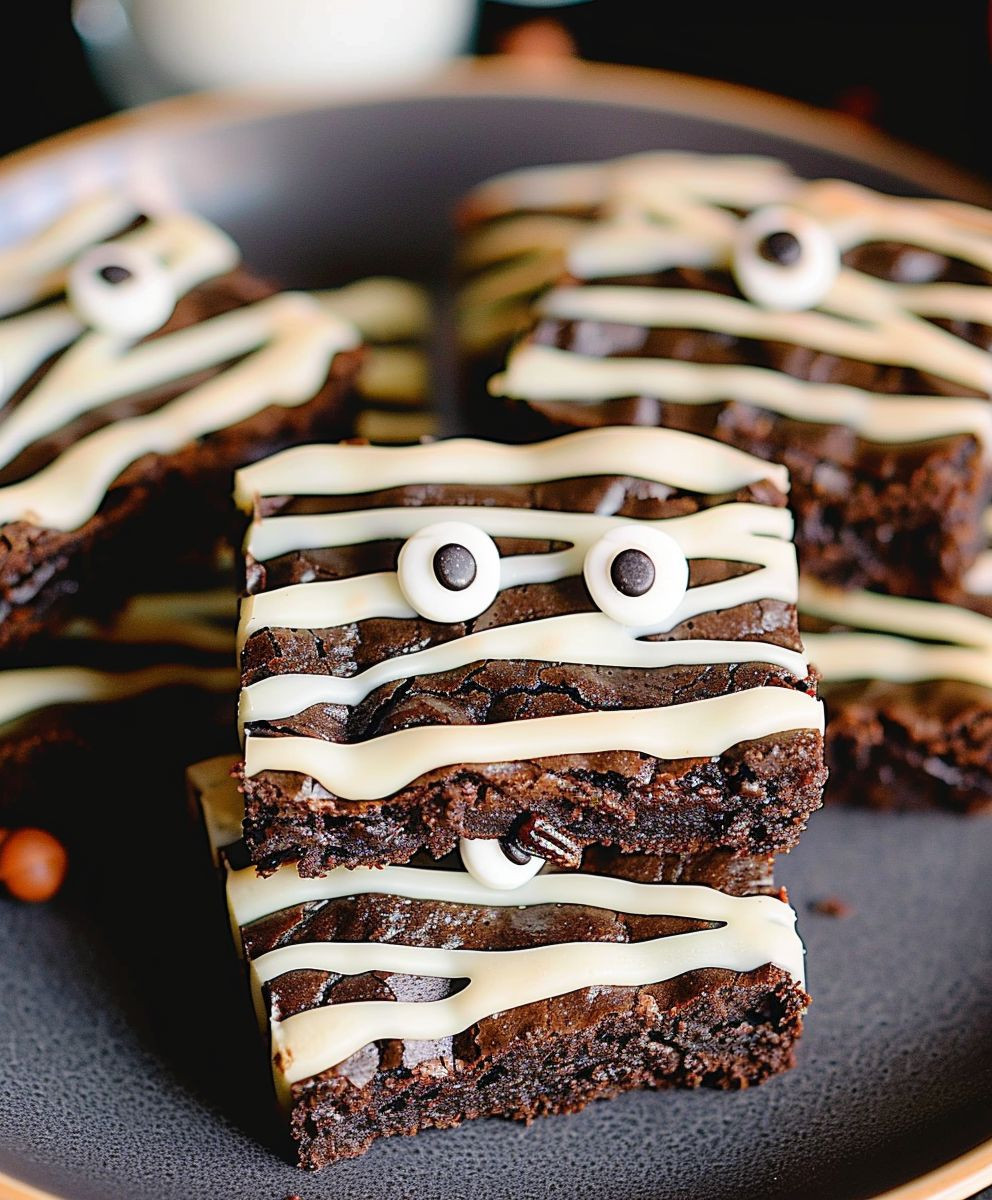
What makes these Mummy Brownies so special? Well, beyond the undeniable deliciousness of a perfectly baked brownie, the added element of the “mummy” design brings an extra layer of fun and creativity. Kids absolutely adore them, and even adults can’t resist the playful presentation. The combination of the rich, chocolatey brownie base with the creamy, slightly sweet white chocolate “bandages” creates a delightful textural contrast that elevates the experience. And let’s be honest, the ease of preparation makes these Mummy Brownies a perfect last-minute Halloween dessert.
So, gather your ingredients, put on your aprons, and let’s embark on this spooky baking adventure together! Prepare to be amazed by how simple it is to create these delightfully creepy yet undeniably delicious Mummy Brownies.
Ingredients:
- 2 cups (250g) all-purpose flour
- 2 cups (400g) granulated sugar
- ¾ cup (60g) unsweetened cocoa powder
- 1 ½ teaspoons baking powder
- 1 ½ teaspoons baking soda
- 1 teaspoon salt
- 1 cup (240ml) buttermilk
- ½ cup (120ml) vegetable oil
- 2 large eggs
- 2 teaspoons vanilla extract
- 1 cup (240ml) freshly brewed hot coffee
- Optional: ½ cup chocolate chips
- Optional: ½ cup chopped walnuts or pecans
Preparing the Dry Ingredients:
- Preheat your oven to 350°F (175°C). Grease and flour a 9×13 inch baking pan. I find parchment paper lining the bottom really helps with easy removal later!
- In a large bowl, whisk together the flour, sugar, cocoa powder, baking powder, baking soda, and salt. Make sure there are no lumps of cocoa powder – a good whisk is key here. I like to sift the dry ingredients together for extra smoothness, but it’s not strictly necessary.
Combining the Wet Ingredients:
- In a separate bowl, whisk together the buttermilk, oil, eggs, and vanilla extract. This is where I usually get my kids involved – they love cracking the eggs!
- Slowly pour the wet ingredients into the dry ingredients, mixing on low speed with an electric mixer until just combined. Don’t overmix! Overmixing can lead to tough brownies. I usually mix for about 30 seconds to a minute, just until everything is moistened.
- Gradually add the hot coffee to the batter, mixing on low speed until fully incorporated. The hot coffee adds incredible moisture and depth of flavor to these brownies. It’s a game changer, trust me!
- Stir in the chocolate chips and nuts (if using). I like to gently fold them in to avoid breaking the chocolate chips too much.
Baking the Brownies:
- Pour the batter into the prepared baking pan and spread evenly. A spatula is perfect for this.
- Bake for 30-35 minutes, or until a toothpick inserted into the center comes out with moist crumbs attached. Don’t overbake! Slightly underbaked brownies are fudgier and more delicious. Start checking for doneness around the 30-minute mark.
- Important Note: Oven temperatures vary, so keep a close eye on your brownies during the last few minutes of baking. If the edges are browning too quickly, you can tent the pan loosely with aluminum foil to prevent over-browning.
Cooling and Serving:
- Let the brownies cool completely in the pan before cutting and serving. This is the hardest part – waiting for them to cool! But trust me, it’s worth it for perfectly cut brownies.
- Once cooled, cut into squares and serve. These brownies are delicious on their own, but they’re also amazing with a scoop of vanilla ice cream or a dollop of whipped cream.
- Storage: Store leftover brownies in an airtight container at room temperature for up to 3 days, or in the refrigerator for up to a week. They also freeze beautifully! Wrap them tightly in plastic wrap and then foil, and they’ll keep for up to 2 months in the freezer.
Tips for Mummy Brownies:
- For a richer chocolate flavor, use dark cocoa powder instead of unsweetened cocoa powder.
- If you don’t have buttermilk, you can make a substitute by adding 1 tablespoon of white vinegar or lemon juice to 1 cup of milk. Let it sit for 5 minutes before using.
- Feel free to experiment with different add-ins! Dried cranberries, chopped pretzels, or even peanut butter chips would be delicious additions.
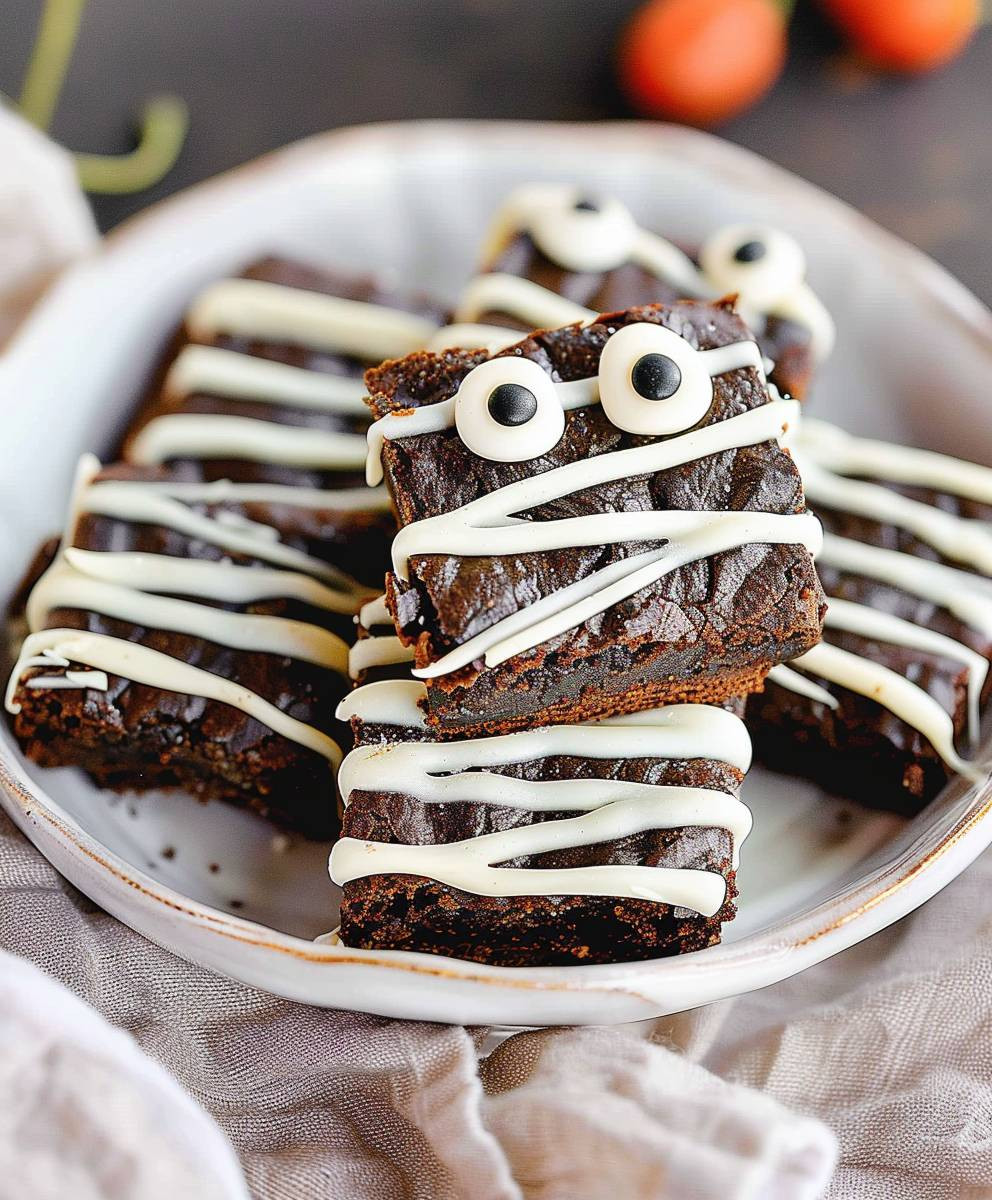
- To make Mummy Brownies, once the brownies are baked and cooled, use white frosting to create mummy bandages. Use mini chocolate chips for eyes. Get creative with your mummy designs!
- For extra fudgy brownies, reduce the baking time by a couple of minutes. Check for doneness frequently.
- For chewier brownies, use brown sugar instead of granulated sugar, or a combination of both.
- Don’t be afraid to adjust the recipe to your liking. If you prefer sweeter brownies, add a little more sugar. If you prefer less intense chocolate flavor, reduce the amount of cocoa powder.
- Pro Tip: For perfectly even brownies, use a kitchen scale to measure your ingredients. This ensures accuracy and consistency in your baking.
- Have fun baking and enjoy your delicious Mummy Brownies!
Conclusion:
So there you have it – my foolproof recipe for Mummy Brownies! I truly believe this recipe is a must-try for several reasons. First, it’s incredibly easy to make, even for beginner bakers. The simple steps and readily available ingredients mean you can whip up a batch in no time, perfect for a last-minute Halloween treat or a fun weekend baking project. Second, the results are spectacular! The fudgy, intensely chocolatey brownies are a delight in themselves, but the adorable mummy decorations elevate them to a whole new level. They’re guaranteed to impress your friends and family, whether you’re hosting a Halloween party or just looking for a fun and festive dessert.
The combination of rich, decadent brownie and the playful mummy design is simply irresistible. It’s the perfect balance of spooky fun and delicious indulgence, making it a truly unique dessert experience. And let’s be honest, who can resist a cute little mummy face staring back at them from a perfectly baked brownie square?
Serving Suggestions:
These Mummy Brownies are fantastic on their own, but you can easily elevate them further. Serve them warm with a scoop of vanilla ice cream for a truly decadent treat. A dollop of whipped cream or a drizzle of chocolate sauce adds another layer of deliciousness. For a more sophisticated touch, consider serving them with a dusting of powdered sugar or a sprinkle of cocoa powder. They also pair wonderfully with a cup of strong coffee or a glass of chilled milk.
Variations:
Feeling adventurous? Why not experiment with different brownie recipes as a base? Try using a peanut butter brownie recipe for a nutty twist, or incorporate white chocolate chips for a contrasting flavor profile. You can also get creative with the mummy decorations. Instead of using white chocolate, try using melted white candy melts for a smoother, more professional look. For a truly spooky touch, add a few drops of green food coloring to the white chocolate to create a ghostly effect. You could even use different types of candy eyes for a more personalized mummy design.
Don’t be afraid to experiment with different fillings too! A layer of caramel or a swirl of peanut butter in the brownie batter before baking would add a delicious surprise. The possibilities are endless!
Share Your Mummy Brownie Creations!
I’d love to see your Mummy Brownie creations! Once you’ve tried this recipe, please share your photos and experiences on social media using the hashtag #MummyBrownieMagic. I can’t wait to see your spooky and delicious masterpieces. Your feedback is invaluable, and it helps me improve my recipes and share the joy of baking with others.
This Mummy Brownie recipe is more than just a dessert; it’s a fun and engaging baking experience that’s perfect for all skill levels. So gather your ingredients, put on your apron, and get ready to create some seriously spooky and delicious treats. You won’t regret it! Happy baking!
Remember, the key to a successful Mummy Brownie is using high-quality ingredients and taking your time with the decorating process. The more detail you put into the mummies, the more impressive your final product will be. So have fun, get creative, and enjoy the process of making these delightful and unforgettable Mummy Brownies.
Mummy Brownies: Spooky Halloween Treats – Easy Recipe
Moist, decadent Halloween brownies, easily customized with add-ins and mummy decorations.
Ingredients
Instructions
Recipe Notes
- For richer chocolate flavor, use dark cocoa powder.
- Buttermilk substitute: 1 tbsp vinegar or lemon juice + 1 cup milk (let sit 5 minutes).
- Experiment with add-ins: dried cranberries, pretzels, peanut butter chips.
- For fudgier brownies, reduce baking time slightly.
- For chewier brownies, use brown sugar or a brown sugar/granulated sugar mix.
- Adjust sugar and cocoa powder to your preference.
- Using a kitchen scale for measuring ingredients ensures accuracy.
Leave a Comment