
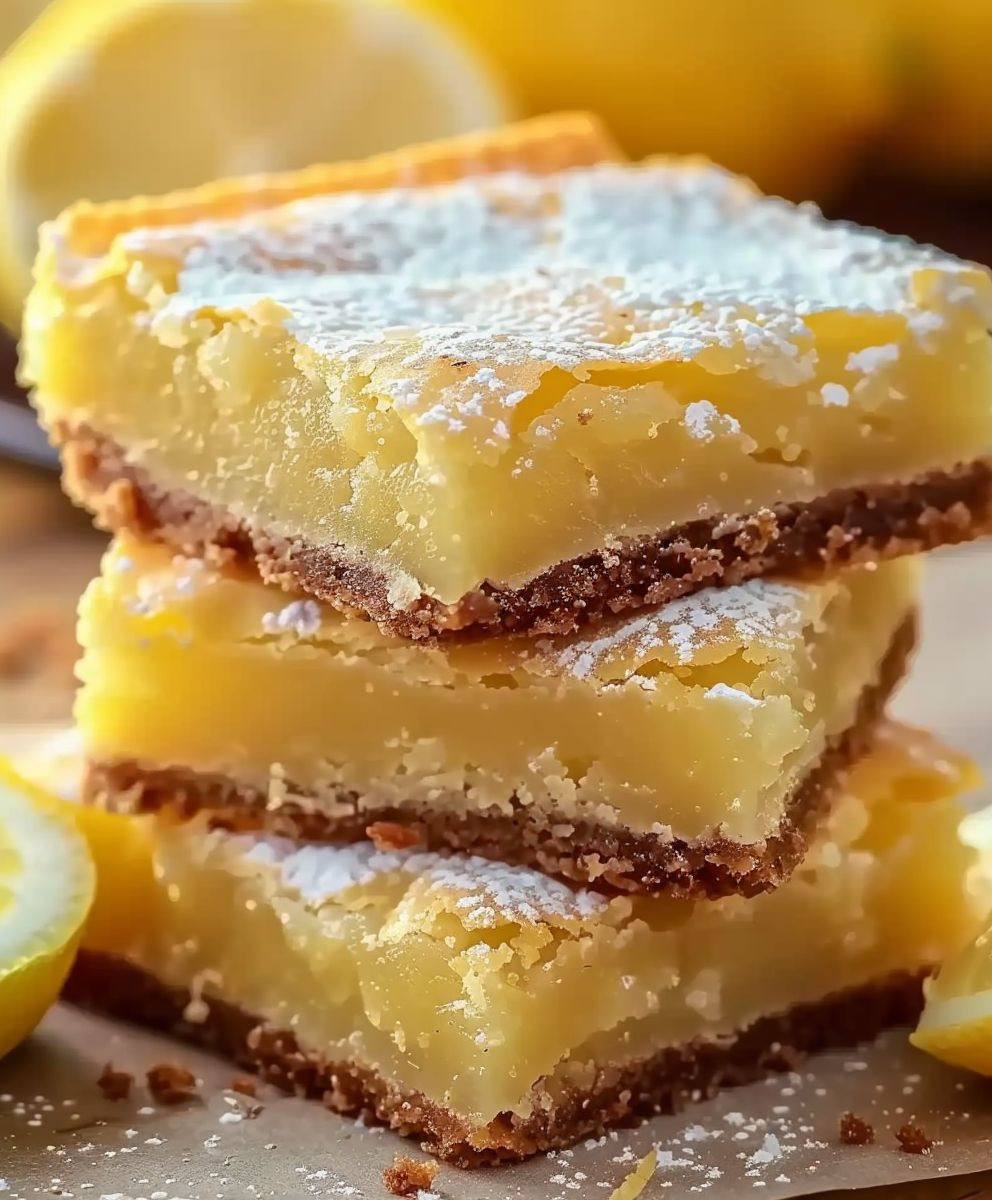
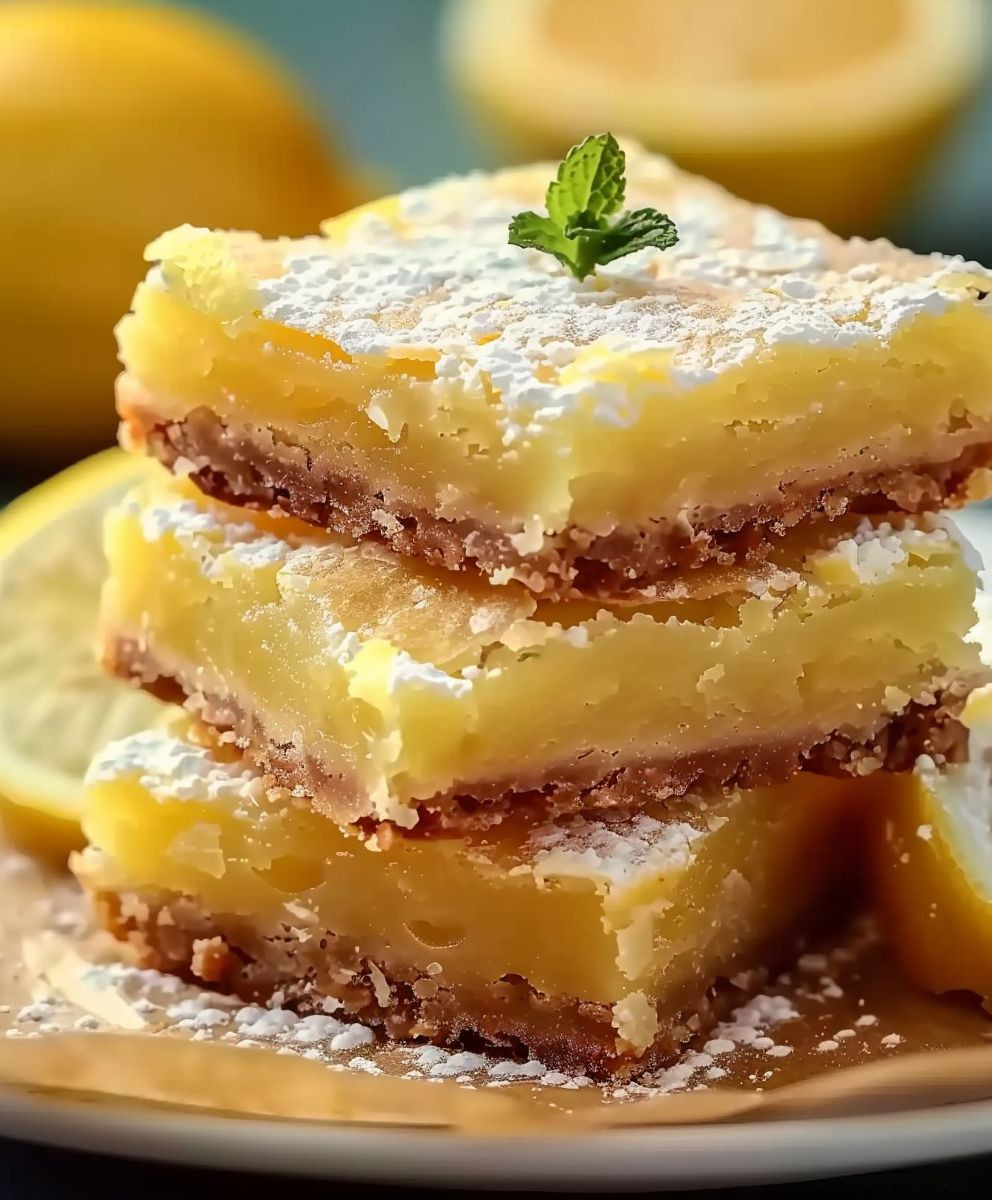
Lemon Brownie Bars: Prepare to meet your new favorite dessert! Imagine the fudgy, chewy goodness of a classic brownie, but infused with the bright, zesty flavor of fresh lemons. These aren’t your average brownies; they’re a delightful twist on a beloved treat, perfect for brightening up any day.
While the exact origins of combining lemon and brownies are a bit of a mystery, the pairing makes perfect sense. Brownies, a relatively modern American invention, have always been a canvas for creativity. Lemon, on the other hand, has a long and storied history in baking, dating back centuries. Its vibrant acidity cuts through richness, creating a balanced and irresistible flavor profile. This is why Lemon Brownie Bars are so popular!
What makes these bars so irresistible? It’s the perfect marriage of textures and tastes. The fudgy, slightly dense brownie base provides a comforting foundation, while the lemon adds a burst of sunshine that awakens the palate. They are incredibly easy to make, requiring minimal ingredients and effort, making them ideal for busy weeknights or impromptu gatherings. People love them because they are a unique and delicious treat that is both comforting and refreshing. Trust me, one bite and you’ll be hooked!
Ingredients:
- For the Brownie Base:
- 1 cup (2 sticks) unsalted butter, melted
- 2 cups granulated sugar
- 4 large eggs
- 1 teaspoon vanilla extract
- 1 cup all-purpose flour
- ¾ cup unsweetened cocoa powder
- ½ teaspoon baking powder
- ¼ teaspoon salt
- For the Lemon Swirl:
- 8 ounces cream cheese, softened
- ½ cup granulated sugar
- 2 large eggs
- ¼ cup lemon juice, freshly squeezed
- 2 tablespoons lemon zest, finely grated
- 1 tablespoon all-purpose flour
- Optional Garnish:
- Powdered sugar, for dusting
- Fresh lemon slices, for decoration
Preparing the Brownie Base
Okay, let’s get started with the brownie base. This is the foundation of our delicious lemon brownie bars, so we want to make sure it’s rich, fudgy, and perfectly chocolatey. Trust me, it’s easier than you think!
- Melt the Butter: First, grab your unsalted butter (2 sticks, or 1 cup) and melt it completely. You can do this in the microwave in 30-second intervals, stirring in between, or in a saucepan over low heat. Just make sure it’s fully melted and smooth. Let it cool slightly before moving on to the next step. This is important because we don’t want to cook the eggs when we add them!
- Combine Butter and Sugar: In a large mixing bowl, pour in the melted butter and add the granulated sugar (2 cups). Whisk these together really well until the mixture is smooth and creamy. This step is crucial for creating that shiny, crackly top we all love on brownies.
- Add the Eggs and Vanilla: Now, crack in the eggs (4 large ones) one at a time, whisking well after each addition. This helps to emulsify the mixture and create a smooth batter. Then, stir in the vanilla extract (1 teaspoon). Vanilla enhances the chocolate flavor and adds a lovely aroma.
- Combine Dry Ingredients: In a separate bowl, whisk together the all-purpose flour (1 cup), unsweetened cocoa powder (¾ cup), baking powder (½ teaspoon), and salt (¼ teaspoon). Whisking ensures that there are no lumps of cocoa powder and that the baking powder and salt are evenly distributed.
- Combine Wet and Dry Ingredients: Gradually add the dry ingredients to the wet ingredients, mixing until just combined. Be careful not to overmix! Overmixing can develop the gluten in the flour, resulting in tough brownies. A few streaks of flour are okay at this point.
Preparing the Lemon Swirl
Now for the star of the show – the lemon swirl! This is what gives these brownies their tangy, bright flavor and beautiful marbled appearance. Don’t be intimidated; it’s super simple to make.
- Soften the Cream Cheese: Make sure your cream cheese (8 ounces) is softened to room temperature. This is essential for a smooth and creamy swirl. If you’re short on time, you can microwave it in 15-second intervals, but be careful not to melt it.
- Combine Cream Cheese and Sugar: In a medium mixing bowl, beat the softened cream cheese with the granulated sugar (½ cup) until smooth and creamy. You can use a hand mixer or a stand mixer for this step.
- Add Eggs, Lemon Juice, and Zest: Beat in the eggs (2 large ones) one at a time, followed by the lemon juice (¼ cup) and lemon zest (2 tablespoons). The lemon zest is where most of the lemon flavor comes from, so don’t skimp on it! Make sure to only zest the yellow part of the lemon, avoiding the white pith, which is bitter.
- Add Flour: Stir in the all-purpose flour (1 tablespoon) until just combined. This helps to thicken the lemon swirl slightly.
Assembling and Baking the Brownie Bars
Alright, we’re in the home stretch! Now it’s time to put everything together and bake these beauties.
- Prepare the Baking Pan: Preheat your oven to 350°F (175°C). Grease and flour a 9×13 inch baking pan. You can also line the pan with parchment paper, leaving an overhang on the sides, for easy removal. This is my preferred method!
- Pour in the Brownie Batter: Pour the brownie batter into the prepared baking pan and spread it evenly.
- Dollop the Lemon Swirl: Drop spoonfuls of the lemon swirl mixture over the brownie batter. Don’t worry about being precise; we’re going for a marbled effect.
- Create the Swirl: Use a knife or skewer to gently swirl the lemon mixture into the brownie batter. Be careful not to overmix, as this can muddy the colors. Just a few swirls are enough to create a beautiful marbled pattern.
- Bake: Bake for 30-35 minutes, or until a toothpick inserted into the center comes out with moist crumbs attached. The baking time may vary depending on your oven, so keep an eye on them.
- Cool Completely: Let the brownie bars cool completely in the pan before cutting into squares. This is important because they will continue to set as they cool. If you try to cut them while they’re still warm, they’ll be messy and gooey (although still delicious!).
Serving and Storing
Finally, the moment we’ve all been waiting for – enjoying our lemon brownie bars! Here are a few tips for serving and storing them.
- Cut into Squares: Once the brownie bars are completely cool, cut them into squares. I usually get about 24 squares from a 9×13 inch pan.
- Dust with Powdered Sugar (Optional): For a pretty presentation, dust the brownie bars with powdered sugar before serving.
- Garnish with Lemon Slices (Optional): You can also garnish them with fresh lemon slices for an extra touch of lemon flavor and visual appeal.
- Serve: Serve the lemon brownie bars at room temperature. They’re delicious on their own, or you can pair them with a scoop of vanilla ice cream or a dollop of whipped cream.
- Store: Store any leftover brownie bars in an airtight container at room temperature for up to 3 days, or in the refrigerator for up to a week. They can also be frozen for longer storage. Just wrap them individually in plastic wrap and then place them in a freezer-safe bag or container.
Tips for Success
- Use Room Temperature Ingredients: Using room temperature ingredients, especially the cream cheese and eggs, will help to create a smoother batter and a more even bake.
- Don’t Overmix: Overmixing the brownie batter can result in tough brownies. Mix until just combined.
- Adjust Baking Time: The baking time may vary depending on your oven. Start checking the brownies after 30 minutes and bake until a toothpick inserted into the center comes out with moist crumbs attached.
- Let Cool Completely: Let the brownie bars cool completely in the pan before cutting into squares. This will prevent them from being messy and gooey.
- Experiment with Flavors: Feel free to experiment with different flavors! You can add chopped nuts, chocolate chips, or other mix-ins to the brownie batter. You can also use different citrus fruits in the lemon swirl, such as lime or orange.
Enjoy!
I hope you enjoy these lemon brownie bars as much as I do! They’re the perfect combination of chocolatey goodness and tangy lemon flavor. Happy baking!
Conclusion:
Okay, friends, let’s be honest: you’ve scrolled this far because something about these Lemon Brownie Bars whispered sweet nothings into your ear. And I’m here to tell you, that whisper was right! This isn’t just another dessert recipe; it’s a sunshine-infused, tangy-sweet experience that will brighten even the gloomiest of days. The fudgy brownie base, perfectly balanced by the zesty lemon swirl, creates a symphony of flavors and textures that’s simply irresistible. Trust me, once you take that first bite, you’ll understand why I’m so passionate about sharing this recipe with you.
But what truly elevates these bars to “must-try” status is their versatility. They’re perfect for a casual afternoon treat, a sophisticated dessert at a dinner party, or even a thoughtful homemade gift. Imagine surprising your coworkers with a batch of these on a Monday morning – instant office hero status, guaranteed! And the best part? They’re surprisingly easy to make. No complicated techniques or fancy ingredients required. Just simple, straightforward steps that even a novice baker can master.
Serving Suggestions and Variations:
Now, let’s talk about how to take these Lemon Brownie Bars to the next level. For a classic presentation, simply dust them with powdered sugar before serving. The delicate sweetness complements the tangy lemon beautifully. Or, if you’re feeling a bit more adventurous, try drizzling them with a white chocolate ganache. The creamy richness of the white chocolate adds another layer of decadence that’s simply divine.
Looking for variations? You’ve got options! For a more intense lemon flavor, add a teaspoon of lemon extract to the brownie batter. If you’re a fan of nuts, try adding chopped walnuts or pecans to the batter for a delightful crunch. And for a truly decadent treat, consider adding a layer of cream cheese frosting on top. The possibilities are endless! You could even experiment with different citrus fruits, like lime or orange, to create your own unique twist on this classic recipe. Think lime brownie bars for a tropical vibe, or orange brownie bars for a cozy winter treat.
These Lemon Brownie Bars are also fantastic served warm with a scoop of vanilla ice cream. The contrast between the warm, fudgy brownie and the cold, creamy ice cream is pure bliss. Or, for a lighter option, serve them with a dollop of whipped cream and a sprinkle of fresh berries. No matter how you choose to enjoy them, I guarantee these bars will be a hit.
I’ve poured my heart and soul into perfecting this recipe, and I’m confident that you’ll love it as much as I do. So, what are you waiting for? Gather your ingredients, preheat your oven, and get ready to bake up a batch of these irresistible Lemon Brownie Bars. I promise, you won’t regret it!
And finally, I’d absolutely love to hear about your experience! Once you’ve tried the recipe, please come back and leave a comment below. Let me know what you thought, what variations you tried, and any tips or tricks you discovered along the way. Sharing your feedback helps me to improve the recipe and inspires other bakers to give it a try. Happy baking!
Lemon Brownie Bars: A Zesty Twist on a Classic Treat
Fudgy chocolate brownies swirled with a bright and tangy lemon cream cheese filling. A delightful combination of rich and zesty flavors!
Ingredients
Instructions
Recipe Notes
- Use room temperature ingredients for a smoother batter.
- Don’t overmix the brownie batter.
- Adjust baking time as needed based on your oven.
- Let the brownies cool completely before cutting.
- Experiment with different flavors by adding nuts, chocolate chips, or using different citrus fruits in the swirl.


Leave a Comment