
Halloween Witch Punch
Halloween Witch Punch is the perfect spooky and delicious addition to your Halloween festivities! Forget the same old cider – this vibrant, bubbling concoction is guaranteed to be a conversation starter and a crowd-pleaser. I’ve been perfecting this recipe for years, drawing inspiration from classic punch recipes and adding my own whimsical twist to create something truly unforgettable.
While the precise origins of punch are shrouded in the mists of time, its popularity exploded during the Victorian era, becoming a staple at lavish parties and gatherings. This Halloween Witch Punch takes that rich history and gives it a fun, modern update, perfect for today’s Halloween celebrations. Imagine the delight on your guests’ faces as they witness the swirling colors and the enchanting aroma of this magical brew.
What makes this Halloween Witch Punch so beloved? It’s the perfect balance of sweet and tart, with a refreshing fizz that’s incredibly satisfying. The vibrant green color, achieved with natural ingredients, is visually stunning, and the addition of gummy worms and dry ice (optional, of course!) adds an element of spooky fun that kids and adults alike will adore. It’s also incredibly easy to prepare, meaning you can spend more time enjoying your party and less time slaving away in the kitchen. Whether you’re hosting a large gathering or a small family get-together, this Halloween Witch Punch is sure to be a resounding success.
So, let’s get started and create some Halloween magic together! This recipe is simple, adaptable, and guaranteed to make your Halloween party truly memorable. Get ready to brew up a batch of this unforgettable Halloween Witch Punch!
Ingredients:
- 1 (46-ounce) can pineapple juice
- 1 (12-ounce) can frozen orange juice concentrate, thawed
- 1 (2-liter) bottle lemon-lime soda
- 1 (12-ounce) can frozen lemonade concentrate, thawed
- 1 cup water
- 1 (16-ounce) bottle cranberry juice
- 1 cup vodka or rum (optional, for an adult version)
- Dry ice (optional, for a spooky effect)
- Gummy worms
- Plastic spiders
- Dry ice pellets (optional, for a smoky effect)
- Large punch bowl
- Ice
- Several small bowls for individual ingredients
- Large spoon or ladle for stirring
- Measuring cups and spoons
Preparing the Juice Base
- First, I like to start by gathering all my ingredients. This makes the process much smoother and less stressful. Make sure everything is at room temperature, except for the ice, of course!
- In a large punch bowl, I pour in the entire can of pineapple juice. I always use a good quality pineapple juice for the best flavor.
- Next, I add the thawed orange juice concentrate. Make sure to fully thaw it to prevent icy chunks in your punch.
- Now, I carefully pour in the thawed lemonade concentrate. This adds a lovely tartness that balances the sweetness of the pineapple and orange.
- I then add the cup of water. This helps to thin the mixture and prevent it from being too thick and syrupy.
- Finally, I pour in the cranberry juice. This adds a beautiful deep red color and a slightly tart flavor that complements the other juices perfectly. Stir gently to combine all the juices.
- If you’re making the adult version, now’s the time to add the vodka or rum. I usually add a cup, but you can adjust to your preference. Stir gently to incorporate the alcohol.
Chilling and Adding the Fizz
- Important step: I always recommend chilling the juice mixture for at least 2-3 hours before adding the soda. This allows the flavors to meld and ensures a perfectly chilled punch.
- Once the juice mixture is well-chilled, I gently stir in the lemon-lime soda. I do this slowly to avoid too much fizzing and spillage. The soda adds a refreshing bubbly element to the punch.
- Taste the punch and adjust the sweetness or tartness as needed. You can always add a little more of any juice to fine-tune the flavor to your liking. This is where your personal touch comes in!
Adding the Spooky Touches
- Now for the fun part! I add a generous amount of ice to the punch bowl. This keeps the punch refreshingly cold throughout the party.
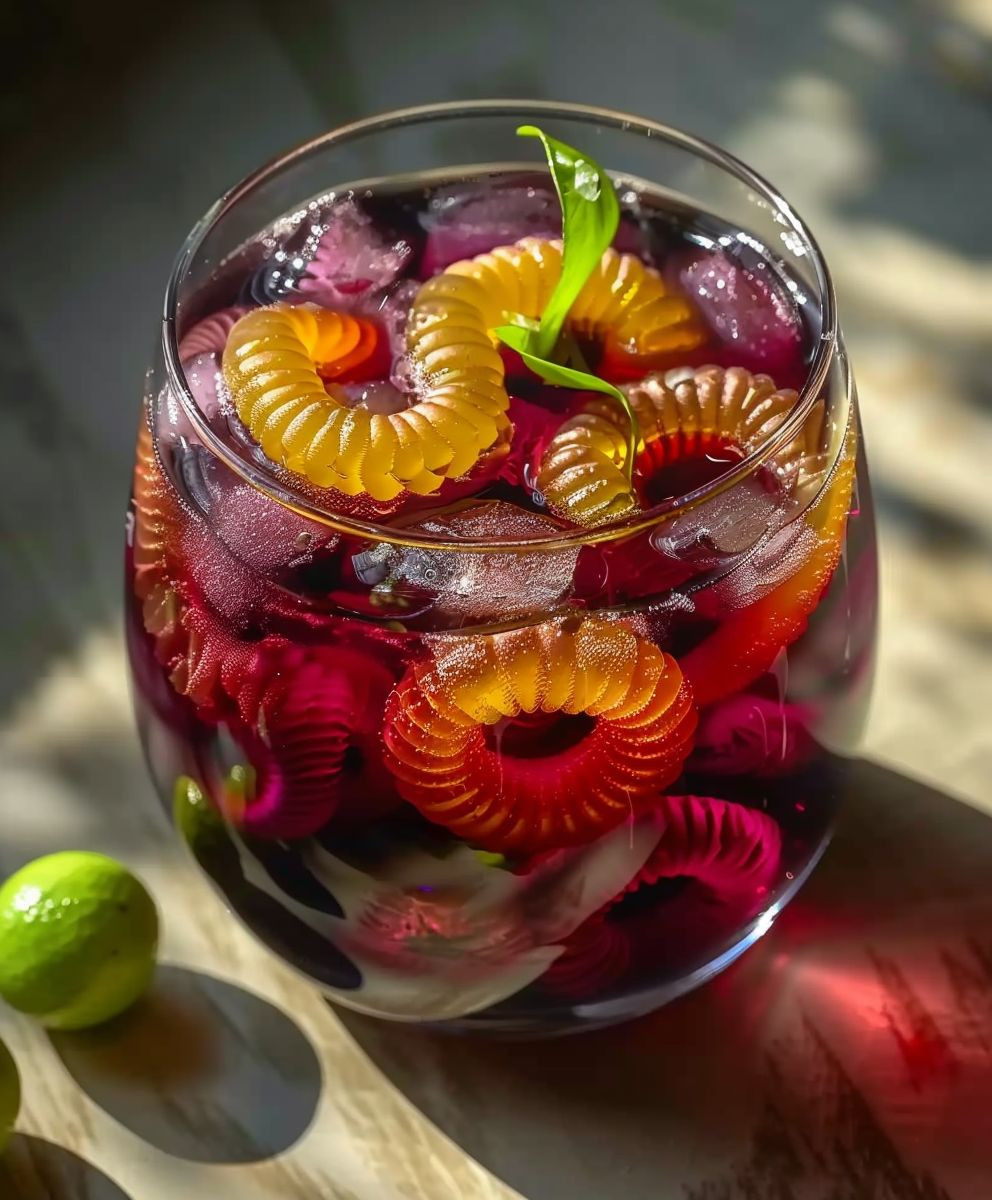
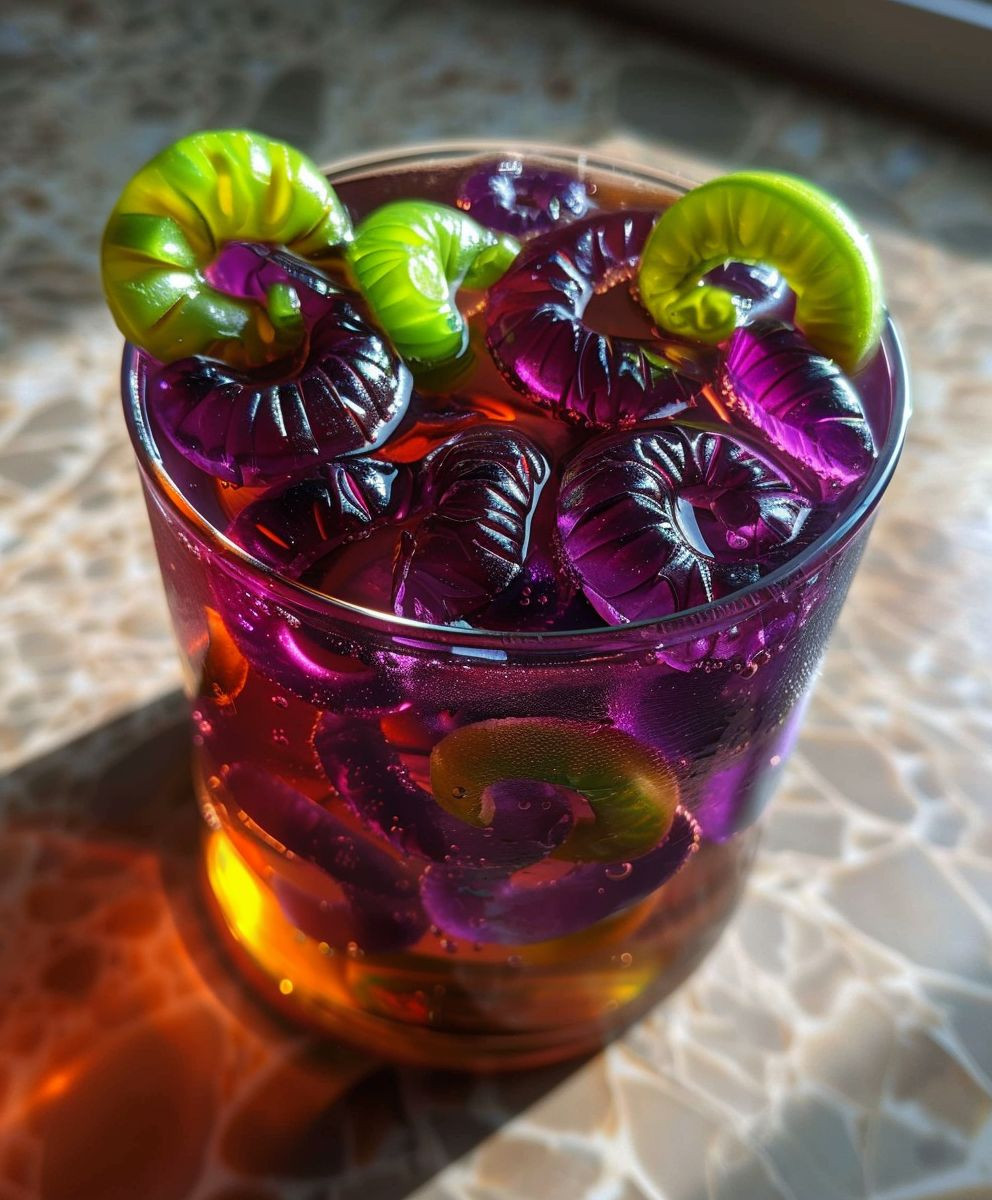
- I then carefully add the gummy worms and plastic spiders. I like to scatter them throughout the punch for a truly spooky effect. You can also use other Halloween-themed candies or decorations.
- If you’re using dry ice, proceed with extreme caution. Always add the dry ice pellets directly to the punch bowl, never touch them with your bare hands. Dry ice is extremely cold and can cause severe burns. A small amount will create a spooky fog effect, adding to the Halloween atmosphere. Remember to never seal the punch bowl if using dry ice, as the carbon dioxide gas can build up and cause an explosion.
- For an extra touch, you can add some plastic ice cubes with glow-in-the-dark features. These add a subtle, eerie glow to the punch bowl.
- Finally, I give the punch one last gentle stir to ensure everything is well distributed. And there you have it – a deliciously spooky Halloween Witch Punch!
Serving Suggestions
- Serve the punch in a large punch bowl, or individual glasses. I like to use Halloween-themed cups for an extra festive touch.
- Garnish each serving with an extra gummy worm or plastic spider for an added spooky detail.
- For a truly immersive experience, serve the punch with Halloween-themed snacks and desserts.
- Remember to keep the punch well-chilled throughout the party. You can add more ice as needed.
- Enjoy responsibly! If you’re serving the alcoholic version, please encourage guests to drink responsibly and provide non-alcoholic alternatives.
Conclusion:
So there you have it – my spooktacular Halloween Witch Punch recipe! I truly believe this recipe is a must-try for your Halloween gatherings this year. It’s not just visually stunning, with its vibrant green color and dramatic dry ice effect (optional, of course!), but it’s also incredibly delicious and refreshingly easy to make. The combination of tart green apple, sweet pineapple, and the subtle zing of lime creates a perfectly balanced flavor profile that both kids and adults will adore. And let’s be honest, who doesn’t love a punch that’s as fun to look at as it is to drink?
This Halloween Witch Punch is the perfect centerpiece for any Halloween party, whether you’re hosting a large gathering or a small get-together with close friends and family. Its vibrant color and festive presentation will instantly elevate the atmosphere, creating a truly memorable Halloween experience for everyone. I’ve found it’s a fantastic conversation starter, too – people are always curious about how I achieve that eerie, bubbling effect!
For those looking to add a personal touch, there are endless possibilities for variations. Feel free to experiment with different fruit juices to create your own unique flavor combinations. Cranberry juice would add a lovely tartness, while orange juice would bring a sweeter, more citrusy note. You could also add a splash of ginger ale or sparkling cider for extra fizz. For a non-alcoholic version, simply omit the vodka or rum. And if you’re feeling particularly creative, consider adding gummy worms or plastic spiders for an extra spooky touch!
To make it even more festive, consider serving your Halloween Witch Punch in a large glass punch bowl, garnished with dry ice (remember to use caution!), lime wedges, and maraschino cherries. You could also add some floating plastic eyeballs or other Halloween-themed decorations for an extra spooky flair. Serve it alongside some spooky snacks like spiderweb dip or mummy dogs for a complete Halloween feast. Alternatively, if you’re serving a more sophisticated Halloween gathering, consider pairing it with some elegant finger foods and desserts.
I’ve personally found that this punch is best served chilled, allowing the flavors to fully meld and the drink to reach its peak refreshment. However, it’s also delicious served at room temperature if you prefer. No matter how you choose to serve it, I’m confident that this Halloween Witch Punch will be a huge hit with your guests.
Serving Suggestions:
- Serve in a large glass punch bowl with dry ice for a dramatic effect.
- Garnish with lime wedges, maraschino cherries, and Halloween-themed decorations.
- Pair with spooky snacks like spiderweb dip or mummy dogs.
- Offer both alcoholic and non-alcoholic versions to cater to all guests.
Variations:
- Experiment with different fruit juices, such as cranberry or orange juice.
- Add a splash of ginger ale or sparkling cider for extra fizz.
- Include gummy worms or plastic spiders for a fun, spooky touch.
So, what are you waiting for? Give my Halloween Witch Punch recipe a try this Halloween and let me know what you think! I’d love to hear about your experience and see your creations. Share your photos and feedback on social media using #HalloweenWitchPunch – I can’t wait to see how you make this recipe your own!
Happy haunting, and happy sipping!
Halloween Witch Punch: A Spooktacular Recipe for Your Party
A vibrant red Halloween punch with pineapple, orange, lemonade, and cranberry juices. Optional vodka or rum adds an adult kick. Gummy worms and spiders create a spooky effect. Chill for at least 2-3 hours.
Ingredients
Instructions
Recipe Notes
- For best flavor, use high-quality pineapple juice.
- Ensure frozen concentrates are fully thawed before adding to prevent icy chunks.
- Chilling the juice mixture is crucial for optimal flavor blending and a refreshing punch.
- Adjust the amount of alcohol to your preference.
- Use caution when handling dry ice. It is extremely cold and can cause severe burns. Never seal the container if using dry ice.
- Serve with Halloween-themed snacks and desserts for a complete spooky experience.
- Encourage responsible alcohol consumption if serving the alcoholic version. Offer non-alcoholic alternatives.


Leave a Comment