
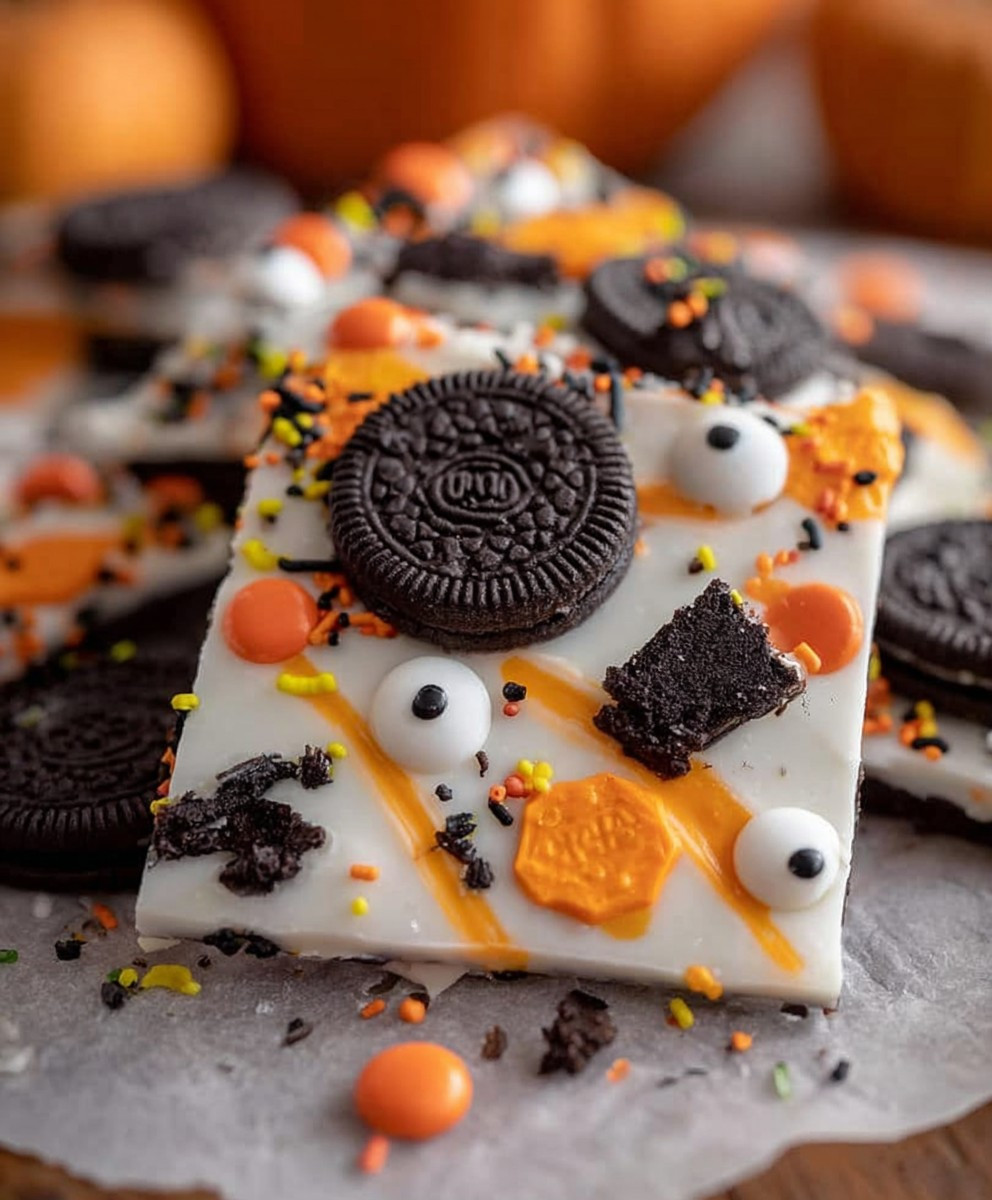
Halloween Oreo Bark: Prepare to be bewitched by the easiest, spookiest, and most delicious treat you’ll make all October! Forget complicated recipes and hours in the kitchen; this festive bark comes together in minutes, delivering a satisfying crunch and a burst of chocolatey-Oreo goodness that will have everyone screaming for more (in a good way, of course!).
While not steeped in ancient tradition, the concept of chocolate bark itself has a rich history, evolving from simple chocolate confections to elaborate creations adorned with nuts, fruits, and candies. This Halloween Oreo Bark takes that evolution a step further, embracing the playful spirit of Halloween with its vibrant colors and iconic Oreo cookies. It’s a modern twist on a classic treat, perfect for parties, gifting, or simply indulging in a little seasonal fun.
What makes this bark so irresistible? It’s the perfect combination of textures – the smooth, rich chocolate, the satisfying snap of the bark, and the delightful crunch of the Oreo cookies. Plus, it’s incredibly versatile! You can customize it with your favorite Halloween candies, sprinkles, and even a drizzle of white chocolate for an extra touch of spooky sweetness. But beyond the taste and texture, people love this dish because it’s so incredibly easy to make. Even the most novice baker can whip up a batch in no time, making it the perfect last-minute treat for any Halloween gathering. So, gather your ingredients, put on your favorite Halloween movie, and let’s get baking!
Ingredients:
- 1 pound high-quality white chocolate, chopped (or white chocolate melting wafers)
- 1 package (14.3 ounces) Oreo cookies, coarsely chopped (about 36 cookies)
- 1/4 cup Halloween-themed sprinkles (orange, black, purple, green)
- 1/4 cup Halloween-themed candies (candy corn, gummy worms, mini chocolate candies), optional
- 1 tablespoon vegetable shortening (optional, for smoother melting)
Preparing the White Chocolate
Alright, let’s get started with the most important part – the white chocolate! This is the base of our bark, so we want to make sure it’s perfectly smooth and melted. I’ve found that using high-quality white chocolate makes a huge difference in the final taste and texture. Trust me, it’s worth the splurge!
- Chop the White Chocolate: First, finely chop your white chocolate. This helps it melt evenly and prevents any stubborn lumps. If you’re using white chocolate melting wafers, you can skip this step.
- Melt the Chocolate: Now, we have two options for melting – the microwave or a double boiler. I personally prefer the double boiler method for more control, but the microwave is definitely quicker.
- Microwave Method: Place the chopped white chocolate (and vegetable shortening, if using) in a microwave-safe bowl. Microwave in 30-second intervals, stirring well after each interval. Continue until the chocolate is almost completely melted, then stir until smooth. Be careful not to overheat the chocolate, as it can seize up and become grainy.
- Double Boiler Method: Fill a saucepan with about an inch of water and bring it to a simmer. Place a heat-safe bowl on top of the saucepan, making sure the bottom of the bowl doesn’t touch the water. Add the chopped white chocolate (and vegetable shortening, if using) to the bowl. Stir constantly until the chocolate is completely melted and smooth.
- Check for Smoothness: Once the chocolate is melted, give it a good stir to ensure it’s perfectly smooth and creamy. If it seems a little thick, you can add a tiny bit more vegetable shortening (a teaspoon at a time) to thin it out.
Preparing the Oreo Cookies and Toppings
While the chocolate is melting (or cooling slightly), let’s get our Oreo cookies and Halloween toppings ready. This is where the fun begins! Feel free to get creative with your toppings – the more festive, the better!
- Chop the Oreo Cookies: Coarsely chop the Oreo cookies. I like to use a large knife or a food processor for this. You want to have a mix of larger chunks and smaller crumbs for a nice texture in the bark. Don’t over-process them into a fine powder!
- Prepare the Sprinkles and Candies: Measure out your Halloween-themed sprinkles and candies. If you’re using larger candies like candy corn or gummy worms, you might want to chop them into smaller pieces so they distribute evenly throughout the bark.
Assembling the Halloween Oreo Bark
Now for the grand finale – putting everything together! This is where the magic happens, and you’ll see your Halloween Oreo bark come to life. Get ready to create a spooky and delicious masterpiece!
- Spread the Melted Chocolate: Line a baking sheet with parchment paper or a silicone baking mat. This will prevent the bark from sticking and make it easy to remove later. Pour the melted white chocolate onto the prepared baking sheet and spread it into an even layer, about 1/4 inch thick.
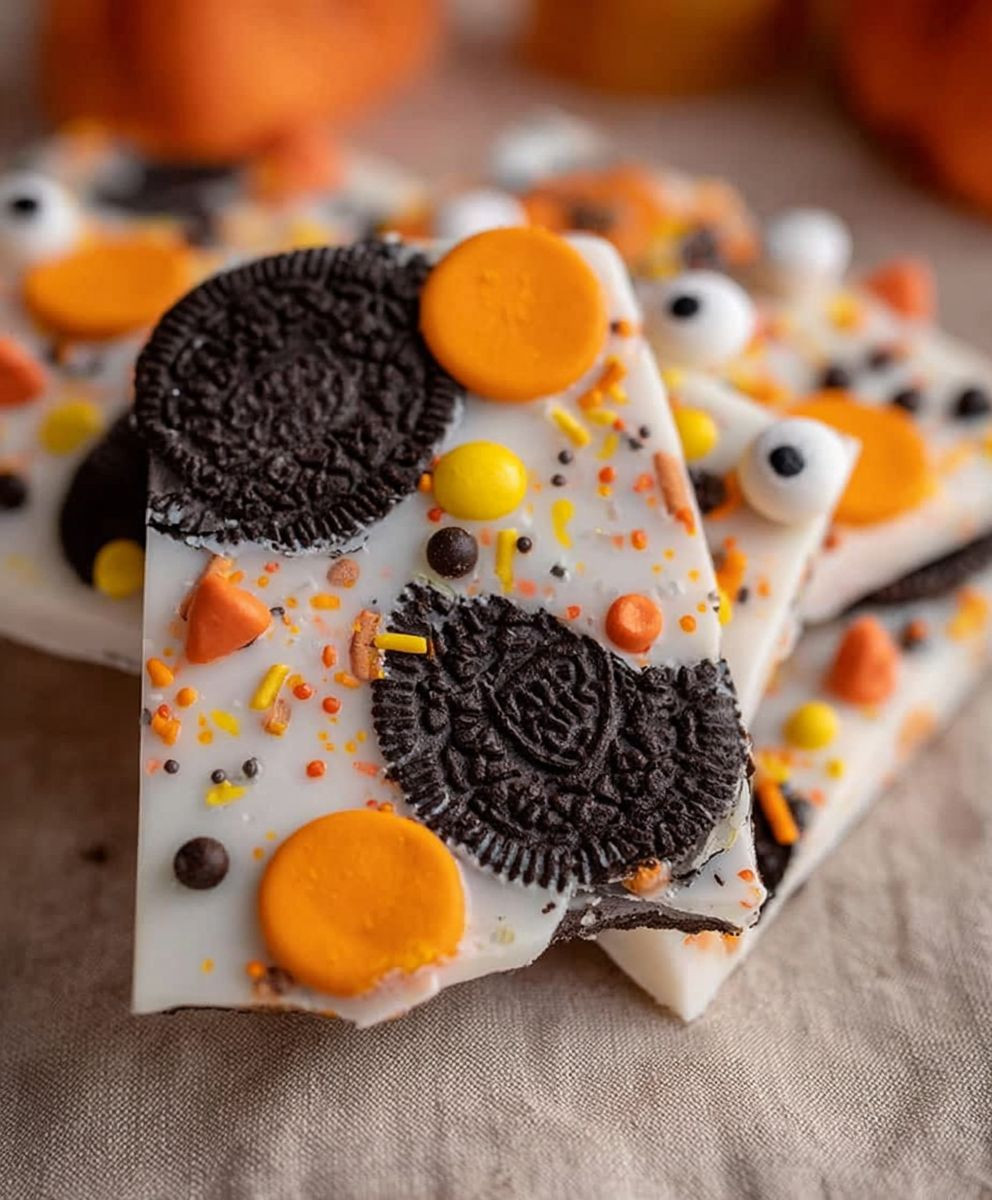
- Add the Oreo Cookies: Immediately sprinkle the chopped Oreo cookies evenly over the melted white chocolate. Gently press the cookies into the chocolate so they adhere well.
- Add the Sprinkles and Candies: Now, sprinkle the Halloween-themed sprinkles and candies over the Oreo cookies. Again, gently press them into the chocolate so they stick.
- Chill the Bark: Place the baking sheet in the refrigerator and chill for at least 30 minutes, or until the bark is firm and set. You can also put it in the freezer for about 15-20 minutes for a faster setting time.
Breaking and Storing the Bark
Once the bark is completely set, it’s time to break it into pieces and enjoy! This is the most satisfying part, in my opinion. And don’t worry about making perfect pieces – the more rustic, the better!
- Break the Bark: Remove the bark from the refrigerator or freezer. Using a sharp knife or your hands, break the bark into irregular pieces. I like to make a variety of sizes, from small bite-sized pieces to larger chunks.
- Store the Bark: Store the Halloween Oreo bark in an airtight container at room temperature or in the refrigerator. It will keep for up to a week, but I doubt it will last that long!
Tips and Variations
Here are a few extra tips and ideas to make your Halloween Oreo bark even more spooktacular:
- Use Different Types of Oreos: Experiment with different flavors of Oreos, such as Golden Oreos, Mint Oreos, or even limited-edition Halloween Oreos.
- Add Food Coloring: Tint the white chocolate with a few drops of food coloring to create a colorful bark. Orange, green, or purple would be perfect for Halloween!
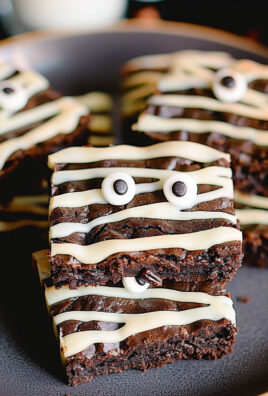
- Drizzle with Chocolate: Drizzle melted milk chocolate or dark chocolate over the white chocolate bark for an extra layer of flavor and visual appeal.
- Add Nuts: Sprinkle chopped nuts, such as peanuts, almonds, or pecans, over the bark for added crunch and flavor.
- Make it Vegan: Use vegan white chocolate and vegan Oreos to make a vegan version of this recipe.
- Personalize with Names: Use a piping bag filled with melted chocolate to write names or spooky messages on individual pieces of bark.
Troubleshooting
Sometimes, things don’t go exactly as planned in the kitchen. Here are a few common issues you might encounter and how to fix them:
- Chocolate Seizes Up: If your chocolate seizes up and becomes grainy, it’s likely because it got too hot or came into contact with water. Try adding a tablespoon of vegetable shortening and stirring vigorously. If that doesn’t work, you might need to start over with fresh chocolate.
- Bark is Too Soft: If your bark is too soft and doesn’t set properly, it could be because the chocolate wasn’t tempered correctly or the room temperature is too warm. Try chilling the bark in the freezer for a longer period of time.
- Toppings Don’t Stick: If your toppings aren’t sticking to the chocolate, make sure you’re pressing them into the chocolate while it’s still melted. You can also lightly spray the toppings with cooking spray to help them adhere better.
Enjoy Your Spooky Treat!
And there you have it – a delicious and festive Halloween Oreo bark that’s sure to be a hit with kids and adults alike! I hope you have fun making this recipe and enjoy sharing it with your friends and family. Happy Halloween!
Conclusion:
This Halloween Oreo Bark is more than just a treat; it’s a festive experience waiting to happen! From the vibrant colors to the satisfying crunch and the delightful combination of chocolate and Oreo goodness, it’s a guaranteed crowd-pleaser. Seriously, if you’re looking for a simple yet impressive dessert to bring to a party, or just a fun activity to do with the kids on a chilly autumn afternoon, look no further.
But why is this recipe a must-try? Well, beyond its sheer deliciousness, it’s incredibly versatile. The base recipe is a blank canvas for your creativity. Feeling adventurous? Try swirling in some peanut butter for a Reese’s-inspired twist. Or, add some pretzels for a salty-sweet sensation. For a truly decadent experience, drizzle some white chocolate over the top after the dark chocolate has set. The possibilities are truly endless!
And speaking of serving suggestions, this bark is perfect on its own, of course. But you can also crumble it over ice cream for an extra special sundae. Or, package it up in cute little bags as party favors or homemade gifts. Imagine the smiles on your friends’ and family’s faces when they receive a piece of this delightful Halloween Oreo Bark! It’s a gift that’s both thoughtful and delicious.
Don’t be intimidated by the idea of making candy. This recipe is incredibly forgiving and easy to adapt. Even if you’re a beginner in the kitchen, I promise you can nail this. The most important thing is to have fun and let your creativity shine. Get the kids involved in decorating – they’ll love arranging the Oreos and sprinkles!
I truly believe this recipe will become a new Halloween tradition in your home. It’s quick, easy, and oh-so-satisfying. Plus, it’s a fantastic way to use up any leftover Halloween candy you might have (though, let’s be honest, is there ever *really* leftover Halloween candy?).
So, what are you waiting for? Grab your ingredients, put on some spooky tunes, and get ready to create some magic in the kitchen. I’m confident you’ll love this Halloween Oreo Bark as much as I do.
And now, for the most important part: I want to hear from you! Once you’ve tried this recipe, please share your experience in the comments below. Did you make any variations? What did your family think? Any tips or tricks you’d like to share? I’m always eager to learn from my readers and see how you’ve made this recipe your own. Your feedback is invaluable and helps me continue to create recipes that you’ll love. Happy baking, and Happy Halloween! Let’s make this Halloween the sweetest one yet, one piece of delicious bark at a time. I can’t wait to see your creations!
Halloween Oreo Bark: Spooky & Delicious Recipe
Simple, no-bake Halloween Oreo Bark with melted white chocolate, chopped Oreos, sprinkles, and candies. Perfect for parties or a fun holiday snack!
Ingredients
Instructions
Recipe Notes
- Use high-quality white chocolate for the best flavor and texture.
- Be careful not to overheat the white chocolate when melting.
- Get creative with your Halloween toppings!
- Experiment with different Oreo flavors.
- Add food coloring to the white chocolate for a colorful bark.
- Drizzle with melted milk or dark chocolate.
- Add chopped nuts for extra crunch.
- Make it vegan by using vegan white chocolate and Oreos.
- Personalize with names or messages using melted chocolate.


Leave a Comment