
Ground Beef Enchiladas: just the name conjures up images of bubbling cheese, rich sauce, and that satisfying, savory filling. Have you ever craved a dish so intensely that you could practically taste it? That’s how I feel about enchiladas, and I’m willing to bet you do too! This isn’t just a recipe; it’s an invitation to a fiesta in your kitchen.
Enchiladas boast a history as vibrant and layered as their flavors. Originating in Mexico, the word “enchilada” comes from the Nahuatl word “chīllapītzalli,” meaning “chili-seasoned flute.” These early versions were simple corn tortillas dipped in chili sauce, a far cry from the cheesy, meat-filled delights we know today. Over time, the dish evolved, incorporating influences from Spanish cuisine and regional ingredients, resulting in the diverse range of enchilada styles we enjoy across the Americas.
What makes Ground Beef Enchiladas so universally loved? It’s the perfect combination of textures and tastes. The soft tortillas, the savory ground beef filling seasoned with aromatic spices, the tangy enchilada sauce, and of course, the gooey, melted cheese – it’s a symphony of flavors that dance on your palate. Plus, they’re incredibly versatile and relatively easy to make, making them a weeknight dinner champion. Whether you’re feeding a crowd or simply treating yourself, these enchiladas are guaranteed to be a hit. So, let’s get cooking and create some delicious memories!

Ingredients:
- 1 tablespoon olive oil
- 1 large onion, chopped
- 2 cloves garlic, minced
- 1.5 pounds ground beef
- 1 packet (1 ounce) taco seasoning
- 1/2 cup water
- 1 can (10 ounces) diced tomatoes and green chilies (like Rotel), undrained
- 1 can (15 ounces) tomato sauce
- 1 can (10.75 ounces) condensed cream of mushroom soup
- 1 cup sour cream
- 12 corn tortillas
- 3 cups shredded cheddar cheese, divided
- Optional toppings: chopped cilantro, diced tomatoes, sour cream, guacamole
Preparing the Ground Beef Mixture
Okay, let’s get started! The heart of these enchiladas is the flavorful ground beef filling. This is where we build the delicious base that will make your taste buds sing.
- Sauté the Aromatics: First, grab a large skillet and heat the olive oil over medium heat. Once the oil is shimmering, add the chopped onion and cook until it’s softened and translucent, about 5-7 minutes. Don’t rush this step; letting the onions soften properly releases their sweetness and adds depth to the flavor. Then, add the minced garlic and cook for another minute until fragrant. Be careful not to burn the garlic, as it can become bitter.
- Brown the Ground Beef: Now, add the ground beef to the skillet. Use a spatula or wooden spoon to break it up into smaller pieces. Cook the beef until it’s browned all over, making sure to drain off any excess grease. Nobody wants greasy enchiladas! Draining the grease is crucial for a better texture and flavor.
- Season the Beef: Once the beef is browned and drained, it’s time to add the taco seasoning. Sprinkle the entire packet of taco seasoning over the beef and stir well to coat everything evenly. Then, pour in the 1/2 cup of water. This helps the seasoning distribute and creates a little bit of sauce.
- Simmer the Filling: Bring the mixture to a simmer and let it cook for about 5-10 minutes, stirring occasionally. This allows the flavors to meld together and the sauce to thicken slightly. You want a nice, cohesive filling that won’t be too watery.
- Add Tomatoes: Stir in the can of diced tomatoes and green chilies (Rotel). This adds a touch of heat and acidity that balances the richness of the beef. If you’re sensitive to spice, you can use a mild version of Rotel or even just plain diced tomatoes.
- Set Aside: Once the filling is ready, remove the skillet from the heat and set it aside. We’ll come back to it later when we’re assembling the enchiladas.
Preparing the Creamy Sauce
Next up, we’re making the creamy sauce that will smother our enchiladas. This sauce is what takes these enchiladas from good to absolutely amazing. It’s rich, flavorful, and oh-so-satisfying.
- Combine Ingredients: In a large bowl, whisk together the tomato sauce, cream of mushroom soup, and sour cream until smooth. Make sure there are no lumps of sour cream. The mixture should be creamy and well combined.
- Taste and Adjust: Give the sauce a taste and adjust the seasoning as needed. You might want to add a pinch of salt, pepper, or even a dash of chili powder for extra flavor. Remember, you can always add more, but you can’t take it away!
Assembling the Enchiladas
Now for the fun part – assembling the enchiladas! This is where all your hard work comes together to create those delicious, cheesy rolls of goodness.
- Preheat Oven: Preheat your oven to 350°F (175°C). This ensures that the enchiladas will cook evenly and the cheese will melt beautifully.
- Warm the Tortillas: This is a crucial step! Warm the corn tortillas to make them more pliable and prevent them from cracking when you roll them. You can warm them in a microwave (wrapped in a damp paper towel for about 30 seconds), in a dry skillet over medium heat (about 15-20 seconds per side), or even in the oven (wrapped in foil for about 10 minutes). I prefer the skillet method because it gives them a slight char that adds flavor.
- Assemble the Enchiladas: Spread a thin layer of the creamy sauce in the bottom of a 9×13 inch baking dish. This prevents the enchiladas from sticking and adds flavor to the bottom layer. Then, one at a time, dip a warmed tortilla into the remaining creamy sauce, coating both sides. Place the sauced tortilla on a plate.
- Fill and Roll: Spoon about 1/4 cup of the ground beef mixture into the center of the tortilla. Sprinkle with about 1/4 cup of shredded cheddar cheese. Roll the tortilla up tightly and place it seam-side down in the prepared baking dish. Repeat with the remaining tortillas, ground beef mixture, and cheese, arranging the enchiladas snugly in the dish.
- Top with Sauce and Cheese: Pour the remaining creamy sauce evenly over the enchiladas. Sprinkle the remaining shredded cheddar cheese over the top. Don’t be shy with the cheese! The more cheese, the better!
Baking the Enchiladas
Almost there! Now it’s time to bake the enchiladas until they’re bubbly, cheesy, and heated through. The aroma that fills your kitchen during this step is simply irresistible.
- Bake: Cover the baking dish with aluminum foil and bake for 20 minutes. This helps to keep the enchiladas moist and prevents the cheese from burning.
- Uncover and Bake: Remove the foil and bake for another 10-15 minutes, or until the cheese is melted and bubbly and the sauce is heated through. The enchiladas should be golden brown and the sauce should be bubbling around the edges.
- Let Rest: Remove the enchiladas from the oven and let them rest for about 5-10 minutes before serving. This allows the sauce to thicken slightly and prevents you from burning your mouth.
Serving and Enjoying
Finally, it’s time to serve and enjoy your delicious homemade ground beef enchiladas! These are perfect for a weeknight dinner, a potluck, or any occasion where you want to impress your friends and family.
- Serve: Serve the enchiladas hot, straight from the baking dish.
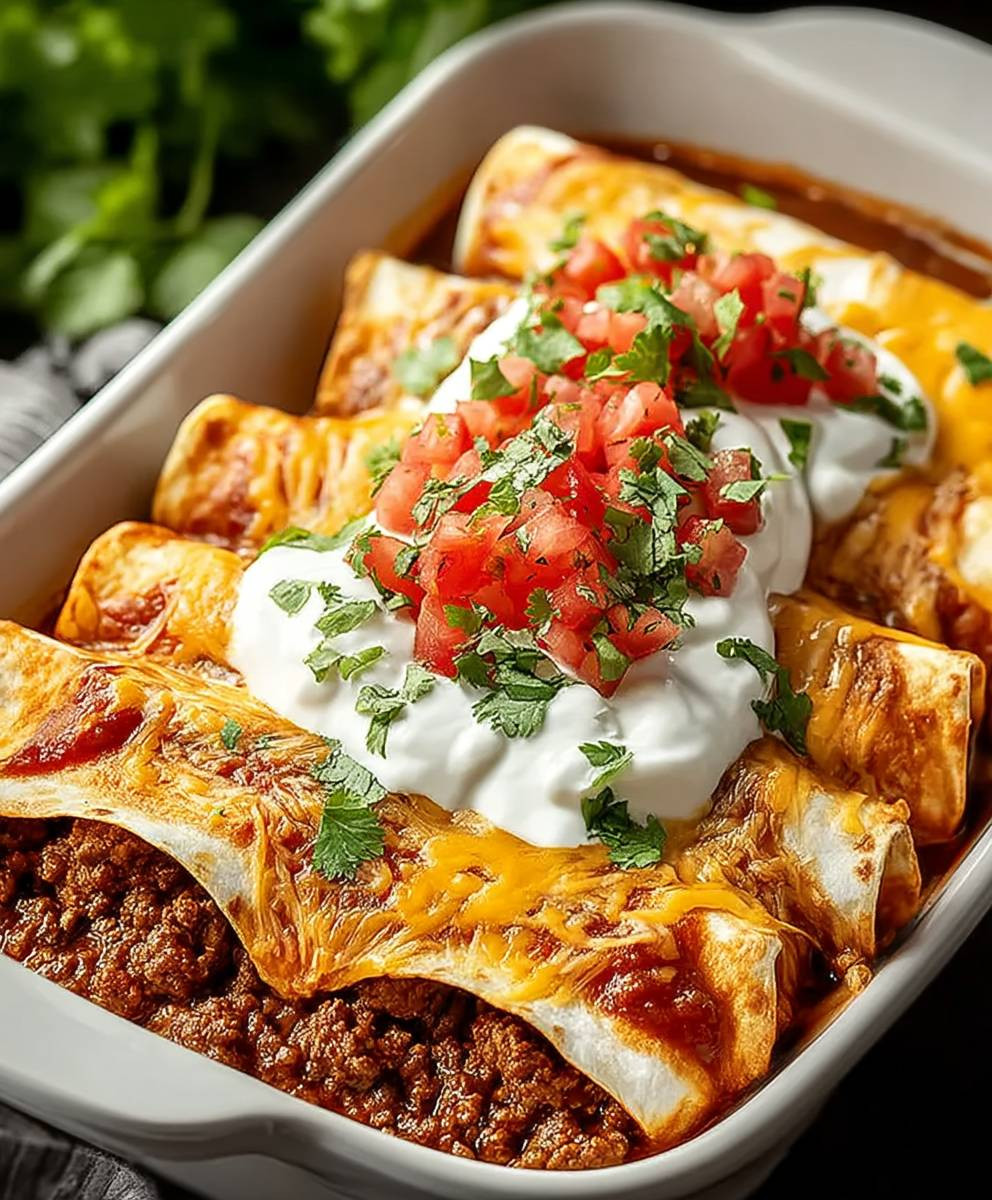
- Add Toppings: Garnish with your favorite toppings, such as chopped cilantro, diced tomatoes, sour cream, and guacamole. These toppings add freshness, flavor, and texture to the enchiladas.
- Enjoy!: Dig in and enjoy! These enchiladas are best enjoyed with a side of rice and beans, or a simple salad.
Tips and Variations
Here are a few tips and variations to help you customize this recipe to your liking:
- Spice Level: Adjust the amount of taco seasoning and diced tomatoes and green chilies to control the spice level.
- Meat Options: You can substitute ground turkey or shredded chicken for the ground beef.
- Vegetarian Option: For a vegetarian option, use black beans, corn, and other vegetables in place of the ground beef.
- Cheese: Use your favorite type of cheese, such as Monterey Jack, Colby Jack, or a Mexican cheese blend.
- Make Ahead: You can assemble the enchiladas ahead of time and store them in the refrigerator for up to 24 hours before baking. Just add a few extra minutes to the baking time.
- Freezing: These enchiladas freeze well. Assemble them, but don’t bake them. Wrap them tightly in plastic wrap and then in foil. Freeze for up to 3 months. When ready to bake, thaw them overnight in the refrigerator and then bake as directed.
Enjoy your homemade enchiladas!
Conclusion:
And there you have it! These Ground Beef Enchiladas are truly a must-try for anyone craving a comforting, flavorful, and satisfying meal. I know, I know, there are a million enchilada recipes out there, but trust me on this one. The combination of the perfectly seasoned ground beef, the rich and tangy sauce, and the melty cheese all wrapped in warm tortillas is simply irresistible. It’s the kind of dish that brings everyone to the table with smiles on their faces, and that’s what cooking is all about, right?
But what really sets these enchiladas apart is their versatility. While the recipe as written is absolutely delicious, feel free to get creative and make it your own! Looking for a vegetarian option? Swap out the ground beef for black beans, lentils, or even crumbled tofu. Want to kick up the heat? Add a pinch of cayenne pepper to the beef mixture or use a spicier enchilada sauce. You can also experiment with different cheeses – Monterey Jack, pepper jack, or even a blend of Mexican cheeses would all be fantastic.
Serving suggestions? Oh, the possibilities are endless! I personally love to serve these enchiladas with a dollop of sour cream or Greek yogurt, a sprinkle of fresh cilantro, and a side of guacamole. A simple green salad or some Mexican rice and beans would also be perfect accompaniments. For a truly festive meal, consider adding some pickled onions or jalapeños for a bit of extra zing. And don’t forget the margaritas!
These Ground Beef Enchiladas are also fantastic for meal prepping. You can easily assemble them ahead of time and bake them just before serving. They also reheat beautifully, making them a great option for leftovers. In fact, I often make a double batch just so I can enjoy them for lunch the next day!
Why are these enchiladas a must-try? Because they are easy to make, incredibly flavorful, and endlessly customizable. They are perfect for a weeknight dinner, a casual gathering with friends, or even a potluck. Plus, they are guaranteed to be a crowd-pleaser!
I’ve poured my heart into perfecting this recipe, and I truly believe you’ll love it as much as I do. So, what are you waiting for? Gather your ingredients, preheat your oven, and get ready to experience enchilada perfection.
I’m so excited for you to try this recipe! Once you’ve made these Ground Beef Enchiladas, I would absolutely love to hear about your experience. Did you make any modifications? What did you serve them with? What did your family and friends think? Share your photos and stories in the comments below! Your feedback is invaluable, and it helps me to continue creating recipes that you’ll love. Happy cooking!
Ground Beef Enchiladas: The Ultimate Recipe for a Delicious Dinner
Cheesy ground beef enchiladas smothered in a creamy tomato sauce. A family favorite perfect for weeknights or potlucks!
Ingredients
Instructions
Recipe Notes
- Spice Level: Adjust taco seasoning and Rotel to control the heat.
- Meat Options: Substitute ground turkey or shredded chicken for ground beef.
- Vegetarian Option: Use black beans, corn, and other vegetables instead of ground beef.
- Cheese: Use your favorite cheese (Monterey Jack, Colby Jack, Mexican blend).
- Make Ahead: Assemble enchiladas and store in the refrigerator for up to 24 hours before baking. Add a few extra minutes to the baking time.
- Freezing: Assemble enchiladas (don’t bake). Wrap tightly in plastic wrap and foil. Freeze for up to 3 months. Thaw overnight in the refrigerator before baking.


Leave a Comment