
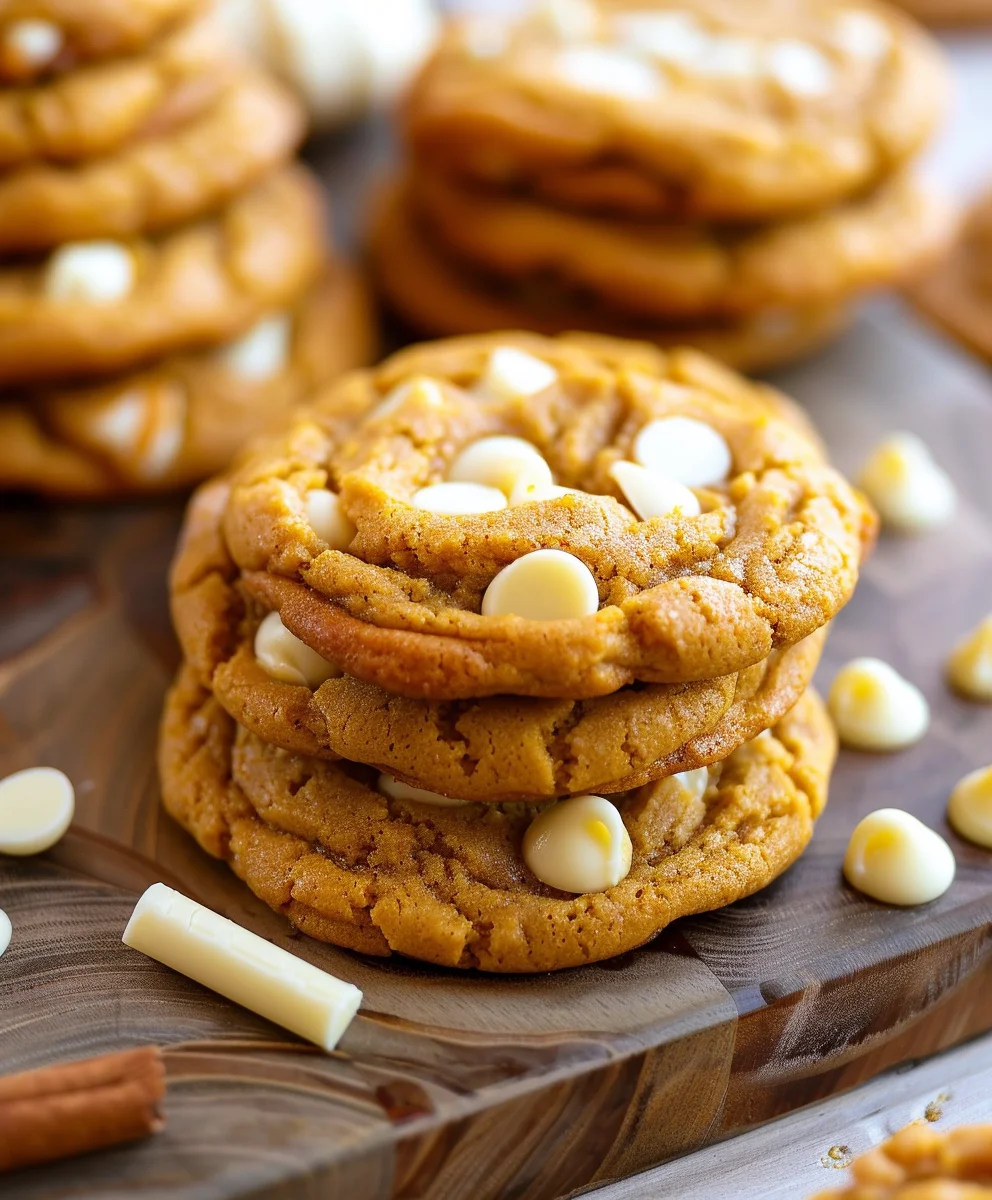
Pumpkin White Chocolate Chip Cookies
More than just a seasonal treat, these cookies are a warm embrace on a crisp autumn day, promising comfort and joy in every single bite. Imagine a cookie that perfectly captures the essence of fall – the earthy sweetness of pumpkin puree beautifully complemented by the creamy, delicate notes of melted white chocolate chips. This delightful combination isn’t just a fleeting trend; it has gracefully become a cherished staple in kitchens across the globe as soon as the leaves begin to turn golden, signaling the arrival of cozy pumpkin season.
I find that what truly makes these particular cookies so utterly irresistible is their wonderfully soft, chewy texture, bursting with that unmistakable pumpkin spice aroma. They offer a delightful contrast of flavors and sensations that make them an instant favorite for all ages. Historically, pumpkin desserts have been a cornerstone of autumn celebrations, especially around Thanksgiving, symbolizing the harvest season’s bounty. By adding the sophisticated sweetness of white chocolate, we elevate a traditional favorite into something truly extraordinary. Whether you’re looking for an easy-to-make dessert for a bustling gathering or simply a cozy, indulgent treat for yourself, these Pumpkin White Chocolate Chip Cookies deliver an unparalleled experience, blending simplicity with sophisticated taste.
Ingredients:
- 2 ½ cups (300g) all-purpose flour: I always make sure to spoon and level my flour for the most accurate measurement. This is crucial for the perfect cookie texture.
- 2 teaspoons pumpkin pie spice: This blend typically includes cinnamon, ginger, nutmeg, and cloves, giving our cookies that warm, autumnal flavor we all adore.
- 1 teaspoon ground cinnamon: Because, let’s be honest, you can never have too much cinnamon in a pumpkin cookie! It really enhances the spice profile.
- 1 teaspoon baking soda: This helps our cookies rise and achieve that wonderful soft chewiness.
- ½ teaspoon baking powder: Working in tandem with baking soda, it gives an extra lift and contributes to a light, airy crumb.
- ½ teaspoon salt: A touch of salt is essential to balance the sweetness and bring out all the other incredible flavors in our cookies. Don’t skip it!
- 1 cup (2 sticks or 226g) unsalted butter, softened to room temperature: Room temperature butter is key for proper creaming with the sugars, creating air pockets for a fluffy dough.
- 1 cup (200g) granulated sugar: Provides sweetness and helps with the spread and texture.
- ½ cup (100g) packed light brown sugar: Adds a deeper, molasses-rich sweetness and contributes to a chewier, moister cookie.
- 1 large egg: Acts as a binder and adds richness to the dough. Make sure it’s also at room temperature.
- 1 teaspoon pure vanilla extract: Enhances all the other flavors and adds a beautiful aromatic note.
- ½ cup (120g) canned pumpkin puree: Please, make sure this is pumpkin puree and not pumpkin pie filling. The pie filling contains added sugars and spices that will throw off our recipe. We want pure pumpkin goodness!
- 1 ½ cups (255g) white chocolate chips: These creamy, sweet morsels melt beautifully and provide a delightful contrast to the spiced pumpkin dough. You can use standard or even white chocolate chunks if you prefer a bigger burst of flavor.
Equipment You’ll Need:
Having the right tools can make all the difference in your baking experience. Here’s what I recommend you have on hand for these delightful pumpkin white chocolate chip cookies:
- Stand mixer with paddle attachment or a large mixing bowl with an electric hand mixer: This will be your best friend for creaming butter and sugar, ensuring a smooth, well-combined dough. While you can do it by hand, a mixer makes the process much easier and more efficient.
- Several large mixing bowls: You’ll need one for your wet ingredients and one for whisking your dry ingredients separately.
- Measuring cups and spoons: Accuracy is important in baking, so make sure your measurements are precise.
- Rubber spatula: Essential for scraping down the sides of your bowl and folding in those glorious white chocolate chips without overmixing.
- Baking sheets: I usually use two to three standard baking sheets so I can rotate them and keep the baking process continuous.
- Parchment paper or silicone baking mats: These are lifesavers for preventing sticking and ensuring even baking, plus they make cleanup a breeze!
- Wire cooling rack: Crucial for allowing your cookies to cool properly, preventing them from becoming soggy on the bottom.
- Cookie scoop (1.5-2 tablespoon size): While optional, a cookie scoop helps create uniform cookies that bake evenly and look professionally made. It also makes portioning the dough incredibly quick and mess-free.
Preparing the Cookie Dough:
-
Whisk Together Dry Ingredients: In a medium-sized mixing bowl, combine your all-purpose flour, pumpkin pie spice, ground cinnamon, baking soda, baking powder, and salt. Use a whisk to thoroughly blend these ingredients together. This step is important because it ensures that the leavening agents and spices are evenly distributed throughout the flour, so every bite of your cookie will have that perfect balance of flavor and rise. Set this bowl aside for a moment.
Pro Tip: Whisking well now prevents clumpy spice pockets or unevenly risen cookies later! -
Cream Butter and Sugars: In the bowl of your stand mixer (or a large mixing bowl if using a hand mixer), add your softened unsalted butter, granulated sugar, and light brown sugar. Beat these ingredients together on medium speed for about 3-5 minutes, until the mixture is light, fluffy, and noticeably paler in color. During this process, tiny air pockets are incorporated into the butter and sugar, which is what gives our cookies their wonderful texture and helps them spread beautifully in the oven. Remember to stop the mixer occasionally and scrape down the sides of the bowl with your rubber spatula to ensure everything is fully combined.
This creaming step is fundamental for light and airy cookies; don’t rush it! - Add Wet Ingredients: Once your butter and sugars are perfectly creamed, crack in the large egg, add the vanilla extract, and then the star of the show, the canned pumpkin puree. Continue to beat on medium-low speed until all these wet ingredients are fully incorporated. The mixture might look a little curdled or separated at first because of the pumpkin’s moisture, but keep mixing until it comes together into a smooth, homogeneous blend. Scrape down the sides of the bowl again to make sure everything is happy and combined.
- Combine Wet and Dry: Now it’s time to bring in our dry ingredients. With your mixer on the lowest speed, gradually add the dry ingredient mixture to the wet mixture, about a third at a time. Mix only until just combined. As soon as you no longer see streaks of dry flour, stop mixing. Overmixing the flour at this stage can develop the gluten too much, leading to tough, dense cookies instead of the soft, chewy ones we’re aiming for. A few lumps of flour are fine; they’ll disappear during the next step.
- Fold in White Chocolate Chips: Remove the bowl from the mixer and grab your rubber spatula. Gently fold in the white chocolate chips until they are evenly distributed throughout the dough. The spatula helps you mix without overworking the dough, ensuring those lovely chunks of chocolate are nestled throughout without compromising the cookie’s tenderness. I love how the creamy white chocolate contrasts with the spiced pumpkin base!
- A Note on Dough Consistency: At this point, your dough should be soft, a little sticky, and wonderfully fragrant. It might seem a bit softer than a typical chocolate chip cookie dough due to the pumpkin puree, but that’s perfectly normal for these delightful autumnal treats.
Chilling for Perfect Texture (Optional, but Highly Recommended):
While you can bake these cookies immediately, I genuinely believe that chilling the dough makes a significant difference. It’s a step I rarely skip for a few good reasons:
- Why Chilling is Your Friend: Chilling the dough allows the butter to firm up, which helps prevent the cookies from spreading too much in the oven, resulting in a thicker, chewier cookie. More importantly, it gives the flour time to fully hydrate, intensifying the flavors and leading to a more tender and cohesive texture. Think of it as letting the ingredients get to know each other better, deepening the overall taste profile.
- How to Chill: Cover the bowl of dough tightly with plastic wrap. Place it in the refrigerator for at least 30 minutes, or up to 2 hours. If you’re short on time, even 15-20 minutes can make a positive impact. If you chill it for longer than 2 hours, you might need to let it sit at room temperature for 10-15 minutes before scooping to make it more pliable. This small act of patience is truly rewarded with superior cookies!
Baking Your Delicious Cookies:
Now for the exciting part – watching your kitchen fill with the most incredible aromas as these cookies bake to golden perfection!
- Preheat Your Oven: While your dough is chilling (or if you’re skipping the chill, right before you start scooping), preheat your oven to 375°F (190°C). It’s crucial to have your oven at the correct temperature before you put the cookies in, as this affects their spread and rise.
- Prepare Baking Sheets: Line two to three large baking sheets with parchment paper or silicone baking mats. This not only prevents sticking but also ensures even baking and makes cleanup a breeze.
-
Scoop the Dough: Using a 1.5-2 tablespoon cookie scoop (or just two spoons), scoop rounded balls of dough onto the prepared baking sheets. Make sure to leave about 2 inches of space between each cookie, as they will spread a bit during baking. I usually fit about 9-12 cookies per standard baking sheet, depending on their size.
For an extra touch of deliciousness, you can sprinkle a tiny bit of granulated sugar or cinnamon sugar on top of each dough ball before baking. This adds a lovely sparkle and a hint of extra sweetness! -
Bake Until Golden: Place one baking sheet at a time into your preheated oven. Bake for 10-14 minutes, or until the edges are lightly golden brown and the centers are just set but still look a tiny bit soft. The exact baking time can vary depending on your oven and the size of your cookies, so keep a close eye on them, especially during the last few minutes. They will continue to set up as they cool.
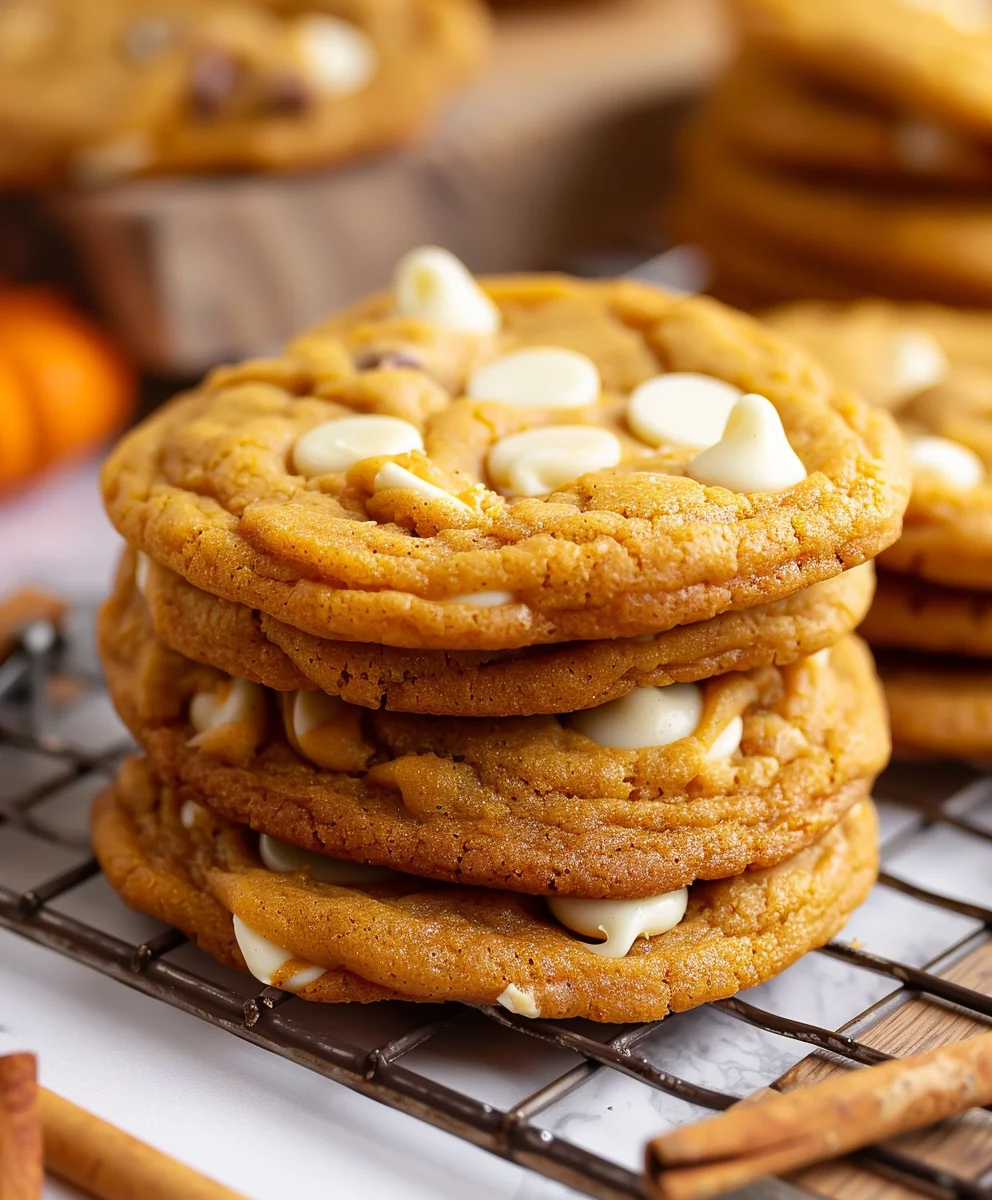
Avoid overbaking, as this can lead to dry, crumbly cookies. We want them soft and tender! - Cool on Baking Sheet: Once baked, remove the baking sheets from the oven and let the cookies cool on the baking sheet for 5-10 minutes. This initial cooling period on the warm tray allows the cookies to continue cooking slightly, firm up, and prevent them from breaking when you transfer them.
- Transfer to Wire Rack: After their brief rest on the baking sheet, carefully transfer the cookies to a wire cooling rack to cool completely. Cooling on a wire rack ensures air circulation all around the cookies, preventing them from becoming soggy on the bottom and allowing them to achieve that perfect chewy-soft texture. If you can resist, let them cool down completely before diving in, as their flavors deepen and texture improves as they settle.
Tips for Success and Variations:
Achieving bakery-quality pumpkin white chocolate chip cookies is within your reach! Here are some extra tips and ideas to ensure your baking experience is a resounding success, and to inspire you to customize your batch.
- Room Temperature Ingredients are Key: This isn’t just a suggestion; it’s a golden rule for many baking recipes, especially cookies. Room temperature butter creams smoothly with sugar, incorporating air that results in a lighter texture. A cold egg might seize up the butter mixture, making it lumpy. Planning ahead by taking your butter and egg out of the fridge an hour or two before baking truly makes a difference in the final product’s texture and consistency.
- Measure Flour Correctly: The “spoon and level” method is your best friend here. Instead of scooping directly from the bag (which compacts the flour, leading to too much being used), spoon the flour into your measuring cup until it overflows, then level it off with the back of a knife. Too much flour will result in dry, dense, and crumbly cookies, while too little can make them spread too much.
- Don’t Overmix the Dough: I cannot stress this enough! Once you add the dry ingredients to the wet, mix only until just combined. Overmixing develops the gluten in the flour, which leads to tough, chewy (not in a good way!), and less tender cookies. A few streaks of flour are perfectly acceptable and will disappear during the final folds or baking. Your spatula is your best tool for folding in the chocolate chips gently.
- Customize Your Spices: While my recipe uses pumpkin pie spice and extra cinnamon, feel free to adjust to your personal preference. Love ginger? Add another ¼ teaspoon! Want a hint of cardamom? A tiny pinch would be delightful. You can also add a small amount of freshly grated nutmeg for an even more aromatic cookie. The beauty of homemade baking is making it your own!
- Consider Other Mix-ins: White chocolate chips are fantastic, but don’t limit yourself! Try adding chopped walnuts or pecans for a textural crunch. A half cup of dried cranberries or chopped dried apricots would add a lovely tart chewiness that complements the pumpkin. You could even swap half of the white chocolate for semi-sweet chocolate chips for a different flavor dynamic. Miniature marshmallows folded in during the last few minutes of baking could also create a wonderfully gooey treat!
- The Power of Salt: That tiny bit of salt in the ingredient list isn’t just for flavor; it’s a flavor enhancer. It balances the sweetness of the sugars and the rich depth of the pumpkin and spices. Don’t omit it, or your cookies might taste a bit flat. For those who love a sophisticated touch, a sprinkle of flaky sea salt on top of the warm cookies fresh out of the oven can elevate their flavor immensely, offering a delightful sweet and salty contrast.
- Storage: Store these pumpkin white chocolate chip cookies in an airtight container at room temperature for up to 3-4 days to maintain their freshness and soft texture. For longer storage, you can freeze the baked cookies for up to 3 months. Just be sure to thaw them at room temperature before enjoying them again. The dough can also be frozen in individual scoops on a baking sheet, then transferred to a freezer bag. When you’re ready to bake, simply place the frozen dough balls on a lined baking sheet and add a couple of extra minutes to the baking time.
- Don’t Be Afraid to Experiment: Baking should be fun! Once you’ve mastered the basic recipe, feel free to play around with the additions. Perhaps a swirl of cream cheese frosting on top once they’re cool, or a drizzle of melted caramel? These cookies are incredibly versatile and serve as a wonderful base for many creative variations.
Conclusion:
Well, my friends, we’ve reached the sweet end of our journey, and I genuinely hope you’re feeling as excited as I am about trying out this phenomenal recipe. If there’s one dessert that truly encapsulates the cozy, comforting essence of autumn, it’s these delightful pumpkin white chocolate chip cookies. Seriously, they are more than just a treat; they’re an experience, a little hug for your taste buds, and I promise you, they will quickly become a cherished favorite in your baking repertoire. The unique blend of earthy pumpkin spice, the unexpected burst of sweet white chocolate, and that perfectly soft, chewy texture creates a symphony of flavors and sensations that is utterly irresistible. I’ve made countless batches, and each time, they disappear in record time, proving just how universally loved they are. They offer that perfect balance of comfort and indulgence without being overly complicated, making them accessible even for novice bakers who want to impress and bring warmth to their homes.
What truly sets these cookies apart, in my humble opinion, is their versatility and the sheer joy they bring to any occasion. Imagine biting into one of these warm, fragrant beauties straight from the oven – the white chocolate chips still slightly gooey, melting delicately on your tongue, perfectly complemented by the warm, aromatic spices of cinnamon, nutmeg, and a hint of clove. It’s a moment of pure bliss, a taste of seasonal magic! They are absolutely perfect served alongside a steaming mug of coffee, a tall glass of cold milk, or even a spiced chai latte, making for an ideal afternoon pick-me-up or a comforting evening treat. For a truly decadent experience, I highly recommend pairing them with a scoop of premium vanilla bean ice cream; the contrast between the warm, spiced cookie and the cold, creamy ice cream is a match made in dessert heaven, creating a simple yet elegant dessert that feels incredibly special without any extra fuss.
But the fun doesn’t stop there! These pumpkin white chocolate chip cookies are also wonderfully adaptable, allowing you to personalize them to your heart’s content. Feel free to experiment with a delicate sprinkle of flaky sea salt on top before baking for an extra layer of flavor that truly makes the sweetness pop and adds a gourmet touch. If you’re a fan of nuts, a handful of finely chopped pecans or walnuts folded into the dough would add a lovely textural contrast and a rich, nutty undertone that pairs beautifully with the pumpkin. For those who love an extra punch of spice, consider adding a pinch of ground ginger or allspice to the mix alongside the traditional cinnamon and nutmeg. You could even drizzle a simple cream cheese glaze over the cooled cookies for an added touch of elegance and tang – just whisk together some powdered sugar, a little softened cream cheese, and a splash of milk until smooth. Or, if you prefer a different kind of chocolate, milk chocolate or even dark chocolate chips could be substituted for the white chocolate, creating a completely different, but equally delicious, flavor profile. Don’t be afraid to get creative and make this recipe truly your own; it’s designed to be a canvas for your culinary imagination and personal preferences!
My heartfelt plea to you: Don’t just read about these cookies, make them!
I genuinely encourage you to carve out some time in your schedule, gather your ingredients, and immerse yourself in the delightful process of baking these fantastic cookies. The aroma that will fill your kitchen alone is worth the effort, creating an inviting and cozy atmosphere that perfectly embodies the spirit of home baking and the festive fall season. Trust me, the joy of pulling a tray of perfectly golden-brown, aromatic pumpkin white chocolate chip cookies from the oven is an unparalleled reward. And once you’ve had a chance to savor their incredible flavor, please, please share your experience with me and with your friends and family! I absolutely love seeing your culinary creations and hearing about your successes. Did you make any fun substitutions or additions? How did your family and friends react to these seasonal delights? What’s your favorite way to enjoy them, perhaps with a specific beverage or as part of a dessert spread?
Share Your Sweet Success!
Tag me in your photos on social media, leave a comment below this article, or simply tell a friend about how wonderfully these cookies turned out. Your feedback and stories are what truly fuel my passion for sharing these recipes and connecting with fellow food lovers. Let’s spread the joy of homemade baking far and wide, one delicious cookie at a time. I truly believe that food brings people together, fostering warmth, conversation, and cherished moments, and these cookies are the perfect excuse to gather around, share some warmth, and create lasting memories. So go on, preheat that oven, mix up a batch, and prepare to fall head over heels in love with your new go-to fall dessert. Happy baking, everyone! I can’t wait to hear all about it!
Easy & Delicious Pumpkin White Chocolate Chip Cookies
These Pumpkin White Chocolate Chip Cookies are a delightful fall treat, combining the earthy sweetness of pumpkin puree with creamy white chocolate chips for a soft, chewy texture and irresistible pumpkin spice aroma. Perfect for any autumn occasion, they blend simplicity with sophisticated taste.
Ingredients
-
1.5 cups (180g) all-purpose flour, spooned and leveled
-
1/2 tsp cinnamon or pumpkin pie spice
-
1 tsp vanilla extract
-
1/2 tsp baking soda
-
1/2 tsp baking powder
-
1/2 tsp salt
-
1/2 cup (1 stick) unsalted butter, softened
-
1/2 cup granulated sugar
-
1/2 cup packed light brown sugar
-
1 egg yolk
-
6 tbsp pumpkin puree
-
1 cup white chocolate chips
Instructions
-
Step 1
In a medium bowl, whisk together flour, pumpkin pie spice/cinnamon, baking soda, baking powder, and salt. Set aside. -
Step 2
In a stand mixer, cream softened butter, granulated sugar, and brown sugar on medium speed for 3-5 minutes until light and fluffy. -
Step 3
Add egg yolk, vanilla extract, and pumpkin puree; beat until combined. -
Step 4
Gradually add the dry ingredients to the wet mixture on low speed, mixing until just combined. Do not overmix. -
Step 5
Fold in the white chocolate chips with a spatula. -
Step 6
Cover and chill dough in the refrigerator for at least 30 minutes, or up to 2 hours (optional, but recommended). -
Step 7
Preheat oven to 375°F (190°C). Line baking sheets with parchment paper. -
Step 8
Scoop 1.5-2 tablespoon dough balls onto prepared sheets, spacing 2 inches apart. -
Step 9
Bake for 10-14 minutes, until edges are golden and centers are just set. Avoid overbaking. -
Step 10
Let cool on baking sheets for 5-10 minutes, then transfer to a wire rack to cool completely.
Important Information
Nutrition Facts (Per Serving)
It is important to consider this information as approximate and not to use it as definitive health advice.
Allergy Information
Please check ingredients for potential allergens and consult a health professional if in doubt.

Leave a Comment