
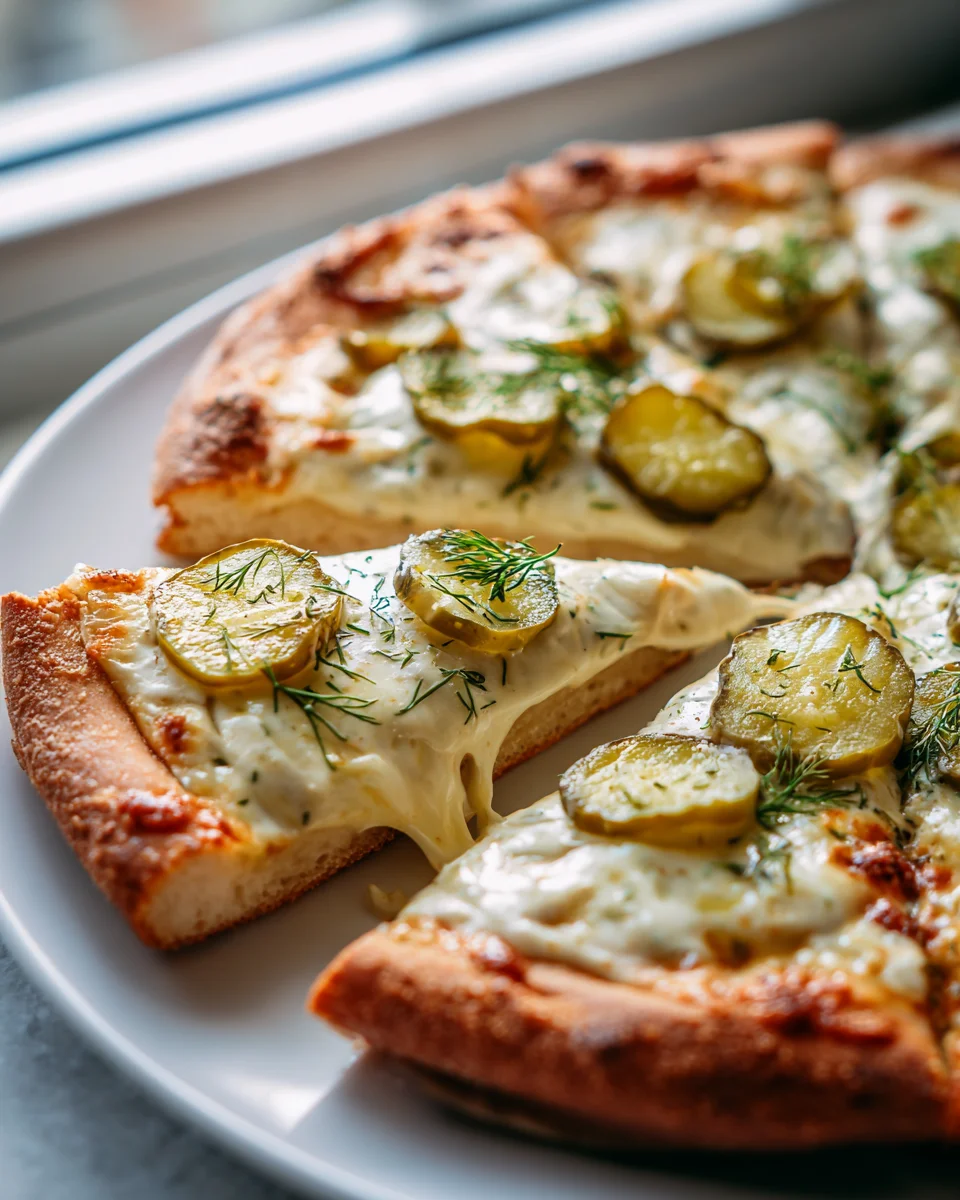
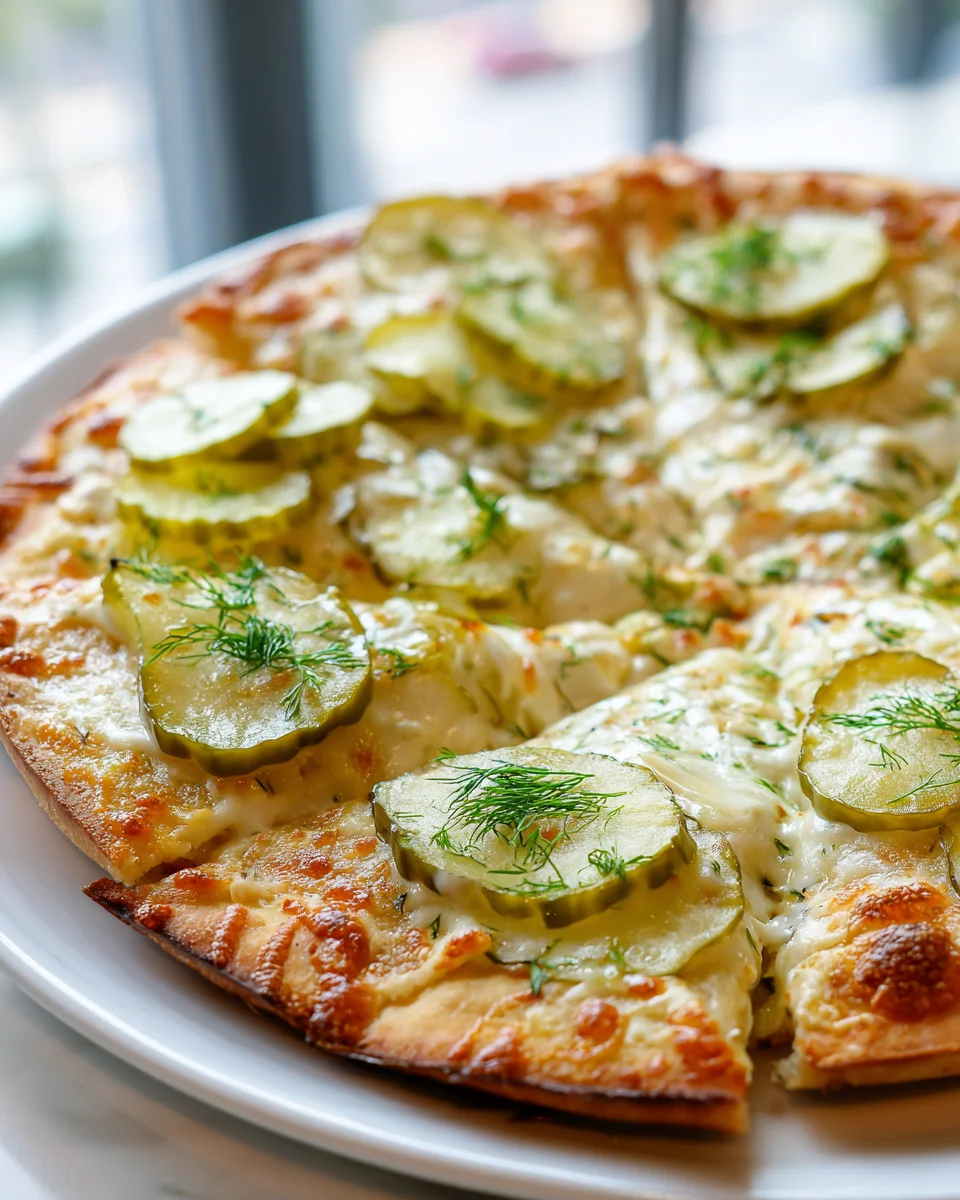
Dill Pickle Pizza Recipe
Dill Pickle Pizza Recipe – I know what you’re thinking: pickles on pizza? Trust me on this one, I wouldn’t lead you astray! This isn’t just any pizza; it’s a culinary adventure that will surprise and delight your taste buds in the most extraordinary way. What makes this recipe truly special is the unexpected harmony of flavors and textures that come together to create something truly unique and utterly delicious.
You’re going to love this recipe because it’s a fun, exciting twist on a classic comfort food that will quickly become a conversation starter at any gathering. It’s perfect for the adventurous eater or anyone who just can’t get enough of that tangy, briny dill pickle goodness. Prepare for a symphony of textures and tastes: a crisp crust provides the perfect foundation for a creamy garlic white sauce, a generous layer of gooey melted mozzarella, and those iconic, wonderfully briny slices of dill pickle adding their signature zing and satisfying crunch. It’s truly addictively delicious, and I can’t wait for you to try it!
Ingredient Notes
Diving into the world of Dill Pickle Pizza requires a few key players to create that uniquely tangy and savory experience we all crave. I find that starting with quality ingredients truly makes all the difference, transforming a quirky idea into a genuine culinary delight. Here’s what I typically reach for:
Pizza Dough
- My Pick: I often opt for a good quality store-bought pizza dough to save time, especially on weeknights. Look for fresh dough in the refrigerated section of your grocery store. It yields a wonderfully chewy yet crisp crust.
- Substitution/Alternative: If you’re feeling ambitious, homemade pizza dough is fantastic – you control the texture and flavor. For those with dietary restrictions, a gluten-free pizza crust works perfectly well. Just be sure to follow the package instructions for baking times, as they can vary.
The Sauce Base
- My Pick: A creamy, tangy base is essential for a dill pickle pizza. My absolute go-to is a good quality ranch dressing. Its herby, creamy profile complements the pickles beautifully. Sometimes, I’ll whisk in a little extra dried dill and a touch of garlic powder to really boost that savory flavor.
- Substitution/Alternative: If ranch isn’t your style, a simple cream cheese spread (softened and spread thinly) or a garlic aioli can also serve as an excellent base. For a dairy-free option, use a vegan ranch dressing or a plant-based cream cheese alternative. You could even get creative with a dill-infused olive oil base for a lighter touch, though I prefer the creaminess.
The Cheese
- My Pick: A classic low-moisture mozzarella is my standard choice. It melts beautifully and provides that familiar pizza stretch without overpowering the star ingredient. I usually shred it myself from a block for better melting.
- Substitution/Alternative: A blend of mozzarella and provolone adds a nice depth of flavor. For an extra tangy kick, try incorporating a small amount of sharp white cheddar or even a touch of crumbled goat cheese. Dairy-free mozzarella shreds are widely available and work great for a vegan version.
The Pickles (The Star of the Show!)
- My Pick: This recipe demands dill pickles, specifically. I prefer using good quality whole dill pickles that I slice thinly myself, or thick-cut dill pickle chips. The thinner slices ensure an even distribution of flavor and prevent the pizza from becoming too watery.
- Important Note: It’s absolutely crucial to pat your pickle slices very dry with paper towels before placing them on the pizza. This step prevents a soggy crust, which is nobody’s friend!
- Substitution/Alternative: While dill is king here, if you’re feeling adventurous, you could experiment with bread and butter pickles for a sweeter tang, but it would change the overall profile significantly.
Optional Toppings & Garnish
- My Pick: I love adding a sprinkle of crispy cooked beef bacon bits for a salty, smoky crunch. Fresh dill, chopped after the pizza bakes, provides a vibrant burst of fresh flavor and aroma. Thinly sliced red onion adds a pleasant sharpness.
- Substitution/Alternative: Other great additions include a sprinkle of everything bagel seasoning before baking for extra texture and flavor, or a drizzle of hot sauce for those who like a little heat. For a vegetarian option, simply omit the beef bacon.
Step-by-Step Instructions
Making Dill Pickle Pizza is surprisingly straightforward, and the results are incredibly rewarding. Follow these steps, and you’ll be enjoying a slice of this unique creation in no time. I always recommend having all your ingredients prepped and ready before you begin, as pizza-making moves pretty quickly once you start!
Step 1: Preheat Your Oven & Prep Your Workspace
- First things first, let’s get that oven roaring. I preheat my oven to a blistering 450°F (232°C). If you have a pizza stone or steel, place it in the oven while it preheats. This helps create a super crispy crust. If not, a sturdy baking sheet will work just fine.
- While the oven heats, lightly flour a clean work surface or a large piece of parchment paper. I find parchment paper particularly helpful for easy transfer to the oven.
Step 2: Prepare the Dough
- Carefully remove your pizza dough from its packaging. On your floured surface (or parchment), gently stretch and roll the dough into your desired shape and thickness. I usually aim for a rough 12-14 inch circle, but oblong or rectangular shapes are perfectly acceptable too. Try not to make it too thin in the middle to prevent tearing once toppings are added.
- If using parchment paper, transfer the dough and paper to a pizza peel or the back of a baking sheet.
Step 3: Spread the Sauce Base
- Now for the tangy foundation! I evenly spread about 1/2 cup of ranch dressing (or your chosen sauce base) over the dough, leaving about a 1/2-inch border around the edge for the crust. Don’t go too heavy on the sauce, as it can make the pizza soggy.
Step 4: Layer the Cheese
- Next, I sprinkle about half of my shredded mozzarella cheese (roughly 1 cup) evenly over the ranch base. This first layer of cheese helps to ‘glue’ the pickles in place and provides a nice barrier.
Step 5: Arrange the Pickles
- This is where the magic happens! Carefully arrange your thoroughly patted-dry dill pickle slices over the cheese layer. I like to overlap them slightly, ensuring every bite gets a good pickle punch. Be generous, but don’t pile them up too high – remember, we want even baking.
Step 6: Add Optional Toppings & Final Cheese Layer
- If you’re using beef bacon bits or thinly sliced red onion, now is the time to scatter them over the pickles.
- Finally, I sprinkle the remaining mozzarella cheese over the pickles and other toppings. This helps hold everything together and provides that classic bubbly pizza top. If using, a sprinkle of everything bagel seasoning can go on now too.
Step 7: Bake to Perfection
- Carefully transfer your pizza to the preheated oven, either directly onto the pizza stone/steel or onto the hot baking sheet.
- Bake for 12-18 minutes, or until the crust is golden brown and the cheese is melted, bubbly, and slightly browned in spots. Cooking times can vary based on your oven and dough thickness, so keep an eye on it.
Step 8: Garnish, Slice, and Serve!
- Once baked, carefully remove the pizza from the oven. I like to let it cool for 2-3 minutes before slicing. This allows the cheese to set slightly, making for cleaner cuts.
- For that final touch, sprinkle generously with fresh chopped dill. Slice into wedges and serve immediately! Enjoy the unique and incredibly satisfying flavors of your homemade Dill Pickle Pizza.
Tips & Suggestions
Crafting the perfect Dill Pickle Pizza is an art, and over time, I’ve picked up a few tricks that really elevate the experience. These tips are designed to help you avoid common pitfalls and enhance the unique flavors of this beloved, if unconventional, pie.
The Golden Rule: Dry Those Pickles!
- My Top Tip: I cannot stress this enough – thoroughly pat your dill pickle slices dry with paper towels. Pickles contain a lot of moisture, and if you don’t remove it, your pizza crust will turn out soggy and unappealing. I usually lay them out on a few layers of paper towels, then place more on top and press gently. This step takes a few minutes but is absolutely critical for a crispy crust.
Embrace the Brine
- Flavor Booster: Don’t discard that pickle juice! A little drizzle of pickle brine over the baked pizza just before serving can add an incredible punch of tangy flavor and moisture. I’ve also been known to whisk a teaspoon or two of brine into my ranch sauce for an extra dill kick.
Achieving the Perfect Crust
- Heat is Key: For a truly crispy bottom crust, make sure your oven is fully preheated to a high temperature (450°F / 232°C). If you have a pizza stone or steel, preheating it for at least 30-60 minutes before baking is a game-changer. The intense heat from the stone immediately starts crisping the dough.
- Don’t Overload: While it’s tempting to pile on the pickles, resist the urge to overload your pizza. Too many toppings, especially moist ones like pickles, can weigh down the dough and prevent it from crisping properly. A single, even layer is best.
Enhancing the Flavor Profile
- Fresh Dill is a Must: While dried dill might go into your sauce, a generous sprinkle of fresh chopped dill after the pizza comes out of the oven is non-negotiable for me. It adds a vibrant, aromatic freshness that brightens up the entire dish.
- Garlic Lover’s Dream: Consider brushing the crust edge with a little garlic-infused olive oil before baking for an extra savory note. A sprinkle of garlic powder can also be added to your ranch base.
- Everything Bagel Seasoning: For an extra layer of texture and savory goodness, I love sprinkling everything bagel seasoning over the top cheese layer before baking. It complements the dill and pickle flavors beautifully.
Serving Suggestions
- Pair it Up: Dill Pickle Pizza is quite rich and flavorful on its own. I find it pairs wonderfully with a simple, crisp green salad with a light vinaigrette to cut through the richness.
- Customization is King: Don’t be afraid to experiment with other additions like thinly sliced jalapeños for heat, or even a sprinkle of crumbled feta cheese for a salty, tangy contrast. Just remember to keep moisture in mind.
Storage
Dill Pickle Pizza is definitely best enjoyed fresh from the oven, when the crust is at its crispiest and the cheese is perfectly melted and gooey. However, I often find myself with a slice or two leftover, and thankfully, it stores and reheats quite well if you follow a few simple guidelines.
Cooling Before Storage
- Crucial First Step: Before attempting to store any leftover pizza, it’s really important to let it cool down completely to room temperature. Storing warm pizza in an airtight container will create condensation, leading to a soggy crust and a less appealing texture when you go to reheat it. I usually let it sit on a cooling rack for at least 30-60 minutes.
Refrigeration
- Method: Once cooled, I transfer individual slices or larger sections of the pizza to an airtight container. Alternatively, you can wrap slices tightly in aluminum foil or plastic wrap. The goal is to prevent air exposure, which can dry out the crust and toppings.
- Duration: Stored properly in the refrigerator, your Dill Pickle Pizza will remain fresh and delicious for about 3-4 days. Past that, the quality, especially of the pickles and crust, starts to decline.
Reheating for Best Results
- My Preferred Method (Oven/Toaster Oven): For the absolute best reheating experience that brings back some of that coveted crispiness, I always turn to my oven or toaster oven.
- Preheat your oven or toaster oven to 350-375°F (175-190°C).
- Place the cold pizza slices directly on a baking sheet or a piece of aluminum foil.
- Heat for 8-12 minutes, or until the cheese is melted and bubbly and the crust is crisp again.
The key here is gentle, indirect heat that allows the crust to re-crisp without burning the toppings.
- Air Fryer Method: An air fryer is another fantastic option for reheating. I set mine to 350°F (175°C) and cook for 3-5 minutes, checking frequently. This method also works wonders for restoring crispiness.
- Microwave (Least Recommended): While the microwave is quick and convenient, it’s my least favorite method for reheating pizza, especially Dill Pickle Pizza. It tends to make the crust soft and chewy, and the pickles can release more moisture, resulting in a less pleasant texture. If you must use it, a short burst (30-60 seconds) on medium power is usually enough to warm it through, but don’t expect crispness.
Freezing
- Is it Recommended? Freezing Dill Pickle Pizza is possible, but I generally don’t recommend it as the texture can suffer significantly. The moisture content in the pickles can become very icy when frozen and then turn mushy upon thawing, impacting both the texture of the pickles and the crust.
- If You Must: If you absolutely need to freeze it, ensure individual slices are wrapped very tightly in plastic wrap, then again in aluminum foil to prevent freezer burn. It can be stored for up to 1-2 months. Reheat directly from frozen in the oven at a slightly lower temperature (around 325°F / 160°C) for a longer time (15-25 minutes), until heated through.
Final Thoughts
There you have it! My heartfelt conclusion to the truly unique and surprisingly addictive Dill Pickle Pizza Recipe. I know it might sound unconventional at first glance, but trust me when I say, this is one culinary adventure you absolutely won’t regret embarking on. The crisp, briny tang of the dill pickles perfectly cuts through the rich, savory cheese, creating a flavor profile that is both exciting and incredibly satisfying. This Dill Pickle Pizza Recipe is a testament to thinking outside the traditional pizza box, offering a delightful twist that will genuinely surprise and please your palate. Give it a go; I promise it will open your eyes to new possibilities and might just become your new favorite pizza!
Dill Pickle Pizza Recipe: Tangy & Delicious Homemade Slice

This Dill Pickle Pizza is a fun twist on a classic comfort food that will surprise and delight your taste buds. Enjoy a crispy crust topped with creamy garlic white sauce, gooey mozzarella, and tangy dill pickles for a unique culinary adventure.
- Prep Time: 15 mins
- Cook Time: 18 mins
- Total Time: 33 minutes
- Yield: 4 servings 1x
- Category: Dinner
- Method: Baking
- Cuisine: American
Ingredients
- 1 good quality store-bought pizza dough (or homemade)
- 1/2 cup ranch dressing (or alternative sauce base)
- 2 cups shredded low-moisture mozzarella cheese (divided)
- good quality whole dill pickles (sliced thinly or thick-cut chips)
- beef bacon bits (optional)
- thinly sliced red onion (optional)
- fresh dill (for garnish)
- everything bagel seasoning (optional)
- garlic powder (optional)
- olive oil (optional for brushing)
Instructions
- Preheat your oven to 450°F (232°C) and place a pizza stone or steel in the oven if you have one.
- Lightly flour a clean work surface or a large piece of parchment paper.
- Remove the pizza dough from its packaging and stretch it into your desired shape and thickness.
- Transfer the dough to a pizza peel or the back of a baking sheet if using parchment paper.
- Spread about 1/2 cup of ranch dressing evenly over the dough, leaving a 1/2-inch border for the crust.
- Sprinkle about 1 cup of shredded mozzarella cheese evenly over the ranch base.
- Carefully arrange the thoroughly patted-dry dill pickle slices over the cheese layer, overlapping slightly.
- If using, scatter beef bacon bits or thinly sliced red onion over the pickles.
- Sprinkle the remaining mozzarella cheese over the pickles and other toppings.
- Transfer the pizza to the preheated oven and bake for 12-18 minutes until the crust is golden brown and the cheese is melted and bubbly.
- Remove the pizza from the oven and let it cool for 2-3 minutes before slicing.
- Sprinkle with fresh chopped dill, slice into wedges, and serve immediately.
Nutrition
- Serving Size: 1 slice
- Calories: 320
- Sugar: 2 g
- Sodium: 650 mg
- Fat: 18 g
- Saturated Fat: 8 g
- Unsaturated Fat: 8 g
- Trans Fat: 0 g
- Carbohydrates: 30 g
- Fiber: 2 g
- Protein: 12 g
- Cholesterol: 30 mg
Keywords: Pat your dill pickle slices dry before adding them to prevent a soggy crust. Feel free to experiment with toppings and sauces to suit your taste.
Leave a Comment