
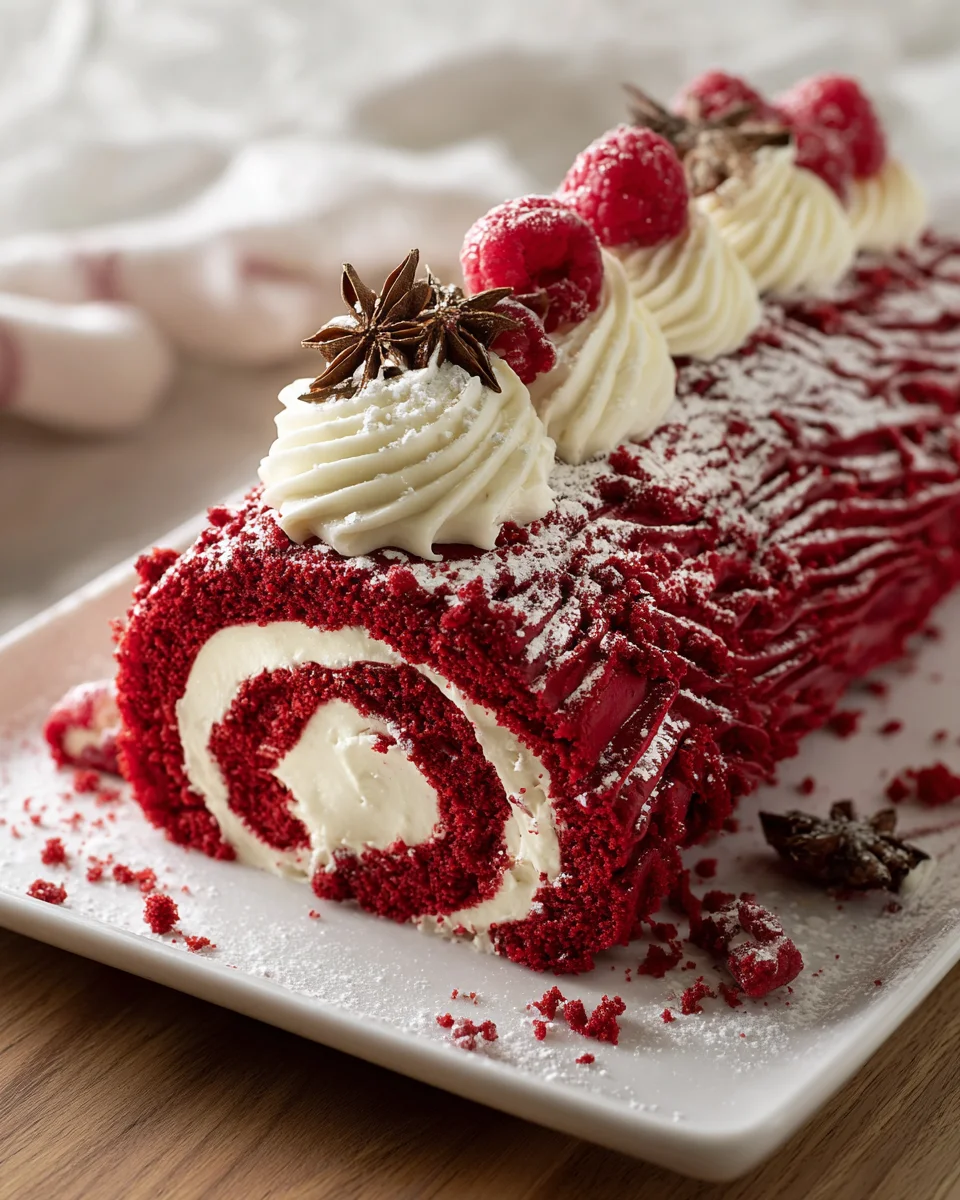
Every holiday season, I find myself reminiscing about the cozy afternoons spent in my grandmother’s kitchen, where the air was thick with the scent of cocoa and baking spices. One particular year, I remember her surprising us with a stunning Red Velvet Yule Log. It was unlike anything I had ever seen—deep crimson swirls enveloped in a velvety cream cheese frosting, resembling a rustic log dusted with powdered sugar snow. As we gathered around the table, the excitement was palpable; the vibrant color and elegant presentation made it a centerpiece, a delicious work of art.
With each slice, the cake revealed its soft, tender crumb, rich cocoa flavor, and that unmistakable hint of tang from the cream cheese. The sweetness was perfectly balanced, making it a delightful treat that felt both festive and indulgent. What makes my version of the Red Velvet Yule Log special is the addition of a hint of espresso powder in the batter, which enhances the chocolate flavor without overpowering the delicate red hue. I also opt for a luscious vanilla bean cream cheese frosting that adds a touch of sophistication and a creamy texture that simply melts in your mouth.
As the holidays approach, this enchanting dessert never fails to bring back the warmth of family gatherings and joyful celebrations. Let me show you exactly how to make this stunning Red Velvet Yule Log, so you can create your own delicious memories this season!
Why You’ll Love This Recipe
- This Red Velvet Yule Log combines the rich, moist texture of a classic red velvet cake with a creamy filling, making each slice a delightful experience.
- It’s surprisingly easy to make, with a total time of just over 5 hours, including chilling, making it accessible even for novice bakers.
- The vibrant red color and the artistic buttercream bark create a stunning visual centerpiece for any holiday table, ensuring it’s a show-stopper.
- With a budget-friendly ingredient list, this festive dessert won’t break the bank while still delivering impressive flavor and presentation.
- Each bite features a perfect balance of sweetness from the honey and a hint of tang from the cream cheese, making it a memorable holiday treat.
Ingredients
- For the sponge:
- 3 medium eggs (165 g)
- 3 medium egg yolks (45 g)
- 3/4 cup (150 g) sugar
- 3 cups (150 g) type 00 flour
- 1 vanilla bean, seeds scraped
- 1 tbsp (10 g) unsweetened cocoa powder
- Red food coloring (liposoluble liquid, gel, or powder), to taste
- For the filling:
- 3 cups (500 g) cream cheese
- 2/3 cup (150 g) heavy cream
- 2 tbsp (50 g) wildflower honey
- For the decoration:
- 1 cup (400 g) cold butter
- 2 tsp (10 g) Sambuca (or vanilla extract as substitute)
- 1 cup (100 g) powdered sugar + extra for sprinkling
- Raspberries, to taste
- Star anise, to taste
Let’s talk about some key ingredients that make this Red Velvet Yule Log truly special. First up is the red food coloring; it’s essential for achieving that signature red hue. I recommend using a high-quality gel or liquid dye for the best color payoff without altering the cake’s texture. If you prefer, natural alternatives like beet juice can also work, but be aware they may alter the flavor slightly.
Next, the cream cheese is a star in the filling, contributing its signature tanginess and creamy texture. When selecting cream cheese, opt for full-fat varieties for a richer flavor. If you’re looking for a lighter option, Neufchâtel cheese can be a suitable substitute, although it may be slightly less creamy. Finally, using a high-quality vanilla bean adds depth to both the cake and frosting; if unavailable, pure vanilla extract can suffice but may not provide the same aromatic experience.
Step-by-Step Instructions
- Preheat the oven: Begin by preheating your oven to 374°F (190°C). This ensures that your cake starts baking evenly right away. While it heats, prepare your baking pan.
- Prepare the baking pan: Line a 12×16 inch baking pan with parchment paper and lightly butter it. This prevents the sponge from sticking and helps it release easily once baked.
- Mix the egg mixture: In a large mixing bowl, whisk together the eggs, egg yolks, sugar, and scraped vanilla seeds until the mixture is pale and frothy, about 5-7 minutes. You’ll know it’s ready when it doubles in volume and forms ribbons when you lift the whisk.
- Add coloring: Gradually mix in red food coloring until you reach your desired shade of red. Start with a small amount and increase as necessary; the color will deepen during baking.
- Sift and fold: Sift the flour and cocoa powder over the egg mixture and gently fold it in using a spatula. Be careful not to deflate the batter; stop folding once no dry ingredients are visible.
- Spread the batter: Pour the batter into the prepared pan, spreading it evenly to the edges. The surface should be smooth; this ensures an even roll later on.
- Bake: Bake in the preheated oven for about 20 minutes. The cake is done when it springs back slightly when touched and the edges begin to pull away from the sides of the pan.
- Cool the sponge: Immediately transfer the baked sponge to a clean sheet of parchment paper. Cover it with plastic wrap to prevent it from drying out, and let it cool completely.
- Prepare the filling: While the sponge cools, beat together the cream cheese, heavy cream, and honey in a mixing bowl until smooth and fluffy, about 3-5 minutes. This filling should be thick yet spreadable.
- Trim and fill: Once the sponge has cooled, trim the edges for a clean finish. Spread the cream cheese filling evenly over the sponge, leaving a small border around the edges.
- Roll the sponge: Using the parchment paper as a guide, carefully roll the sponge away from you, creating a log shape. Tightly wrap it in the parchment and refrigerate for at least 2 hours to set.
- Prepare the decoration: For the buttercream, beat the cold butter with powdered sugar until fluffy, around 5-7 minutes. Then mix in the Sambuca or vanilla extract until fully incorporated.
- Frost the log: Once the log has chilled, remove it from the fridge and cut the ends at an angle to mimic branches. Frost the entire log lightly, then pipe lines on the surface to create a bark texture.
- Decorate: Finish your Yule Log with fresh raspberries and star anise for a festive touch. Dust lightly with powdered sugar just before serving for a snowy effect.
Pro Tips for the Best Red Velvet Yule Log
- Be gentle when folding: One of the most common mistakes is overmixing the batter after adding the dry ingredients. Fold just until incorporated to keep your sponge airy and light.
- Use a flexible spatula: This tool is invaluable for both folding the batter and spreading the filling. It allows for more control and helps maintain the volume of your batter.
- Chill well before slicing: Refrigerating the filled log for at least 2 hours helps it firm up, making it easier to cut cleanly without squishing the cake.
- Experiment with flavors: For a unique twist, consider adding a hint of almond extract to the frosting or using flavored honey in the filling for a new flavor profile.
- Practice your piping: If you’re new to decorating, practice piping the bark texture on a piece of parchment paper first. This will help you get the hang of it before adding it to your log.
Variations & Serving Ideas
If you want to switch things up a bit, consider these variations for your Red Velvet Yule Log. You can create a gluten-free version by substituting type 00 flour with a gluten-free blend. For a seasonal twist, add a touch of peppermint extract to the filling for a minty version perfect for the holidays. You can also experiment with different fillings, like a chocolate ganache or a spiced pumpkin cream for a fall-inspired yule log.
When it comes to serving ideas, this Yule Log pairs beautifully with a side of freshly whipped cream or a scoop of vanilla ice cream to balance its sweetness. A warm cup of spiced chai or a rich hot chocolate also complements the flavors perfectly, enhancing the cozy, holiday vibes.
Storage, Make-Ahead & Reheating
Your Red Velvet Yule Log can be stored in the refrigerator for up to 3 days. To keep it fresh, wrap it tightly in plastic wrap or store it in an airtight container. It also freezes well for up to 2 months; just remember to wrap it tightly in plastic wrap and then in aluminum foil to prevent freezer burn. When you’re ready to enjoy it, thaw in the refrigerator overnight. Interestingly, this dessert often tastes even better the next day as the flavors meld together beautifully!
Frequently Asked Questions
Can I make Red Velvet Yule Log ahead of time?
Yes — in fact, it tastes even better the next day as the flavors have time to meld. You can prepare it a day in advance and store it in the refrigerator, wrapped tightly in plastic wrap.
What can I use as a substitute for Sambuca?
Final Thoughts
The Red Velvet Yule Log is truly a showstopper, combining the rich, velvety texture of red velvet cake with the festive charm of a classic log cake. Its delightful cream cheese filling and striking appearance make it not only a treat for the taste buds but also a centerpiece for any holiday gathering.
This is the kind of recipe I come back to again and again, especially when I want to impress my family and friends with something visually stunning yet simple to make. The joy of slicing into this beautiful dessert, revealing its vibrant color and creamy filling, never fails to bring smiles all around.
I encourage you to give this recipe a try! Experiment with your own twists, whether it’s adding a hint of spice or a sprinkle of festive decorations, and don’t forget to share your delicious results with loved ones!
Delicious Red Velvet Yule Log Recipe for the Holidays

This stunning Red Velvet Yule Log combines rich cocoa flavor with a creamy filling, making it a delightful centerpiece for your holiday gatherings. With its vibrant color and elegant presentation, it’s sure to impress family and friends alike.
- Prep Time: 2 hours
- Cook Time: 20 minutes
- Total Time: 2 hours 20 minutes
- Yield: 12 servings 1x
- Category: Dessert
- Method: Baking
- Cuisine: American
Ingredients
- 3 medium eggs (165 g)
- 3 medium egg yolks (45 g)
- 3/4 cup (150 g) sugar
- 3 cups (150 g) type 00 flour
- 1 vanilla bean, seeds scraped
- 1 tbsp (10 g) unsweetened cocoa powder
- Red food coloring (liposoluble liquid, gel, or powder), to taste
- 3 cups (500 g) cream cheese
- 2/3 cup (150 g) heavy cream
- 2 tbsp (50 g) wildflower honey
- 1 cup (400 g) cold butter
- 2 tsp (10 g) Sambuca (or vanilla extract as substitute)
- 1 cup (100 g) powdered sugar + extra for sprinkling
- Raspberries, to taste
- Star anise, to taste
Instructions
- Preheat the oven: Begin by preheating your oven to 374°F (190°C). This ensures that your cake starts baking evenly right away. While it heats, prepare your baking pan.
- Prepare the baking pan: Line a 12×16 inch baking pan with parchment paper and lightly butter it. This prevents the sponge from sticking and helps it release easily once baked.
- Mix the egg mixture: In a large mixing bowl, whisk together the eggs, egg yolks, sugar, and scraped vanilla seeds until the mixture is pale and frothy, about 5-7 minutes. You’ll know it’s ready when it doubles in volume and forms ribbons when you lift the whisk.
- Add coloring: Gradually mix in red food coloring until you reach your desired shade of red. Start with a small amount and increase as necessary; the color will deepen during baking.
- Sift and fold: Sift the flour and cocoa powder over the egg mixture and gently fold it in using a spatula. Be careful not to deflate the batter; stop folding once no dry ingredients are visible.
- Spread the batter: Pour the batter into the prepared pan, spreading it evenly to the edges. The surface should be smooth; this ensures an even roll later on.
- Bake: Bake in the preheated oven for about 20 minutes. The cake is done when it springs back slightly when touched and the edges begin to pull away from the sides of the pan.
- Cool the sponge: Immediately transfer the baked sponge to a clean sheet of parchment paper. Cover it with plastic wrap to prevent it from drying out, and let it cool completely.
- Prepare the filling: While the sponge cools, beat together the cream cheese, heavy cream, and honey in a mixing bowl until smooth and fluffy, about 3-5 minutes. This filling should be thick yet spreadable.
- Trim and fill: Once the sponge has cooled, trim the edges for a clean finish. Spread the cream cheese filling evenly over the sponge, leaving a small border around the edges.
- Roll the sponge: Using the parchment paper as a guide, carefully roll the sponge away from you, creating a log shape. Tightly wrap it in the parchment and refrigerate for at least 2 hours to set.
- Prepare the decoration: For the buttercream, beat the cold butter with powdered sugar until fluffy, around 5-7 minutes. Then mix in the Sambuca or vanilla extract until fully incorporated.
- Frost the log: Once the log has chilled, remove it from the fridge and cut the ends at an angle to mimic branches. Frost the entire log lightly, then pipe lines on the surface to create a bark texture.
- Decorate: Finish your Yule Log with fresh raspberries and star anise for a festive touch. Dust lightly with powdered sugar just before serving for a snowy effect.
Nutrition
- Serving Size: 1 slice
- Calories: 350
- Sugar: 30 g
- Sodium: 150 mg
- Fat: 20 g
- Saturated Fat: 12 g
- Unsaturated Fat: 8 g
- Trans Fat: 0 g
- Carbohydrates: 40 g
- Fiber: 2 g
- Protein: 5 g
- Cholesterol: 100 mg
Keywords: Be gentle when folding the batter to keep your sponge airy and light. You can substitute Sambuca with vanilla extract if needed.
Leave a Comment