
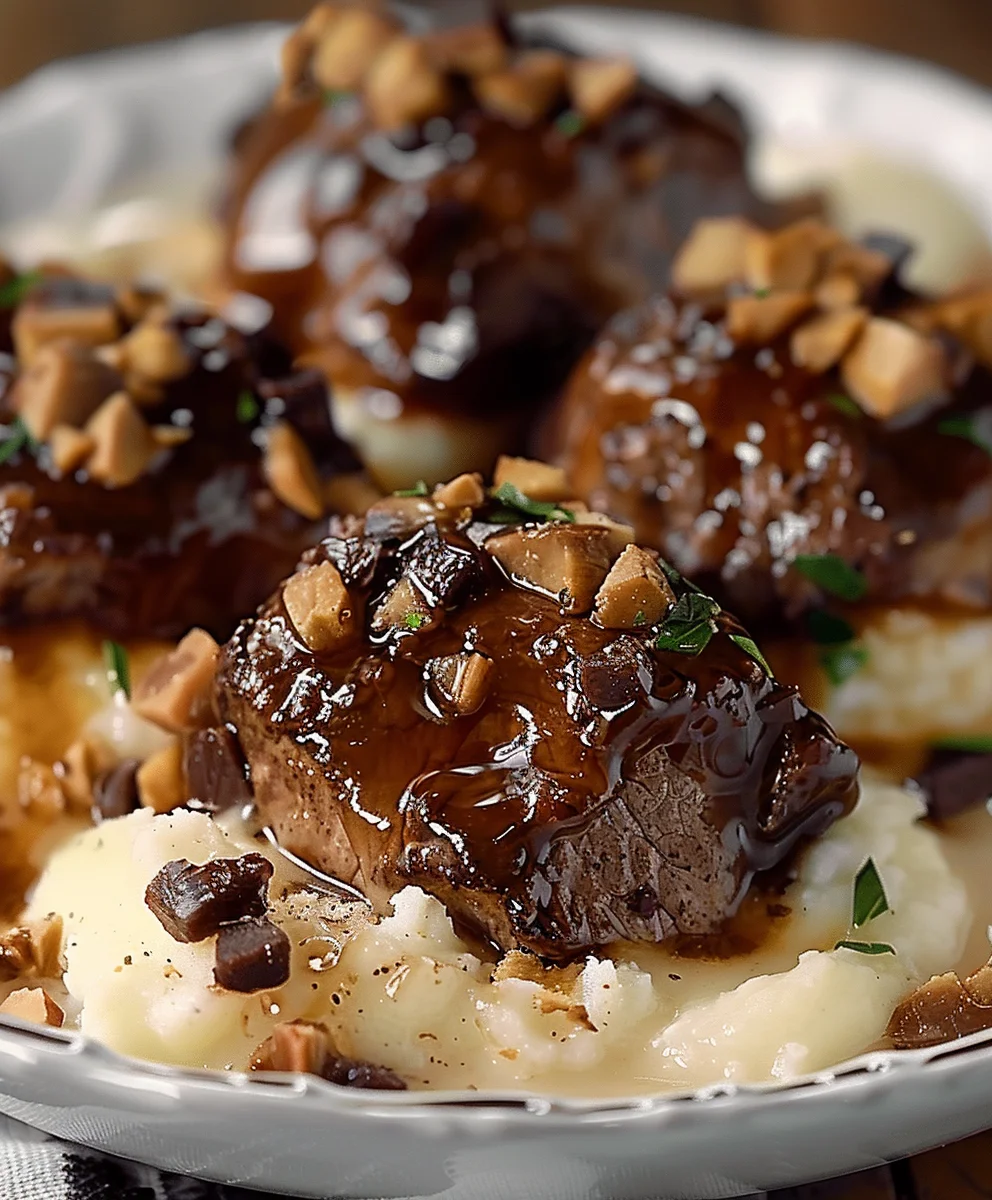
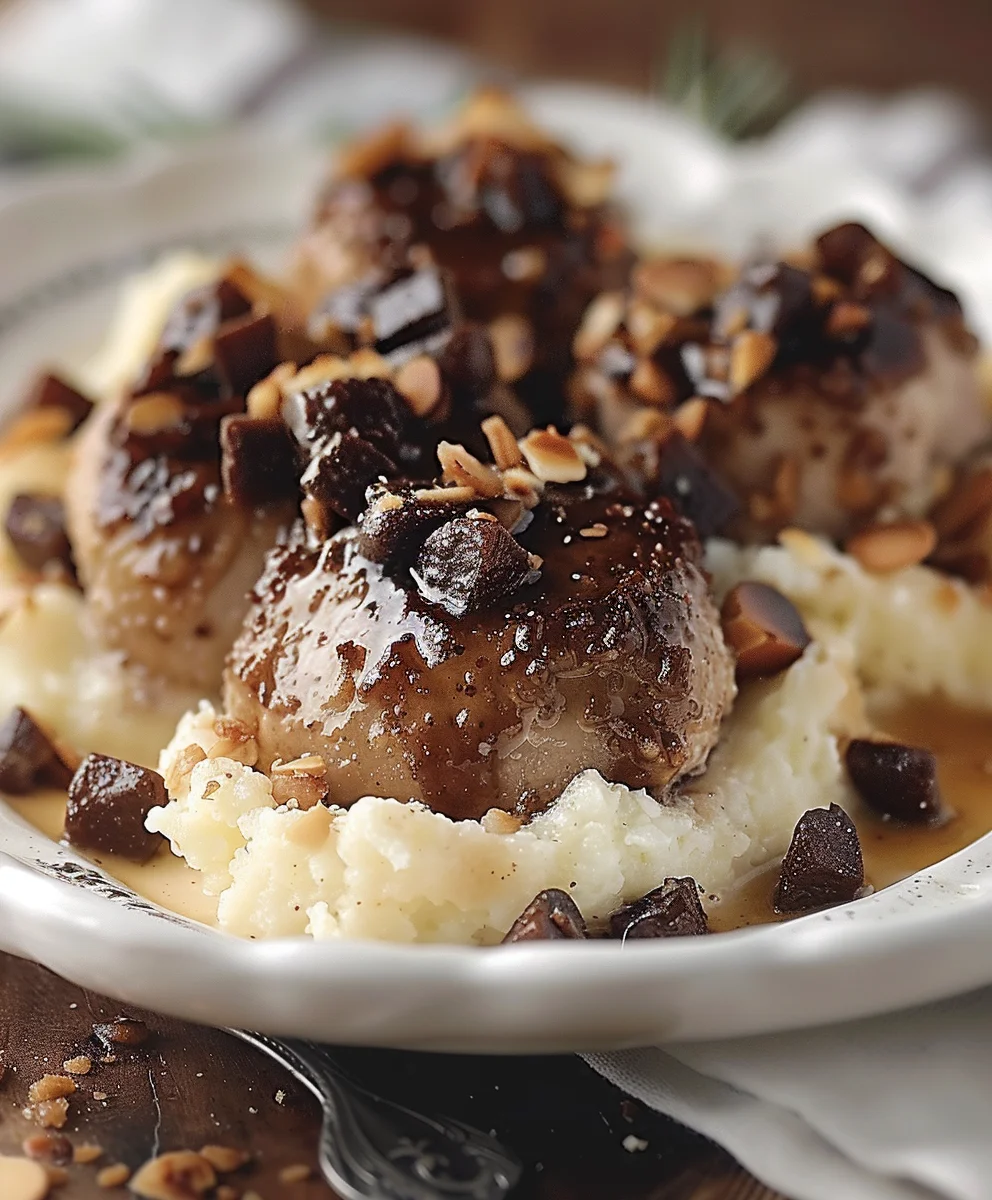
Moose Farts! Yes, you read that right, and before you raise an eyebrow, let me assure you, this delightful, bite-sized confection is anything but what its name suggests. Prepare to have your taste buds surprised and your sweet cravings utterly satisfied by a treat so unique, its whimsical moniker only adds to its undeniable charm. I am so excited to share the recipe for these intriguing morsels with you.
I often find that the most memorable recipes are those with the most unusual names, and this one certainly takes the cake – or, should I say, the “fart.” While its exact origins are delightfully shrouded in mystery, tales often whisper of remote Canadian cabins, impromptu dessert creations born from simple pantry staples, and a mischievous sense of humor that led to this perfectly imperfect name for a truly irresistible snack. It’s a testament to how the simplest ingredients can come together to create something truly special, sparking joy and a good laugh with every mention.
So, why do people utterly adore these little morsels? Beyond the chuckle-inducing name, it’s their incredible combination of textures and flavors. Imagine a chewy, sweet interior, often studded with delightful surprises, all wrapped up in a rich, satisfying layer. They’re incredibly easy to make, require no baking, and are perfect for a quick energy boost, a unique party treat, or simply to satisfy that midday sweet tooth. I promise you, one bite of these charming Moose Farts, and you’ll understand why they’ve become such a beloved, talked-about recipe.
Ingredients:
- For the Chocolate Oat Base:
- ½ cup (1 stick or 113g) unsalted butter, cut into pieces
- ½ cup (120ml) milk (any kind works, but whole milk yields a richer base)
- 2 cups (400g) granulated sugar
- ½ cup (45g) good quality unsweetened cocoa powder
- ¼ teaspoon fine sea salt
- 3 cups (270g) quick-cooking rolled oats (not instant, not old-fashioned – quick-cooking provides the best texture for Moose Farts)
- 1 teaspoon pure vanilla extract
- For the Creamy Peanut Butter Filling:
- 1 cup (250g) creamy peanut butter (I find Jif or Skippy work wonderfully for their smooth consistency)
- ½ cup (113g) unsalted butter, softened to room temperature
- 2 cups (240g) powdered sugar (confectioners’ sugar), sifted to remove lumps
- 1 teaspoon pure vanilla extract
- For the Rich Chocolate Coating:
- 2 cups (about 340g) semi-sweet chocolate chips (good quality chips melt smoothly)
- 2 tablespoons (28g) unsalted butter
- 1 teaspoon pure vanilla extract
Preparing the Delectable Chocolate Oat Base for Your Moose Farts
This foundational layer is where the magic truly begins for your homemade Moose Farts. It’s a delightful no-bake cookie base that provides a rich, chewy texture and a deep chocolate flavor that perfectly complements the peanut butter filling. Precision is key here, so let’s walk through it carefully to ensure the perfect consistency and taste.
- Prepare Your Baking Pan: First things first, grab a 9×13 inch baking pan. Line it completely with parchment paper, leaving an overhang on the sides. This overhang acts as a convenient handle later, making it super easy to lift your finished Moose Farts out of the pan. A light spray of cooking oil on the pan before the parchment can help it stick better, ensuring no slippage during assembly.
- Combine Wet Ingredients and Sugar: In a large, heavy-bottomed saucepan, combine the ½ cup of unsalted butter (cut into pieces to help it melt faster and more evenly), the ½ cup of milk, the 2 cups of granulated sugar, the ½ cup of unsweetened cocoa powder, and the ¼ teaspoon of fine sea salt. I always recommend a heavy-bottomed pan as it distributes heat more evenly and helps prevent scorching, which is crucial for this recipe.
- Bring to a Rolling Boil: Place the saucepan over medium heat. Stir the mixture constantly with a wooden spoon or heat-proof spatula. You’ll want to continue stirring until the butter is fully melted, the sugar is dissolved, and the mixture comes to a full, rolling boil. What do I mean by “rolling boil”? It’s when the mixture is bubbling vigorously all over the surface and these bubbles cannot be stirred down. This stage is vital for the proper setting of your Moose Farts. Once it reaches this point, set a timer for precisely one minute.
- Boil for One Minute: Allow the mixture to boil for exactly one minute, continuing to stir constantly. This boiling time is critical for the consistency of the final product. Boiling for too short a time might result in Moose Farts that don’t set properly, and boiling for too long can make them dry and crumbly.
- Remove from Heat and Incorporate Oats & Vanilla: As soon as the minute is up, remove the saucepan from the heat immediately. Stir in the 3 cups of quick-cooking rolled oats and the 1 teaspoon of pure vanilla extract. Mix vigorously until everything is thoroughly combined and the oats are completely coated in the rich chocolate mixture. The aroma filling your kitchen right now is simply divine!
- Spread the Base Layer: Quickly, before the mixture sets too much, transfer the entire chocolate oat mixture into your prepared 9×13 inch baking pan. Using a spatula or the back of a spoon, spread it evenly across the bottom of the pan, pressing it down firmly. You want a compact, uniform layer. This forms the delightful base of your Moose Farts. Set this aside to cool slightly while you prepare the next layer.
Crafting the Velvety Peanut Butter Filling
This is the luscious heart of our Moose Farts, providing that irresistible sweet and salty counterpoint to the chocolate. This layer needs to be smooth, creamy, and utterly delightful. Achieving the right texture here is straightforward but requires a bit of attention.
- Soften the Butter: Ensure your ½ cup of unsalted butter is genuinely softened to room temperature. This isn’t just a suggestion; it’s important for achieving a smooth, lump-free filling. If it’s too cold, it won’t cream properly with the peanut butter and powdered sugar. You should be able to press a finger into it easily.
- Combine Peanut Butter and Butter: In a large mixing bowl, combine the 1 cup of creamy peanut butter with the softened ½ cup of unsalted butter. Using an electric mixer (either hand-held or stand mixer with a paddle attachment) on medium speed, beat these two ingredients together until they are light, fluffy, and well combined. This usually takes about 2-3 minutes. Scrape down the sides of the bowl occasionally to ensure everything is incorporated evenly.
- Add Powdered Sugar and Vanilla: Gradually add the 2 cups of sifted powdered sugar to the peanut butter mixture. I always recommend sifting powdered sugar because it helps eliminate any stubborn lumps, guaranteeing a silky-smooth filling. Start on low speed to avoid a “sugar cloud” in your kitchen, then increase to medium once the sugar starts to incorporate. Continue beating until the mixture is smooth and creamy. Finally, beat in the 1 teaspoon of pure vanilla extract until just combined. The mixture should be thick yet spreadable.
- Spread Over Chocolate Base: Carefully spoon the peanut butter filling over the cooled (but not necessarily cold) chocolate oat base in your baking pan. Use an offset spatula or the back of a spoon to gently spread the peanut butter layer evenly from edge to edge. Take your time to ensure it’s smooth and uniform, as this layer provides a beautiful contrast and delightful texture to your Moose Farts. Once evenly spread, place the pan in the refrigerator for at least 30 minutes. This chilling time helps the peanut butter layer firm up, making it easier to handle when you add the final chocolate coating.
Creating the Glossy Chocolate Coating
The grand finale for our Moose Farts is this decadent, glossy chocolate coating. It adds another layer of rich chocolate flavor and seals in all that wonderful peanut butter goodness. This step requires a gentle touch to ensure a smooth, professional finish.
- Prepare for Melting: In a microwave-safe bowl, combine the 2 cups of semi-sweet chocolate chips and the 2 tablespoons of unsalted butter. Using good quality chocolate chips is a game-changer here, as they melt more smoothly and provide a superior flavor compared to lower-quality alternatives.
- Melt the Chocolate: Heat the chocolate and butter in the microwave in 30-second intervals, stirring thoroughly after each interval. It’s crucial not to overheat the chocolate, as this can cause it to seize and become grainy. Continue heating and stirring until the mixture is completely smooth and glossy. Alternatively, you can melt the chocolate and butter using a double boiler method for a more controlled melting process. Once melted, stir in the 1 teaspoon of pure vanilla extract until well combined. The mixture should be beautifully liquid and pourable.
- Pour Over Peanut Butter Layer: Retrieve your pan from the refrigerator. Pour the melted chocolate coating evenly over the chilled peanut butter layer. Gently tilt the pan or use an offset spatula to spread the chocolate from edge to edge, ensuring the entire peanut butter layer is covered. Aim for a smooth, even surface. This is the top layer of your incredible Moose Farts!
Assembly, Setting, and Slicing Your Perfect Moose Farts
We’re in the home stretch now! This final phase ensures that your Moose Farts set up beautifully, making them easy to slice and even easier to enjoy. Patience during the chilling process is key to preventing a messy situation and ensuring clean, appealing squares.
- Chill for Setting: Once the chocolate coating is evenly spread, carefully place the baking pan back into the refrigerator. Allow the Moose Farts to chill for at least 2-3 hours, or preferably until the chocolate coating is completely firm. For best results and the easiest slicing, I often leave them in the fridge overnight. Resist the urge to cut them too early! If the layers aren’t fully set, you’ll end up with a sticky, uneven mess, and nobody wants that after all your hard work.
- Prepare for Slicing: Once fully chilled and firm, use the parchment paper overhang to carefully lift the entire slab of Moose Farts out of the baking pan and onto a clean cutting board. This makes the slicing process much simpler and protects the integrity of your delicious creation.
- Slice into Squares: Using a large, sharp knife, cut the Moose Farts into desired square or rectangular pieces. For neat slices, I recommend wiping your knife blade clean with a warm, damp cloth between each cut. This prevents the chocolate from sticking and creates beautifully clean edges. I usually aim for about 24-36 squares, depending on how generous I’m feeling, but you can certainly cut them larger or smaller to suit your preference. Each square is a delightful bite of chocolatey, peanut buttery goodness.
- Serving and Storage: Your amazing “Moose Farts” are now ready to be enjoyed! Serve them at room temperature for the best texture, as the peanut butter filling will be wonderfully soft and creamy. Store any leftovers in an airtight container in the refrigerator for up to one week. If you prefer, they can also be stored in the freezer for up to a month; just be sure to let them thaw for a few minutes before indulging.
Tips for Perfect Moose Farts Every Time
Making Moose Farts is relatively simple, but a few insider tips can elevate your results from good to absolutely outstanding. Pay attention to these details, and you’ll be cranking out perfect batches every time!
- Temperature Matters: Ensure your butter for the peanut butter filling is truly at room temperature. This is vital for a smooth, lump-free filling. If it’s too cold, it won’t combine properly. Similarly, don’t rush the chilling process for any of the layers. Patience yields perfectly set Moose Farts.
- Boiling Time is Critical: For the chocolate oat base, the one-minute rolling boil is not a suggestion; it’s a rule. Too short, and your Moose Farts won’t set. Too long, and they might become dry or crumbly. Set a timer and stick to it!
- Sift Your Powdered Sugar: This simple step makes a huge difference in the texture of your peanut butter filling. Sifting ensures there are no little lumps of sugar that could mar the smoothness.
- Don’t Overheat Chocolate: When melting the chocolate for the topping, heat it gently and slowly. Overheated chocolate can seize, becoming grainy and unusable. Stir frequently and remove it from the heat source as soon as it’s smooth.
- Clean Knife for Clean Cuts: For those picture-perfect squares, wipe your knife with a warm, damp cloth between each slice. This prevents the chocolate from dragging and gives you beautifully crisp edges on your Moose Farts.
- Experiment with Toppings: While classic Moose Farts are perfect as is, you can get creative! A sprinkle of flaky sea salt on top of the melted chocolate layer before it sets adds a wonderful flavor contrast. You could also drizzle with white chocolate or sprinkle with chopped nuts.
- Storage for Freshness: These Moose Farts keep wonderfully in the refrigerator in an airtight container. If you make a large batch, they also freeze beautifully, offering a convenient treat whenever a craving strikes. Just let them come to a slightly softer temperature before enjoying.
- Double the Batch: This recipe is incredibly popular, especially for gatherings or holidays. I often find myself doubling the recipe and using a larger sheet pan (like a half-sheet pan) to make sure there’s enough for everyone, because trust me, these Moose Farts disappear fast!
There you have it! A comprehensive guide to making these delightful, uniquely named treats. I promise you, once you taste these “Moose Farts,” you’ll understand why they’re such a beloved no-bake classic. The combination of chewy chocolate oats, creamy peanut butter, and a rich chocolate shell is simply irresistible. Happy baking (or rather, no-baking)!
Conclusion:
So, there you have it – the full journey to creating these utterly delightful, surprisingly addictive treats. We’ve navigated through the simple steps, gathered our humble ingredients, and now stand on the precipice of pure confectionary joy. Honestly, if you’re looking for a dessert that’s not only a conversation starter but also an absolute crowd-pleaser, you absolutely must give these a go. Forget complicated baking techniques or obscure ingredients; this recipe is all about maximizing flavor with minimal fuss. The combination of chewy oats, rich chocolate, and sweet coconut creates a symphony of taste and texture that truly sets them apart. They’re the kind of treat that disappears from the plate faster than you can say ‘another one, please!’ Trust me when I say, the whimsical name, “Moose Farts,” only adds to their charm and the sheer delight they bring to anyone lucky enough to try them. It’s a guaranteed hit at any gathering, a perfect pick-me-up for an afternoon slump, or simply a sweet reward after a long day. You’ll find yourself reaching for just one more, and then another, without a moment’s hesitation. This isn’t just a recipe; it’s an experience in delightful simplicity and unexpected deliciousness.
Serving Suggestions & Creative Variations:
But the fun doesn’t stop once they’re perfectly formed and cooled. Oh no, the versatility of these wonderful bites truly shines through in how you choose to enjoy them or even how you decide to tweak the recipe for your own unique twist. For serving, think beyond just a plate; arrange them artfully on a tiered stand for a stunning dessert display at your next brunch or party. They are absolutely sublime alongside a steaming cup of freshly brewed coffee, where the slight bitterness of the coffee perfectly balances their sweetness. Or, for a nostalgic touch, pair them with a tall, cold glass of milk, transporting you straight back to childhood memories of after-school snacks. Kids absolutely adore them, making them a fantastic addition to school lunchboxes or as a celebratory treat after a big game. Their portability also makes them ideal for picnics, road trips, or simply having a stash on hand for when a sweet craving strikes.
Feeling adventurous? Let’s talk variations! While the classic recipe is undeniably perfect, there’s always room to experiment and make them truly your own. Consider rolling them in finely chopped nuts – pecans, walnuts, or even pistachios – for an added layer of texture and a gourmet touch. A sprinkle of sea salt flakes before they set can elevate the flavors, creating that irresistible sweet-and-salty dynamic we all crave. For a different flavor profile, try adding a few drops of almond extract alongside the vanilla, or even a hint of orange zest for a bright, citrusy note that truly awakens the palate. If you’re planning for a holiday, a dash of peppermint extract can transform them into a festive treat for Christmas, or swap out some of the chocolate for white chocolate chips and add a bit of food coloring for a themed occasion, like green for St. Patrick’s Day or red for Valentine’s. You could even dip half of them in melted white chocolate and sprinkle with festive sprinkles for an extra special touch. For those who enjoy a bit of spice, a tiny pinch of chili powder can add an intriguing warmth, complementing the chocolate beautifully. The possibilities are truly endless, limited only by your imagination and what delights your taste buds the most, allowing you to tailor this simple base to any occasion or preference.
Your Turn to Create and Share!
So, what are you waiting for? I genuinely hope that reading through this has inspired you to step into your kitchen and give these utterly charming treats a try. Don’t let the simplicity fool you; the reward is immense. You’ll be amazed at how quickly they come together and even more surprised by the rave reviews you’ll receive from everyone who tries them. I can almost guarantee they’ll become a staple in your recipe repertoire, a reliable go-to for those moments when you need a little sweet indulgence or a guaranteed crowd-pleaser that will have everyone asking for the recipe. They’re truly one of those magical concoctions that bring smiles and satisfaction with every bite.
Once you’ve whipped up your own batch, please, please, please share your experience! I absolutely love hearing about your culinary adventures and seeing your creations come to life. Did you stick to the classic? Did you try any of the variations I suggested, or perhaps invent a brilliant one of your own? Take a photo, share it with your friends and family, and don’t forget to tell me all about it. Your feedback and creativity are what make this community so vibrant and exciting. There’s nothing more satisfying than knowing I’ve helped you create something delicious and memorable in your own home, sparking joy and deliciousness. So go forth, embrace the fun of making these wonderful bites, and prepare to delight everyone around you with your new favorite treat. Happy cooking, and I eagerly await hearing about your incredible creations!
Delicious Moose Farts: Quick & Fun No-Bake Candy Bites!
Moose Farts! Yes, you read that right, and before you raise an eyebrow, let me assure you, this delightful, bite-sized confection is anything but what its name suggests. Prepare to have your taste buds surprised and your sweet cravings utterly satisfied by a treat so unique, its whimsical moniker only adds to its undeniable charm. Perfect for no-bake lovers, busy parents, or anyone needing a last-minute party dessert, Moose Farts are a low-effort, high-reward recipe. They can be prepped ahead, chilled in batches, and even frozen. Whether you’re hosting a holiday get-together or looking for a laugh with your dessert tray, these Canadian classics bring flavor and fun to every table.
Ingredients
-
1 can (14 oz / 300 ml) sweetened condensed milk
-
1/4 cup melted butter
-
1 tsp vanilla extract
-
1 1/2 cups dried shredded coconut
-
1 1/2 cups graham cracker crumbs (plus extra for rolling)
-
1 1/2 cups chocolate chips
Instructions
-
Step 1
In a large mixing bowl, combine the sweetened condensed milk, melted butter, and vanilla extract. Mix well until smooth. -
Step 2
Add the dried shredded coconut, graham cracker crumbs, and chocolate chips to the wet mixture. Stir thoroughly until all ingredients are evenly incorporated and coated. -
Step 3
Roll the mixture into small, bite-sized balls (approximately 1-inch in diameter). If desired, roll the formed balls in extra graham cracker crumbs for a final coating. -
Step 4
Place the prepared Moose Farts on a parchment-lined baking sheet or tray. Chill in the refrigerator for at least 1-2 hours, or until they are firm enough to handle and hold their shape. -
Step 5
Serve chilled. Store any leftover Moose Farts in an airtight container in the refrigerator for up to one week, or freeze for up to one month.
Important Information
Nutrition Facts (Per Serving)
It is important to consider this information as approximate and not to use it as definitive health advice.
Allergy Information
Please check ingredients for potential allergens and consult a health professional if in doubt.


Leave a Comment