
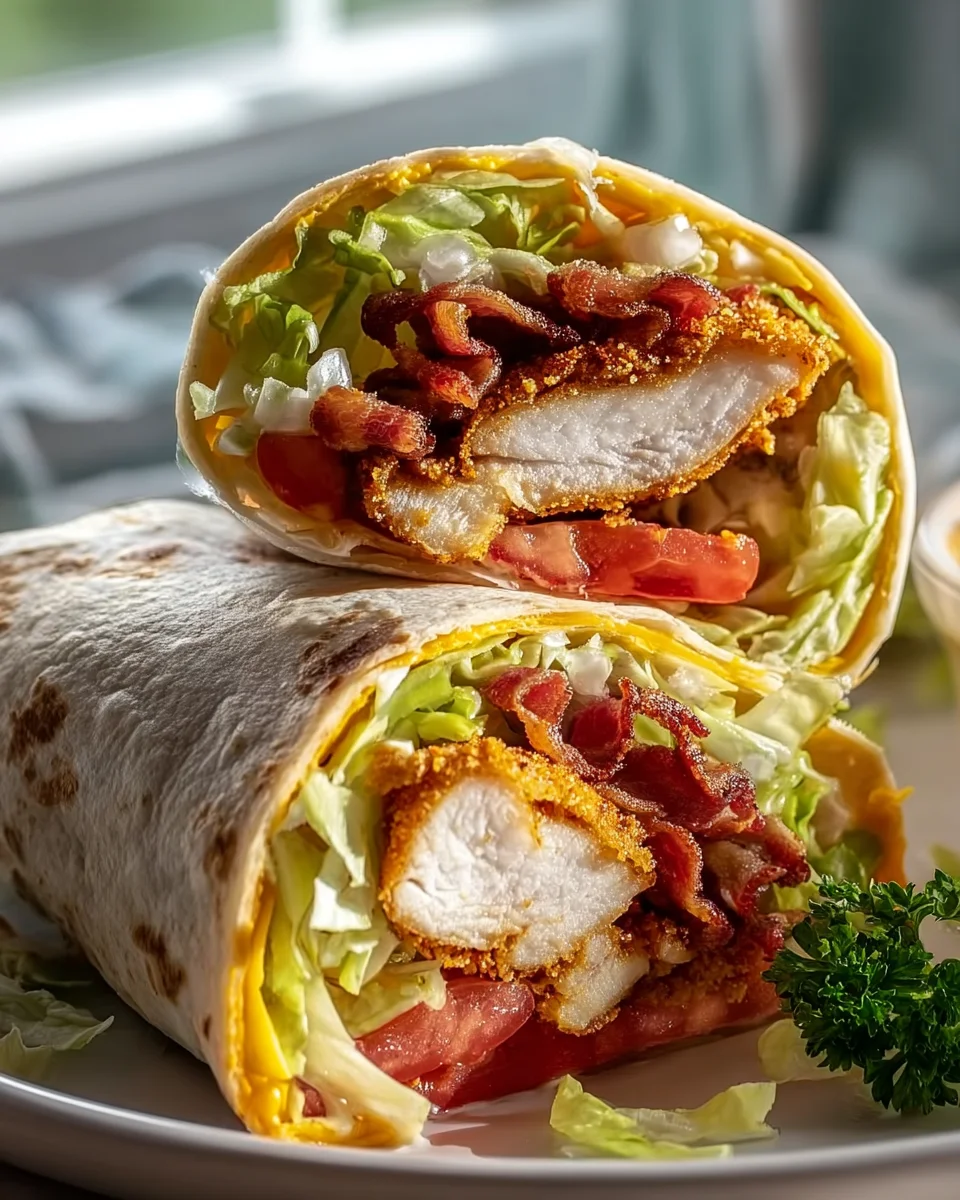
Crispy Chicken Club Wrap! Oh, if there’s one thing I absolutely adore, it’s taking a beloved classic and giving it a fresh, exciting twist. And believe me, this recipe does exactly that. We’re taking all the iconic deliciousness of a club sandwich – the juicy chicken, crisp lettuce, ripe tomatoes, savory beef bacon, and a generous slather of creamy mayo – but reimagining it in a gloriously portable wrap, starring unbelievably crispy chicken that will make your taste buds sing.
What makes this Crispy Chicken Club Wrap so special, you ask? It’s that irresistible textural contrast. You get the satisfying crunch of perfectly cooked chicken and beef bacon, the fresh snap of vibrant vegetables, and the soft embrace of a warm tortilla, all harmonizing with a rich, tangy sauce. You’re going to love how quickly this comes together for a phenomenal lunch, a casual weeknight dinner, or even a picnic spread that feels like a real treat. It’s comforting yet elevated, familiar yet innovative, and utterly, totally delicious. Trust me, once you try this crispy, savory, fresh, and creamy combination, you’ll wonder how you ever lived without it!

Ingredient Notes
There’s something incredibly satisfying about biting into a perfectly crafted wrap, especially when it’s packed with flavor and texture like our Crispy Chicken Club Wrap. To get this right, each ingredient plays a crucial role. Here’s a rundown of what you’ll need and some helpful notes from my kitchen to yours.
- Chicken Breast: For the “crispy chicken,” I always opt for boneless, skinless chicken breasts. They’re lean and cook relatively quickly. I like to slice them horizontally into thinner cutlets, about a quarter-inch thick. This ensures they cook evenly and crisp up beautifully without drying out.
- Panko Breadcrumbs: My secret to truly crispy chicken! Panko breadcrumbs are coarser and lighter than regular breadcrumbs, yielding an unparalleled crunch. If you can’t find panko, regular breadcrumbs will work, but you might lose a little of that epic crispiness.
- All-Purpose Flour & Eggs: These are essential for our breading station. The flour helps the egg wash adhere, and the egg wash helps the panko stick. It’s a simple but effective system!
- Large Flour Tortillas: The vessel for our delicious club wrap! You’ll want large, soft flour tortillas, typically 10-12 inches in diameter. This size is perfect for holding all the generous fillings without tearing. Whole wheat or gluten-free tortillas are excellent alternatives if you prefer.
- Beef Bacon: To give us that classic club sandwich flavor profile, beef bacon is a must. It brings a smoky, salty crunch that complements the chicken perfectly. Make sure to cook it until it’s nice and crispy. If you’re looking for an alternative, turkey bacon or even thinly sliced, smoked beef deli meat can work in a pinch.
- Fresh Lettuce: I love using crisp iceberg or romaine lettuce. The crunch factor is key here, providing a refreshing contrast to the richness of the chicken and bacon. Shredding it finely helps distribute it evenly throughout the wrap.
- Ripe Tomatoes: Juicy, ripe tomatoes sliced thinly add a burst of freshness and a touch of acidity. Choose firm, red tomatoes for the best flavor and texture. Cherry tomatoes, halved, can also be a fun addition if you don’t have large ones.
- Mayonnaise: The classic spread for any club sandwich. A good quality mayonnaise provides creaminess and binds all the flavors together. For a little extra zing, I sometimes stir in a dash of Dijon mustard, a squeeze of lemon juice, or a pinch of garlic powder into my mayo. For a lighter option, a Greek yogurt-based dressing or mashed avocado can be lovely.
- Cheese Slices (Optional but Recommended): I often include a slice or two of sharp cheddar or Monterey Jack cheese. It melts slightly from the warm chicken and adds another layer of creaminess and savory depth. Feel free to omit it or use a dairy-free alternative if you prefer.
- Seasonings: Don’t forget salt, black pepper, and maybe a little garlic powder or paprika for seasoning your chicken and the breading. Good seasoning makes all the difference!
Step-by-Step Instructions
Let’s get cooking! Crafting these Crispy Chicken Club Wraps is a fun and straightforward process. Follow these steps, and you’ll have a fantastic meal ready in no time.
- Prepare and Cook the Crispy Chicken:
- First, take your boneless, skinless chicken breasts and slice them horizontally into two or three thinner cutlets. Pat them dry with paper towels.
- Set up your breading station: In one shallow dish, place about ½ cup of all-purpose flour seasoned with salt, pepper, and a pinch of garlic powder. In a second dish, whisk two large eggs with a tablespoon of water or milk. In a third dish, pour 1 cup of panko breadcrumbs, also seasoned with a little salt and pepper.
- Dredge each chicken cutlet first in the seasoned flour, shaking off any excess. Then dip it into the egg wash, allowing any excess to drip off. Finally, thoroughly coat it in the panko breadcrumbs, pressing gently to ensure they adhere well.
- You have a few options for cooking:
- Pan-Frying (My Favorite): Heat about ½ inch of vegetable or canola oil in a large skillet over medium-high heat. Once hot (a breadcrumb sizzles immediately), carefully place the chicken cutlets in the pan, ensuring not to overcrowd it. Cook for 3-4 minutes per side, or until golden brown, crispy, and cooked through (internal temperature of 165°F / 74°C).
- Air Frying: Preheat your air fryer to 375°F (190°C). Lightly spray the breaded chicken with cooking spray. Air fry for 12-15 minutes, flipping halfway, until golden and crispy.
- Baking: Preheat your oven to 400°F (200°C). Place the breaded chicken on a wire rack set over a baking sheet (for maximum crispiness). Bake for 20-25 minutes, flipping halfway, until golden and cooked through.
- Once cooked, transfer the crispy chicken to a plate lined with paper towels to drain any excess oil. Let them rest for a couple of minutes, then slice into ½-inch wide strips.
- Cook the Beef Bacon:
- While the chicken is cooking or resting, cook your beef bacon. You can pan-fry it until crispy, or for less mess, bake it on a foil-lined baking sheet at 400°F (200°C) for 15-20 minutes, or until desired crispiness is reached. Drain on paper towels and break into pieces.
- Prepare Your Veggies and Spread:
- Wash and shred your lettuce. Slice your ripe tomatoes thinly.
- In a small bowl, mix your mayonnaise. This is a great time to add any extra seasonings like a pinch of garlic powder, a tiny bit of smoked paprika, or a squeeze of lemon juice for an elevated flavor.
- Assemble Your Wraps:
- Lightly warm your large flour tortillas. You can do this in a dry skillet over medium heat for 15-20 seconds per side, or in the microwave for 10-15 seconds. Warming them makes them more pliable and less likely to crack when rolled.
- Lay a warm tortilla flat. Spread a generous layer of your seasoned mayonnaise across the entire surface, leaving about an inch clear around the edges.
- Arrange a layer of shredded lettuce down the center, followed by a layer of sliced tomatoes. If using cheese, place a slice or two over the vegetables.
- Pile a good portion of the crispy chicken strips on top of the cheese/vegetables.
- Scatter the crispy beef bacon pieces over the chicken.
- To roll: Fold the sides of the tortilla inward over the filling, about 1-2 inches on each side. Then, starting from the bottom edge closest to you, tightly roll the tortilla upwards, tucking in the filling as you go. Keep it as snug as possible!
- Once rolled, slice the wrap diagonally in half. Serve immediately and enjoy the crunch and flavor!
Tips & Suggestions
To truly elevate your Crispy Chicken Club Wrap experience, here are a few tips and tricks I’ve picked up along the way. These will help ensure maximum flavor, texture, and ease of preparation.
- For the Ultimate Crispy Chicken:
- Double Dip for Extra Crunch: If you want truly next-level crispy chicken, after the initial breading, you can dip the chicken back into the egg wash and then into the panko breadcrumbs again. This creates a thicker, super crunchy crust.
- Don’t Overcrowd the Pan: When pan-frying or air frying, cook the chicken in batches if necessary. Overcrowding lowers the oil temperature and can lead to soggy chicken rather than crispy.
- Chill Before Cooking: After breading your chicken, you can place it in the fridge for 15-20 minutes. This helps the breading adhere better during cooking, preventing it from falling off.
- Perfectly Pliable Tortillas: Warming your tortillas is a small step that makes a huge difference. A quick zap in the microwave or a few seconds in a dry skillet makes them flexible and much easier to roll without cracking. Don’t overdo it, though, or they can become stiff.
- Flavor Boost Your Mayo: Don’t settle for plain mayonnaise! As mentioned, a little Dijon mustard, garlic powder, onion powder, a dash of your favorite hot sauce (non-alcoholic, of course!), or finely chopped fresh chives or parsley can really take your spread to the next level.
- The Art of the Tight Roll: This is crucial for a wrap that holds together and is easy to eat. After layering your ingredients down the center, fold in the short sides first, then use your thumbs to tuck the bottom edge over the fillings, pulling back slightly as you roll upwards. The tighter you roll, the better it will hold.
- Customization is Key: This is a club, but it’s your club! Feel free to add extra layers. Avocado slices or a dollop of guacamole add creaminess and healthy fats. Thinly sliced red onion can provide a sharp bite, or a few pickle slices for tang. A drizzle of ranch dressing or a light spread of BBQ sauce could also be delicious twists.
- Prep Ahead Components: While assembling the wraps fresh is best, you can definitely cook the crispy chicken and beef bacon ahead of time. Store them separately in airtight containers in the fridge. Reheat the chicken in an oven or air fryer to regain its crispiness, and the bacon briefly in a pan. This makes assembly a breeze for a quick lunch or dinner.
Storage
While Crispy Chicken Club Wraps are definitely at their best when eaten fresh, especially to enjoy that signature crunch, I understand that sometimes you might have leftovers or want to prep components ahead of time. Here’s how I handle storage to maintain as much quality as possible.
- Assembled Wraps: I generally recommend assembling these wraps right before serving. The moisture from the tomatoes, lettuce, and mayonnaise can start to make the crispy chicken soggy and the tortilla a bit soft if left for too long. If you must store an assembled wrap, wrap it very tightly in plastic wrap or foil, and refrigerate for no more than 1-2 hours. Beyond that, the textures will really start to degrade. It’s not ideal for next-day consumption.
- Crispy Chicken: This is the component that suffers the most from refrigeration. To keep it crispy for later use, store the cooked chicken strips in an airtight container in the refrigerator for up to 3 days. When ready to eat, reheat the chicken in a preheated oven or an air fryer at 350°F (175°C) for 5-10 minutes, or until warmed through and re-crisped. Microwaving is not recommended as it will make the chicken soggy.
- Beef Bacon: Cooked beef bacon can be stored in an airtight container in the refrigerator for up to 4-5 days. You can easily reheat it in a dry skillet over medium heat for a minute or two until crispy again, or microwave it briefly if you don’t mind a slightly less crispy texture.
- Vegetables: Sliced lettuce and tomatoes should be stored separately in airtight containers in the refrigerator. Use within 1-2 days for best freshness.
- Mayonnaise: Any leftover seasoned mayonnaise should be stored in an airtight container in the refrigerator and used within a few days.
By storing components separately, you can quickly assemble a fresh wrap whenever the craving strikes, ensuring that satisfying crispy crunch every time!
Final Thoughts
And there you have it! Your incredible journey to crafting the Crispy Chicken Club Wrap is complete. I truly believe this recipe is an absolute standout, bringing together everything you love about a classic club sandwich with the irresistible crunch of perfectly cooked chicken, all nestled in a convenient, delicious wrap.
What makes the Crispy Chicken Club Wrap so special? It’s that harmonious blend of textures: the golden-crisp chicken, the savory beef bacon, the fresh, crisp lettuce and juicy tomatoes, and a creamy finish, all enveloped in a soft tortilla. It’s more than just a meal; it’s an experience – hearty, satisfying, and bursting with flavor in every single bite.
I genuinely hope you take immense pleasure in savoring this fantastic creation. The Crispy Chicken Club Wrap isn’t just a recipe to try; it’s a must-make that I’m sure will become a new favorite in your kitchen!
Crispy Chicken Club Wrap: Quick & Delicious Recipe

This Crispy Chicken Club Wrap takes the classic club sandwich and transforms it into a portable delight. Enjoy the satisfying crunch of crispy chicken, savory beef bacon, and fresh vegetables all wrapped in a warm tortilla.
- Prep Time: 15 mins
- Cook Time: 30 mins
- Total Time: 45 minutes
- Yield: 4 servings
- Category: Lunch
- Method: Pan-frying, Air frying, Baking
- Cuisine: American
Ingredients
- Boneless, skinless chicken breasts
- Panko breadcrumbs
- All-purpose flour
- Large eggs
- Large flour tortillas
- Beef bacon
- Fresh lettuce (iceberg or romaine)
- Ripe tomatoes
- Mayonnaise
- Cheese slices (optional, sharp cheddar or Monterey Jack)
- Salt
- Black pepper
- Garlic powder
- Paprika
Instructions
- Prepare and Cook the Crispy Chicken: Slice the chicken breasts horizontally into thinner cutlets and pat dry.
- Set up your breading station with seasoned flour, whisked eggs, and panko breadcrumbs.
- Dredge each chicken cutlet in flour, then dip in egg wash, and coat with panko breadcrumbs.
- Cook the chicken by pan-frying, air frying, or baking until golden brown and cooked through.
- Transfer the cooked chicken to a plate lined with paper towels and let rest before slicing into strips.
- Cook the Beef Bacon: While the chicken is cooking, cook the beef bacon until crispy.
- Prepare Your Veggies and Spread: Wash and shred the lettuce, slice the tomatoes, and mix the mayonnaise with any desired seasonings.
- Assemble Your Wraps: Warm the tortillas, spread mayonnaise, layer lettuce, tomatoes, cheese, chicken strips, and bacon.
- Roll the tortilla tightly and slice diagonally in half before serving.
Nutrition
- Serving Size: 1 wrap
- Calories: 500
- Sugar: 3 g
- Sodium: 800 mg
- Fat: 25 g
- Saturated Fat: 8 g
- Unsaturated Fat: 15 g
- Trans Fat: 0 g
- Carbohydrates: 45 g
- Fiber: 3 g
- Protein: 30 g
- Cholesterol: 100 mg
Keywords: For extra crispy chicken, double dip in egg wash and panko. Customize with avocado, red onion, or ranch dressing for added flavor.
Leave a Comment