
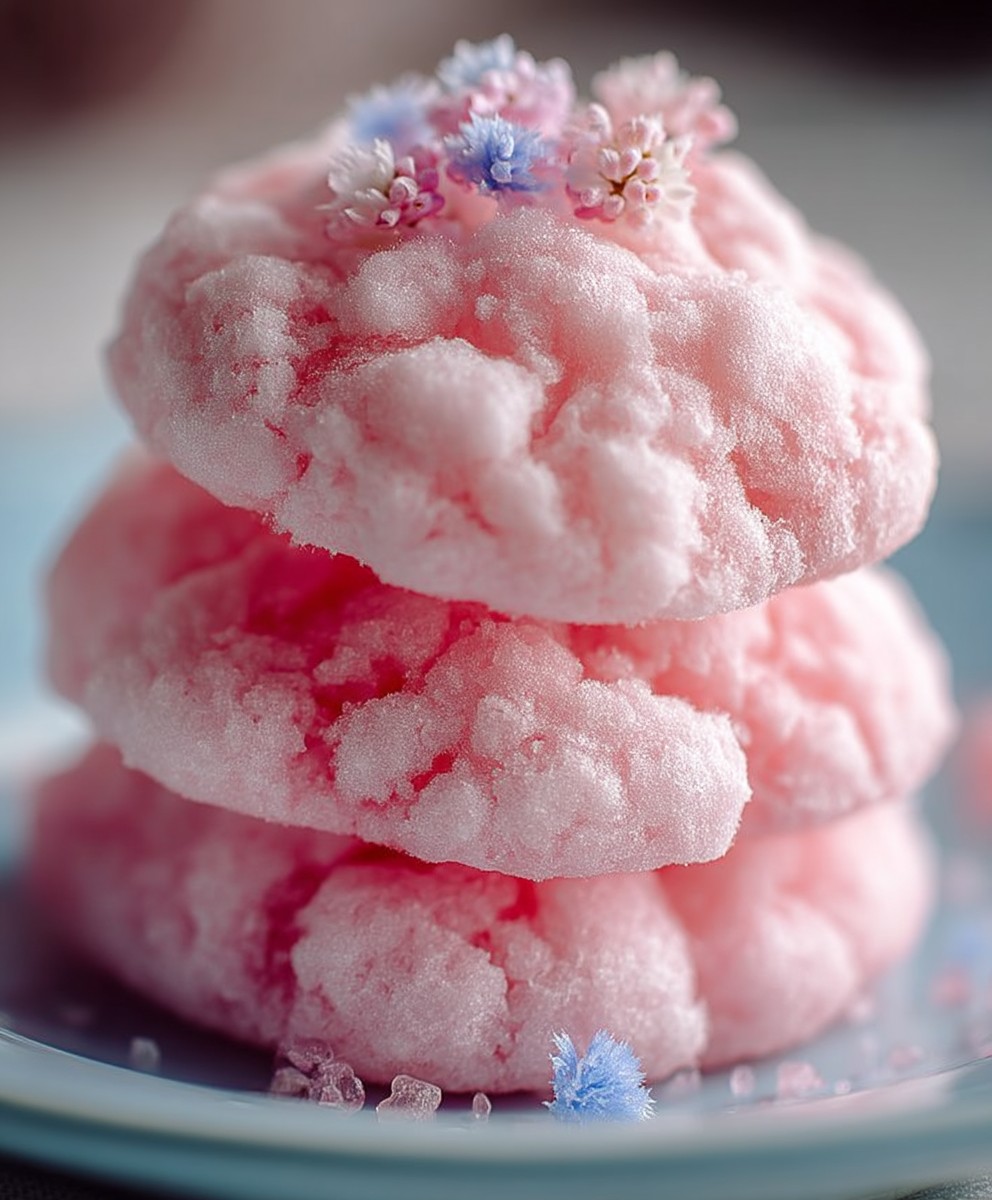
Cotton Candy Flavored Cookies: Prepare to be transported back to carefree summer days at the carnival with every single bite! Imagine the fluffy, melt-in-your-mouth sweetness of cotton candy, now perfectly captured in a delightful cookie. This isn’t just a cookie; it’s a nostalgic experience that will bring a smile to your face and a burst of sugary joy to your taste buds.
While cotton candy itself has a fascinating history, dating back to 15th-century Italy where spun sugar was a delicacy only the wealthy could afford, the modern version we know and love was invented in 1897 by dentist William Morrison and confectioner John C. Wharton. They introduced their “Fairy Floss” at the 1904 World’s Fair, and the rest, as they say, is sweet history! Now, we’re taking that iconic flavor and infusing it into a classic treat.
People adore cotton candy for its unique, airy texture and its pure, unadulterated sweetness. It’s a simple pleasure that evokes feelings of happiness and childhood wonder. These Cotton Candy Flavored Cookies capture that essence perfectly. They offer a delightful combination of a soft, chewy cookie base with the unmistakable flavor of cotton candy. They’re easy to make, fun to eat, and guaranteed to be a hit with kids and adults alike. Get ready to bake up a batch of pure happiness!

Ingredients:
- For the Cotton Candy Cookie Dough:
- 2 ½ cups all-purpose flour
- 1 teaspoon baking soda
- 1 teaspoon cream of tartar
- ½ teaspoon salt
- 1 cup (2 sticks) unsalted butter, softened
- ¾ cup granulated sugar
- ¾ cup packed light brown sugar
- 2 large eggs
- 2 teaspoons vanilla extract
- 1 teaspoon cotton candy flavoring (extract or oil)
- Pink and blue gel food coloring
- For the Cotton Candy Swirl:
- 4 ounces cream cheese, softened
- ¼ cup powdered sugar
- ½ teaspoon vanilla extract
- ½ teaspoon cotton candy flavoring (extract or oil)
- Pink and blue gel food coloring
- Optional Decorations:
- Cotton candy sprinkles
- Edible glitter
Preparing the Cotton Candy Cookie Dough
- Combine Dry Ingredients: In a medium bowl, whisk together the flour, baking soda, cream of tartar, and salt. Make sure everything is evenly distributed. This ensures a consistent texture in your cookies.
- Cream Butter and Sugars: In a large bowl (or the bowl of a stand mixer), cream together the softened butter, granulated sugar, and brown sugar until light and fluffy. This usually takes about 3-5 minutes. Scrape down the sides of the bowl occasionally to ensure everything is incorporated properly. The mixture should be pale and airy.
- Add Eggs and Extracts: Beat in the eggs one at a time, mixing well after each addition. Then, stir in the vanilla extract and the cotton candy flavoring. Don’t overmix at this stage, just combine until everything is incorporated. The cotton candy flavoring is key to getting that authentic taste, so don’t skip it!
- Gradually Add Dry Ingredients: Gradually add the dry ingredients to the wet ingredients, mixing on low speed until just combined. Be careful not to overmix, as this can lead to tough cookies. Mix until you no longer see streaks of flour.
- Divide and Color the Dough: Divide the dough into two equal portions. In one portion, add a few drops of pink gel food coloring and mix until evenly colored. In the other portion, add a few drops of blue gel food coloring and mix until evenly colored. Start with a small amount of food coloring and add more until you achieve your desired shades of pink and blue. Remember, a little goes a long way!
- Chill the Dough: Wrap each portion of dough in plastic wrap and chill in the refrigerator for at least 30 minutes. This will help prevent the cookies from spreading too much during baking and will make them easier to handle. I usually chill mine for an hour, but 30 minutes will do in a pinch!
Preparing the Cotton Candy Swirl
- Cream Cheese Base: In a medium bowl, beat the softened cream cheese until smooth and creamy. Make sure your cream cheese is truly softened, or you’ll end up with lumps.
- Add Sweeteners and Flavorings: Add the powdered sugar, vanilla extract, and cotton candy flavoring to the cream cheese. Beat until smooth and well combined. Again, the cotton candy flavoring is crucial here!
- Divide and Color the Swirl: Divide the cream cheese mixture into two equal portions. In one portion, add a few drops of pink gel food coloring and mix until evenly colored. In the other portion, add a few drops of blue gel food coloring and mix until evenly colored. Just like with the dough, start with a small amount of food coloring and add more until you achieve your desired shades.
Assembling the Cookies
- Preheat Oven and Prepare Baking Sheets: Preheat your oven to 375°F (190°C). Line baking sheets with parchment paper. This will prevent the cookies from sticking and make cleanup a breeze.
- Scoop the Dough: Using a cookie scoop or spoon, scoop out equal-sized portions of the pink and blue cookie dough. I usually use a medium-sized cookie scoop.
- Combine Dough Portions: Gently press a pink dough portion and a blue dough portion together in your hand. Don’t overmix them; you want to maintain distinct swirls of color.
- Flatten Slightly: Place the combined dough ball on the prepared baking sheet and flatten it slightly with your palm.
- Create the Swirl: Using a small spoon or piping bag, place a small dollop of pink and blue cream cheese swirl on top of each cookie. Use a toothpick or the tip of a knife to swirl the colors together. Get creative with your swirls! You can make simple circles or more intricate designs.
- Add Decorations (Optional): If desired, sprinkle the cookies with cotton candy sprinkles or edible glitter before baking.
Baking the Cookies
- Bake: Bake the cookies for 8-10 minutes, or until the edges are lightly golden brown. Keep a close eye on them, as they can burn easily. The baking time will depend on your oven, so start checking them at 8 minutes.
- Cool: Remove the baking sheets from the oven and let the cookies cool on the baking sheets for a few minutes before transferring them to a wire rack to cool completely. This will prevent them from breaking.
Tips and Tricks for Perfect Cotton Candy Cookies
- Don’t Overmix the Dough: Overmixing develops the gluten in the flour, which can result in tough cookies. Mix until just combined.
- Chill the Dough: Chilling the dough is crucial for preventing the cookies from spreading too much during baking. It also makes the dough easier to handle.
- Use Gel Food Coloring: Gel food coloring is more concentrated than liquid food coloring, so you’ll need less of it to achieve vibrant colors. It also won’t affect the consistency of the dough as much.
- Softened Butter and Cream Cheese: Make sure your butter and cream cheese are properly softened before using them. This will ensure that they cream together smoothly and evenly.
- Don’t Overbake: Overbaked cookies will be dry and crumbly. Bake until the edges are lightly golden brown.
- Experiment with Flavors: If you can’t find cotton candy flavoring, you can try using other fruity flavors, such as raspberry or strawberry.
- Storage: Store the cookies in an airtight container at room temperature for up to 3 days.
- Freezing: You can freeze the unbaked cookie dough for up to 2 months. Thaw it in the refrigerator overnight before baking. You can also freeze the baked cookies for up to 1 month.
- Adjust Sweetness: If you prefer a less sweet cookie, you can reduce the amount of sugar slightly.
- Variations: Try adding white chocolate chips or chopped nuts to the dough for added flavor and texture.
Troubleshooting
- Cookies are spreading too much: Make sure you’ve chilled the dough for long enough. You can also try adding a tablespoon or two of flour to the dough.
- Cookies are too dry: Don’t overbake them. Also, make sure you’re using the correct amount of butter and eggs.
- Cookies are too tough: Don’t overmix the dough.
- Swirl is sinking into the cookie: Make sure your cream cheese swirl is thick enough. You can add a little more powdered sugar if needed. Also, don’t add too much swirl to each cookie.
Enjoy your delicious and colorful Cotton Candy Cookies!
Conclusion:
And there you have it! These aren’t just cookies; they’re a trip down memory lane, a burst of pure, sugary joy in every single bite. I truly believe these Cotton Candy Flavored Cookies are a must-try for anyone who loves a little whimsy in their baking. They’re surprisingly easy to make, and the result is something truly special – a cookie that tastes exactly like the fluffy, spun-sugar treat we all know and love.
But why are they a must-try? Beyond the sheer novelty and fun factor, these cookies are incredibly delicious. The delicate cotton candy flavor isn’t overpowering; it’s subtle and sweet, perfectly complementing the buttery, slightly chewy texture of the cookie itself. They’re a guaranteed crowd-pleaser, perfect for birthday parties, bake sales, or just a fun weekend treat. Imagine the smiles on the faces of your friends and family when they taste these!
Now, let’s talk serving suggestions and variations. While these cookies are absolutely divine on their own, warm from the oven, there are so many ways to elevate them even further. Consider crumbling them over vanilla ice cream for a truly decadent dessert. Or, use them to make ice cream sandwiches with a scoop of bubblegum ice cream for an extra dose of fun. You could even dip them in melted white chocolate and sprinkle them with edible glitter for a truly magical presentation.
For variations, the possibilities are endless! If you’re feeling adventurous, try adding a few drops of pink or blue food coloring to the dough for a more vibrant, cotton candy-esque look. You could also experiment with different extracts – a touch of vanilla or almond extract can add a lovely depth of flavor. And if you’re a fan of sprinkles, don’t be shy! A generous sprinkle of colorful sprinkles before baking will add even more visual appeal.
Another fun variation is to make mini versions of these cookies. They’re perfect for little hands and make a great addition to a dessert platter. You could even package them up in small cellophane bags and give them as party favors.
But honestly, the best way to enjoy these cookies is simply with a glass of cold milk and a good friend. They’re the perfect treat to share and enjoy together.
I’m so excited for you to try this recipe and experience the magic of Cotton Candy Flavored Cookies for yourself. I know you’ll love them as much as I do. They are a delightful treat that brings back childhood memories.
So, what are you waiting for? Gather your ingredients, preheat your oven, and get ready to bake up a batch of these delightful cookies. I promise you won’t be disappointed.
And finally, I would absolutely love to hear about your experience! Did you try any of the variations I suggested? Did you add your own creative twist? Please, share your photos and stories in the comments below. I can’t wait to see what you create! Happy baking!
Cotton Candy Flavored Cookies: A Sweet Treat Recipe
Soft, chewy cotton candy cookies with a colorful cream cheese frosting swirl. Fun and festive, perfect for parties!
Ingredients
- 2 ½ cups all-purpose flour
- 1 teaspoon baking soda
- 1 teaspoon cream of tartar
- ½ teaspoon salt
- 1 cup (2 sticks) unsalted butter, softened
- ¾ cup granulated sugar
- ¾ cup packed light brown sugar
- 2 large eggs
- 2 teaspoons vanilla extract
- 1 teaspoon cotton candy flavoring (extract or oil)
- Pink and blue gel food coloring
- 4 ounces cream cheese, softened
- ¼ cup powdered sugar
- ½ teaspoon vanilla extract
- ½ teaspoon cotton candy flavoring (extract or oil)
- Pink and blue gel food coloring
- Cotton candy sprinkles
- Edible glitter
Instructions
- Combine Dry Ingredients: In a medium bowl, whisk together the flour, baking soda, cream of tartar, and salt.
- Cream Butter and Sugars: In a large bowl (or the bowl of a stand mixer), cream together the softened butter, granulated sugar, and brown sugar until light and fluffy (3-5 minutes). Scrape down the sides of the bowl occasionally.
- Add Eggs and Extracts: Beat in the eggs one at a time, mixing well after each addition. Then, stir in the vanilla extract and the cotton candy flavoring.
- Gradually Add Dry Ingredients: Gradually add the dry ingredients to the wet ingredients, mixing on low speed until just combined. Be careful not to overmix.
- Divide and Color the Dough: Divide the dough into two equal portions. In one portion, add pink gel food coloring and mix until evenly colored. In the other portion, add blue gel food coloring and mix until evenly colored.
- Chill the Dough: Wrap each portion of dough in plastic wrap and chill in the refrigerator for at least 30 minutes.
- Cream Cheese Base: In a medium bowl, beat the softened cream cheese until smooth and creamy.
- Add Sweeteners and Flavorings: Add the powdered sugar, vanilla extract, and cotton candy flavoring to the cream cheese. Beat until smooth and well combined.
- Divide and Color the Swirl: Divide the cream cheese mixture into two equal portions. In one portion, add pink gel food coloring and mix until evenly colored. In the other portion, add blue gel food coloring and mix until evenly colored.
- Preheat Oven and Prepare Baking Sheets: Preheat your oven to 375°F (190°C). Line baking sheets with parchment paper.
- Scoop the Dough: Using a cookie scoop or spoon, scoop out equal-sized portions of the pink and blue cookie dough.
- Combine Dough Portions: Gently press a pink dough portion and a blue dough portion together in your hand.
- Flatten Slightly: Place the combined dough ball on the prepared baking sheet and flatten it slightly with your palm.
- Create the Swirl: Using a small spoon or piping bag, place a small dollop of pink and blue cream cheese swirl on top of each cookie. Use a toothpick or the tip of a knife to swirl the colors together.
- Add Decorations (Optional): If desired, sprinkle the cookies with cotton candy sprinkles or edible glitter before baking.
- Bake: Bake the cookies for 8-10 minutes, or until the edges are lightly golden brown.
- Cool: Remove the baking sheets from the oven and let the cookies cool on the baking sheets for a few minutes before transferring them to a wire rack to cool completely.
Notes
- Don’t overmix the dough.
- Chilling the dough is crucial.
- Use gel food coloring.
- Make sure your butter and cream cheese are properly softened.
- Don’t overbake.
- If you can’t find cotton candy flavoring, you can try using other fruity flavors, such as raspberry or strawberry.
- Store the cookies in an airtight container at room temperature for up to 3 days.
- You can freeze the unbaked cookie dough for up to 2 months. Thaw it in the refrigerator overnight before baking. You can also freeze the baked cookies for up to 1 month.
- If you prefer a less sweet cookie, you can reduce the amount of sugar slightly.
- Try adding white chocolate chips or chopped nuts to the dough for added flavor and texture.
- If cookies are spreading too much: Make sure you’ve chilled the dough for long enough. You can also try adding a tablespoon or two of flour to the dough.
- If cookies are too dry: Don’t overbake them. Also, make sure you’re using the correct amount of butter and eggs.
- If cookies are too tough: Don’t overmix the dough.
- If the swirl is sinking into the cookie: Make sure your cream cheese swirl is thick enough. You can add a little more powdered sugar if needed. Also, don’t add too much swirl to each cookie.

Leave a Comment