
Classic Mini Pineapple Upside Down Cakes
Oh, prepare yourselves for a truly delightful treat! I am so excited to share my recipe for Classic Mini Pineapple Upside Down Cakes. This isn’t just any cake; it’s a nostalgic trip to pure joy, reimagined in the most adorable, single-serving form. What makes these little beauties so incredibly special? Well, it’s all about that individual charm! Each cake is its own perfect masterpiece, making them not only irresistibly cute but also incredibly easy to serve – no slicing required, just pure, unadulterated enjoyment for everyone.
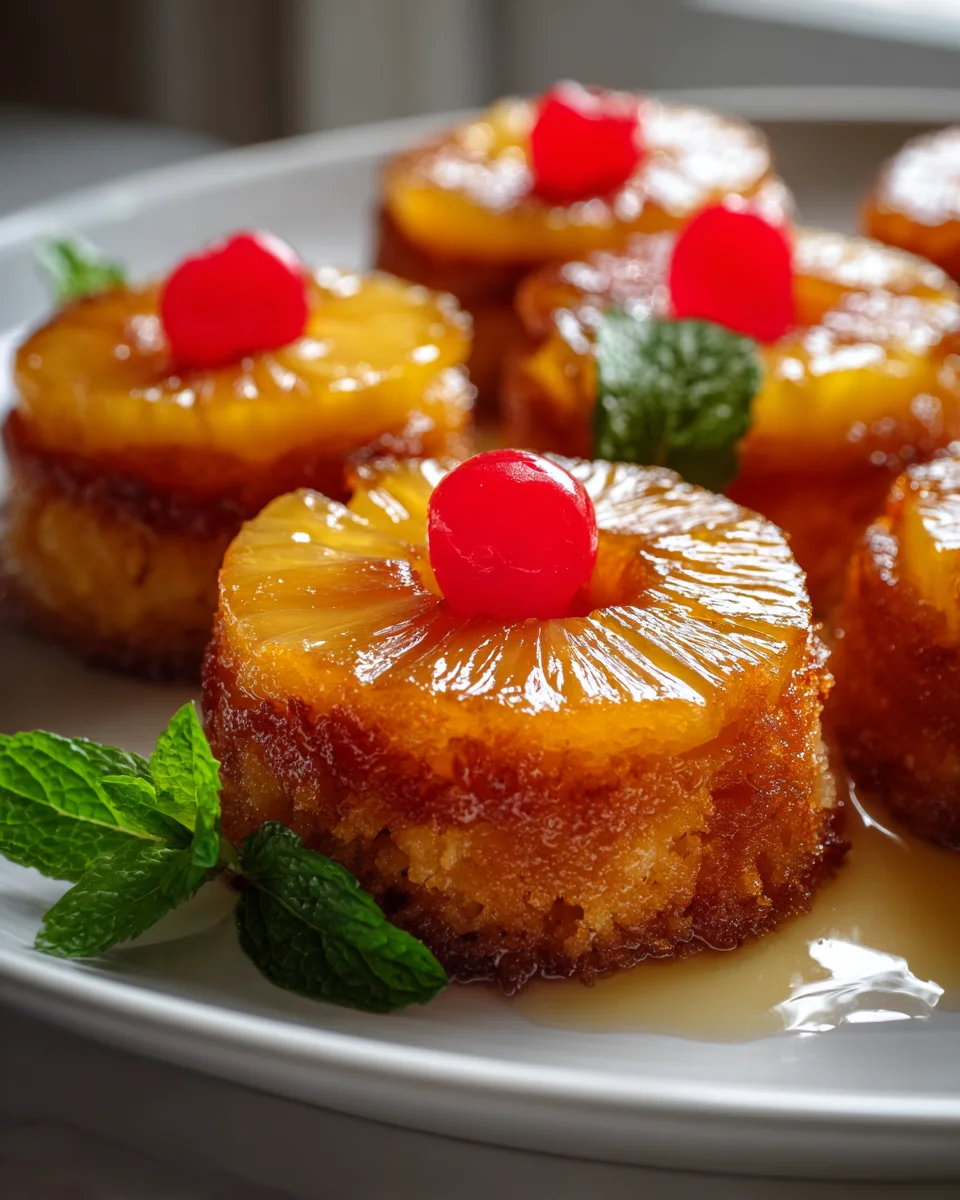
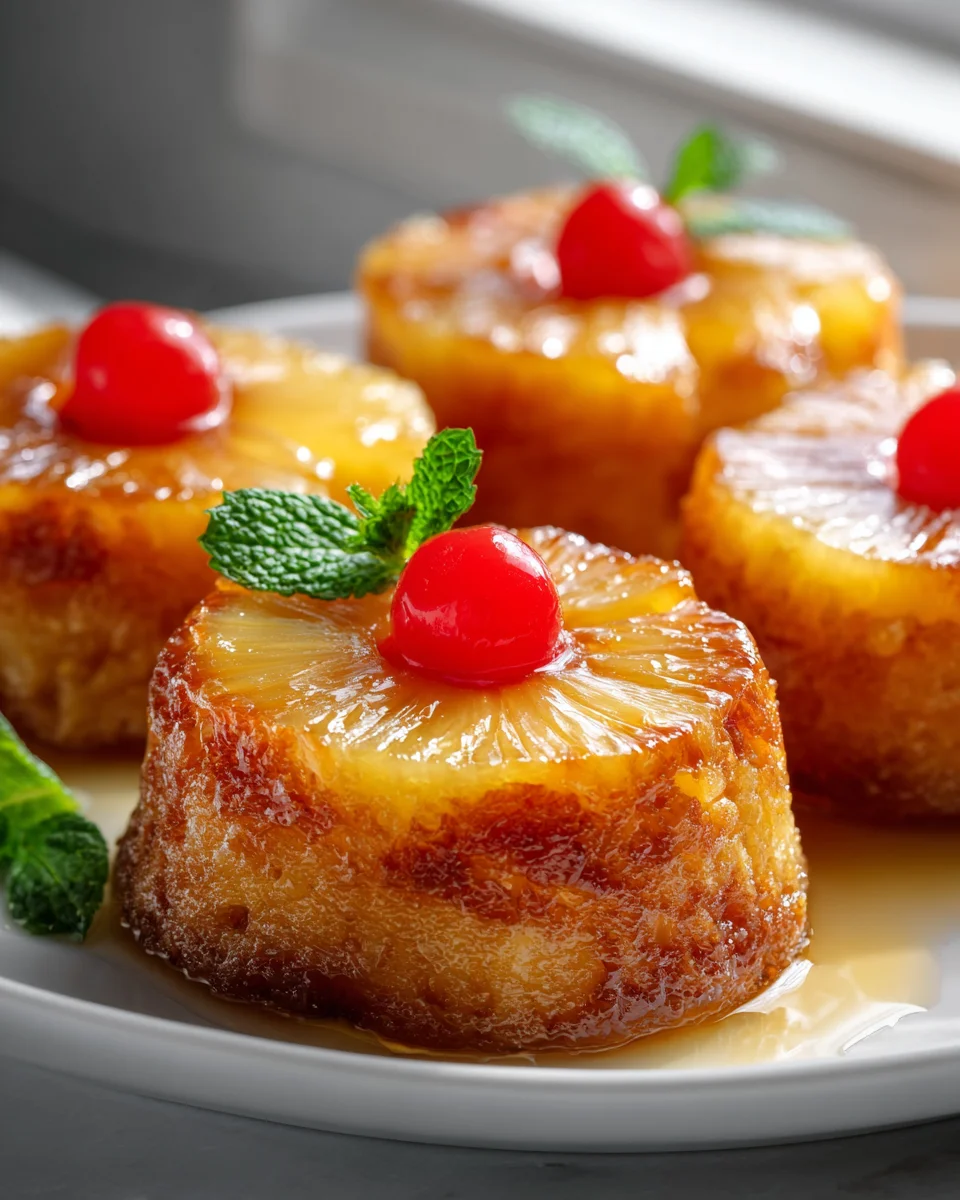
You are absolutely going to adore these for so many reasons. Imagine biting into a wonderfully moist, tender vanilla cake, perfectly complemented by a warm, buttery, caramelized pineapple ring and a vibrant cherry on top. The magic truly happens when you invert them, revealing that gorgeous, golden-brown fruit topping that just screams ‘homemade goodness.’ They’re impressive enough for a dinner party but simple enough for a cozy weeknight indulgence. It’s that perfect balance of sweet, tangy, and rich flavors, all wrapped up in a perfectly portioned package.
In a nutshell, these Classic Mini Pineapple Upside Down Cakes start with a luscious layer of melted butter, brown sugar, a pineapple ring, and a cherry at the bottom of individual ramekins or muffin tins. Then, we spoon in a fluffy cake batter that bakes up beautifully, soaking in all those wonderful caramel juices. Once they’re out of the oven and flipped, you’re left with a stunning, personal-sized dessert that’s sure to bring smiles all around. Trust me, these are going to be your new go-to for a show-stopping yet simple dessert!
Ingredient Notes
Crafting these adorable Classic Mini Pineapple Upside Down Cakes begins with selecting the right ingredients. Each component plays a vital role in achieving that perfect balance of sweet, tangy, and moist goodness. Here’s a closer look at what you’ll need and some helpful tips for making them your own.
Pineapple
- Classic Choice: Canned Pineapple Rings. For mini cakes, I find small, canned pineapple rings work best. They fit perfectly into standard muffin cups and give that iconic look. Make sure to drain them very well! Excess juice can make your caramel topping too watery and prevent it from setting properly. Gently pat them dry with a paper towel for the best results.
- Alternative: Crushed Pineapple. If you can’t find small rings, or prefer a less structured look, well-drained crushed pineapple works wonderfully too. Just press it gently into the bottom of the muffin cups over the caramel.
- Fresh Pineapple: While delicious, fresh pineapple requires a bit more prep work. You’d need to slice it thinly and use a small cookie cutter to create rings that fit your muffin tins. Ensure it’s ripe for the best flavor!
Maraschino Cherries
- The Signature Touch: These bright red cherries are non-negotiable for that classic upside-down cake aesthetic. They add a lovely pop of color and a subtle sweetness. I usually cut mine in half, but you can leave them whole if they fit your design. Again, make sure to drain them thoroughly to avoid excess moisture.
- Flavor Twist: While maraschino cherries are traditional, if you’re looking for a slightly different flavor profile, a few dried cranberries or pitted sour cherries could offer a pleasant tartness, though they won’t have the same vibrant color.
Brown Sugar and Butter
- The Caramel Base: Light brown sugar is my go-to for the rich, gooey caramel topping. Its molasses notes add depth of flavor. Dark brown sugar can also be used for a more intense, robust caramel.
- Melted Butter: Unsalted butter is preferred, as it allows you to control the saltiness of the dish. It combines with the brown sugar to create that irresistible, bubbling caramel layer that coats the pineapple.
Cake Batter Ingredients
- All-Purpose Flour: The foundation of our cake. Sifting it isn’t strictly necessary but can help ensure a lighter texture.
- Granulated Sugar: For sweetness in the cake itself, balancing the tangy fruit.
- Baking Powder and Salt: These are your leavening agent and flavor enhancer, respectively. Don’t skip them!
- Eggs: Large eggs provide structure and moisture. Make sure they are at room temperature for better emulsification with other ingredients.
- Milk: Any type of milk works, whole milk will give a richer cake. For a dairy-free option, unsweetened almond or soy milk can be used.
- Vanilla Extract: A crucial flavor component that elevates the entire cake. Use good quality pure vanilla extract for the best taste.
- Melted Butter or Neutral Oil: I often use a little melted butter in my cake batter for added richness and moisture, but a neutral-flavored oil like canola or vegetable oil can also be used for a slightly lighter texture.
Substitutions and Considerations
- Shortcut: Yellow Cake Mix. If you’re short on time, a good quality yellow cake mix can be a fantastic shortcut for the batter. Just follow the package instructions, adding any enhancements you like (like extra vanilla or a splash of non-alcoholic rum extract for depth).
- Dairy-Free Options: As mentioned, use plant-based milk and a dairy-free butter alternative for the topping and batter.
- Flavor Boost: A tiny pinch of cinnamon or nutmeg can add a warm spice note to the cake batter, complementing the pineapple beautifully. A splash of non-alcoholic rum extract can also add a wonderfully complex aroma and flavor without the alcohol.
Remember, the goal is to have fun and make these mini cakes your own! Don’t be afraid to experiment a little once you’ve mastered the classic version.
Step-by-Step Instructions
Let’s get baking! These Classic Mini Pineapple Upside Down Cakes are surprisingly simple to make, and the individual portions are just too cute to resist. Follow these steps for perfect little treats every time.
Step 1: Prepare Your Muffin Tins
- Preheat & Grease: Start by preheating your oven to 350°F (175°C). This ensures your oven is at the correct temperature when your cakes are ready to go in. Next, generously grease a 12-cup standard muffin tin. I use a non-stick spray and then lightly flour the cups, tapping out any excess. This extra step is crucial for easily releasing the cakes later, as the caramel can be quite sticky.
Step 2: Create the Caramel Topping
- Melt Butter: In a small, microwave-safe bowl or a small saucepan, melt about 1/4 cup (4 tablespoons) of unsalted butter.
- Combine: Stir in 1/2 cup of packed light brown sugar until well combined and a thick paste forms.
- Distribute: Spoon about 1-2 teaspoons of this brown sugar-butter mixture into the bottom of each prepared muffin cup. Gently spread it out to cover the bottom as evenly as possible. This will be your gorgeous caramel layer!
Step 3: Arrange the Fruit
- Pineapple & Cherries: Take your well-drained small pineapple rings. For most standard muffin cups, one small ring fits perfectly. If your rings are a bit too large, you can trim them slightly, or use a smaller cookie cutter. Place one pineapple ring directly on top of the brown sugar mixture in each muffin cup.
- Add Cherries: Place a halved or whole maraschino cherry (or two, if you like!) in the center of each pineapple ring. This gives the cakes their iconic bullseye appearance.
Step 4: Prepare the Cake Batter
- Dry Ingredients: In a medium bowl, whisk together 1 1/2 cups all-purpose flour, 1 1/2 teaspoons baking powder, and 1/4 teaspoon salt. Set aside.
- Wet Ingredients: In a separate larger bowl, whisk together 1/2 cup (1 stick) melted unsalted butter (or neutral oil), 1 cup granulated sugar, 2 large eggs (room temperature for best results), 1 teaspoon vanilla extract, and 1/2 cup milk. Whisk until smooth and well combined.
- Combine: Gradually add the dry ingredients to the wet ingredients, mixing with a spoon or spatula just until combined. Be careful not to overmix; a few small lumps are perfectly fine. Overmixing can lead to a tough cake.
Step 5: Fill and Bake
- Spoon Batter: Spoon the cake batter evenly over the pineapple and cherries in each muffin cup. Fill each cup about two-thirds full, ensuring the pineapple is completely covered. Do not overfill, as the cakes will rise during baking.
- Bake: Transfer the muffin tin to your preheated oven. Bake for 18-22 minutes, or until the cakes are golden brown and a wooden skewer or toothpick inserted into the center of a cake comes out clean.
Step 6: Invert and Cool
- Cool Slightly: This is a critical step for perfect upside-down cakes! Once baked, remove the muffin tin from the oven and let the cakes cool in the tin for only 5-10 minutes. This allows the caramel to set slightly but remain fluid enough to release easily.
- Invert: After the brief cooling period, place a large wire rack or serving platter directly over the muffin tin. With oven mitts, carefully but confidently flip the entire tin over, inverting the cakes onto the rack/platter.
- Lift Off: Carefully lift the muffin tin away. If any pineapple or caramel sticks to the tin, gently scrape it out with a small spatula and re-apply it to the top of the corresponding cake. Be quick, but gentle!
- Serve: Let the mini cakes cool completely on the wire rack, or serve them warm with a scoop of vanilla ice cream or a dollop of whipped cream. Enjoy your beautiful, individual treats!
Tips & Suggestions
Making these Classic Mini Pineapple Upside Down Cakes is a joy, and with a few insider tips, you can ensure they turn out perfectly every time. These suggestions are specifically tailored for working with individual portions and achieving that irresistible caramel topping.
- Greasing is Gold: I cannot stress this enough – grease your muffin tins VERY well. Even if you have non-stick pans, a generous coating of butter or baking spray (the one with flour in it) is your best friend. The sticky caramel can be notoriously clingy, and thorough greasing will save you from heartbreak when inverting. Sometimes I even cut out small circles of parchment paper to place on the bottom of each cup after greasing and before adding the caramel.
- Pineapple Precision: For the mini cakes, using the small, canned pineapple rings makes life much easier. If you only have larger rings, use a round cookie cutter or a sharp knife to trim them to fit neatly into your muffin cups. The goal is to cover as much of the bottom as possible without crowding the edges too much. Patting the pineapple dry with paper towels is a small step that makes a big difference in the final caramel consistency.
- Don’t Overfill: When spooning the batter over the fruit, aim to fill each muffin cup about two-thirds full. This leaves enough room for the cakes to rise without spilling over, ensuring neat, attractive individual portions. Overfilling can lead to a messy bake and cakes that lose their shape.
- The Inversion Imperative: Timing is everything when inverting. You want to flip the cakes when they are warm, but not scorching hot. Waiting too long allows the caramel to cool and solidify in the pan, making it harder to release, and potentially leaving some of that glorious topping behind. Aim for that 5-10 minute cooling window in the pan.
- Caramel Cleanup: Sometimes, despite your best efforts, a little bit of the caramel or a piece of pineapple might stick to the bottom of the muffin cup when you invert. Don’t fret! Simply use a small, heat-proof spatula or knife to gently scrape it out and place it back on top of the corresponding cake. It’s a quick fix that makes all the difference in presentation.
-
Flavor Boosters:
- Warm Spices: A pinch of ground cinnamon or nutmeg in the cake batter pairs beautifully with the pineapple.
- Non-Alcoholic Rum Extract: For an extra layer of sophisticated flavor without the alcohol, try adding 1/2 teaspoon of non-alcoholic rum extract to your cake batter. It really enhances the tropical notes.
- Citrus Zest: A little orange or lemon zest in the batter can brighten the flavor profile beautifully.
- Serving Suggestions: These mini cakes are delightful on their own, but a small dollop of freshly whipped cream or a tiny scoop of vanilla bean ice cream takes them to an even higher level of indulgence. The cold cream or ice cream contrasts wonderfully with the warm, sweet cake.
Enjoy the process and the delicious reward of these perfectly portioned, classic treats!
Storage
These Classic Mini Pineapple Upside Down Cakes are best enjoyed fresh, when the caramel is still wonderfully gooey and the cake is tender. However, if you have leftovers (which is rare in my house!), they store quite well with a few simple tips.
-
Room Temperature:
For short-term storage, you can keep the mini pineapple upside down cakes at room temperature. Once they have completely cooled, arrange them in a single layer in an airtight container. They will stay fresh and delicious for about 1-2 days. The moisture from the pineapple can make the cakes a little softer over time, so an airtight seal is important to prevent them from drying out too much or getting stale.
-
Refrigeration:
If you need to store them for a bit longer, or if your kitchen is particularly warm, refrigeration is your best bet. Place the completely cooled cakes in a single layer in an airtight container. They will keep well in the refrigerator for up to 3-4 days. Be aware that the caramel topping will firm up considerably when chilled, but it will soften again when warmed. It’s best to let them come to room temperature or gently warm them before serving to get the best texture.
-
Freezing:
Freezing these mini cakes is possible, but it’s not always ideal due to the texture changes that can occur, especially with the delicate caramel and the moist pineapple. If you do choose to freeze them:
- Individual Wrapping: Once the cakes are completely cooled, wrap each one individually in plastic wrap, then again in aluminum foil. This double layer helps prevent freezer burn.
- Airtight Container: Place the individually wrapped cakes in a freezer-safe airtight container or a heavy-duty freezer bag.
- Storage Duration: They can be stored in the freezer for up to 1 month. Beyond that, the quality might start to decline.
- Thawing: To thaw, simply transfer the frozen cakes to the refrigerator overnight. You can then let them come to room temperature or gently warm them before serving.
-
Reheating:
For that fresh-baked feel, you can gently reheat chilled or room-temperature mini pineapple upside down cakes. Pop them into a preheated oven at 300°F (150°C) for about 5-10 minutes, or microwave them for 15-30 seconds until just warm. Be careful not to overheat in the microwave, as this can make them tough. Reheating will melt the caramel topping back into its lovely gooey state, making them extra enjoyable.
Final Thoughts
There you have it! I truly hope you enjoyed baking these Classic Mini Pineapple Upside Down Cakes as much as I do. They are more than just a dessert; they’re a delightful little bite of sunshine, perfectly portioned and utterly charming. The golden caramelized pineapple, the sweet cherry, and the moist, tender cake combine to create a nostalgic treat that never disappoints. These individual delights are an absolute must-try for their incredible ease, their beautiful presentation that always impresses, and that unforgettable flavor that brings a smile to everyone’s face. Go on, share a little joy with these delightful mini cakes!
Classic Mini Pineapple Upside Down Cakes: Perfect Treat!

These Classic Mini Pineapple Upside Down Cakes are a delightful single-serving dessert that combines moist vanilla cake with caramelized pineapple and cherries. Perfect for any occasion, they are both adorable and easy to serve!
- Prep Time: 15 mins
- Cook Time: 22 mins
- Total Time: 37 minutes
- Yield: 12 servings 1x
- Category: Dessert
- Method: Baking
- Cuisine: American
Ingredients
- 1/4 cup (4 tablespoons) unsalted butter (melted)
- 1/2 cup packed light brown sugar
- small canned pineapple rings (well-drained)
- maraschino cherries (drained and halved or whole)
- 1 1/2 cups all-purpose flour
- 1 1/2 teaspoons baking powder
- 1/4 teaspoon salt
- 1/2 cup (1 stick) melted unsalted butter (or neutral oil)
- 1 cup granulated sugar
- 2 large eggs (room temperature)
- 1 teaspoon vanilla extract
- 1/2 cup milk (any type, or dairy-free alternative)
Instructions
- Preheat your oven to 350°F (175°C) and generously grease a 12-cup standard muffin tin.
- In a small bowl, melt about 1/4 cup of unsalted butter. Stir in 1/2 cup of packed light brown sugar until well combined and a thick paste forms.
- Spoon about 1-2 teaspoons of the brown sugar-butter mixture into the bottom of each prepared muffin cup.
- Place one pineapple ring directly on top of the brown sugar mixture in each muffin cup and add a halved or whole maraschino cherry in the center of each pineapple ring.
- In a medium bowl, whisk together 1 1/2 cups all-purpose flour, 1 1/2 teaspoons baking powder, and 1/4 teaspoon salt. Set aside.
- In a separate larger bowl, whisk together 1/2 cup melted unsalted butter, 1 cup granulated sugar, 2 large eggs, 1 teaspoon vanilla extract, and 1/2 cup milk until smooth.
- Gradually add the dry ingredients to the wet ingredients, mixing just until combined.
- Spoon the cake batter evenly over the pineapple and cherries in each muffin cup, filling each cup about two-thirds full.
- Bake for 18-22 minutes, or until the cakes are golden brown and a toothpick inserted comes out clean.
- Remove the muffin tin from the oven and let the cakes cool in the tin for 5-10 minutes before inverting onto a wire rack or serving platter.
Nutrition
- Serving Size: 1 mini cake
- Calories: 180
- Sugar: 15 g
- Sodium: 150 mg
- Fat: 7 g
- Saturated Fat: 4 g
- Unsaturated Fat: 3 g
- Trans Fat: 0 g
- Carbohydrates: 25 g
- Fiber: 1 g
- Protein: 2 g
- Cholesterol: 40 mg
Keywords: Ensure to grease the muffin tins very well to prevent sticking. You can use small canned pineapple rings for ease, and feel free to add a pinch of cinnamon or nutmeg for extra flavor.
Leave a Comment