
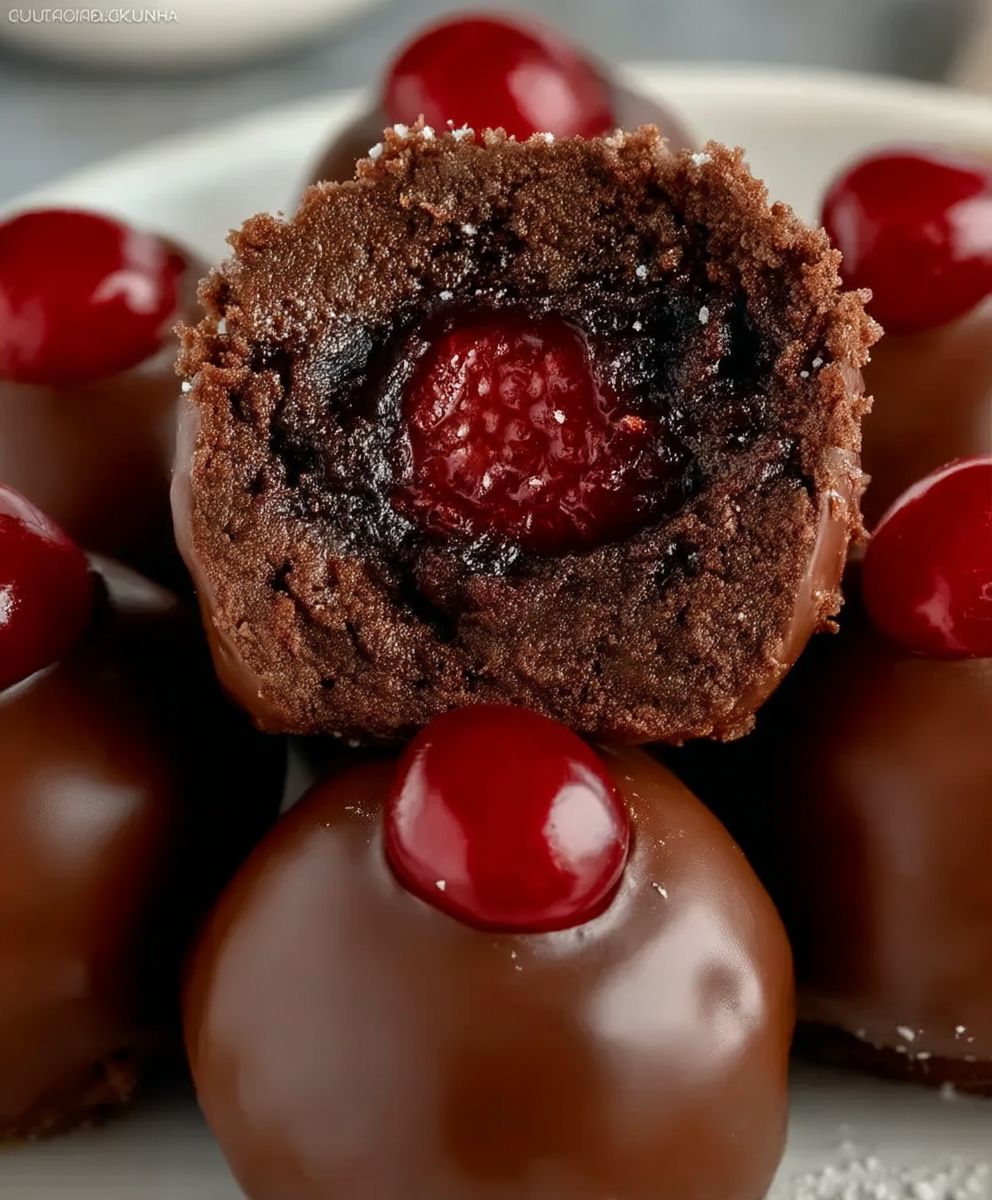
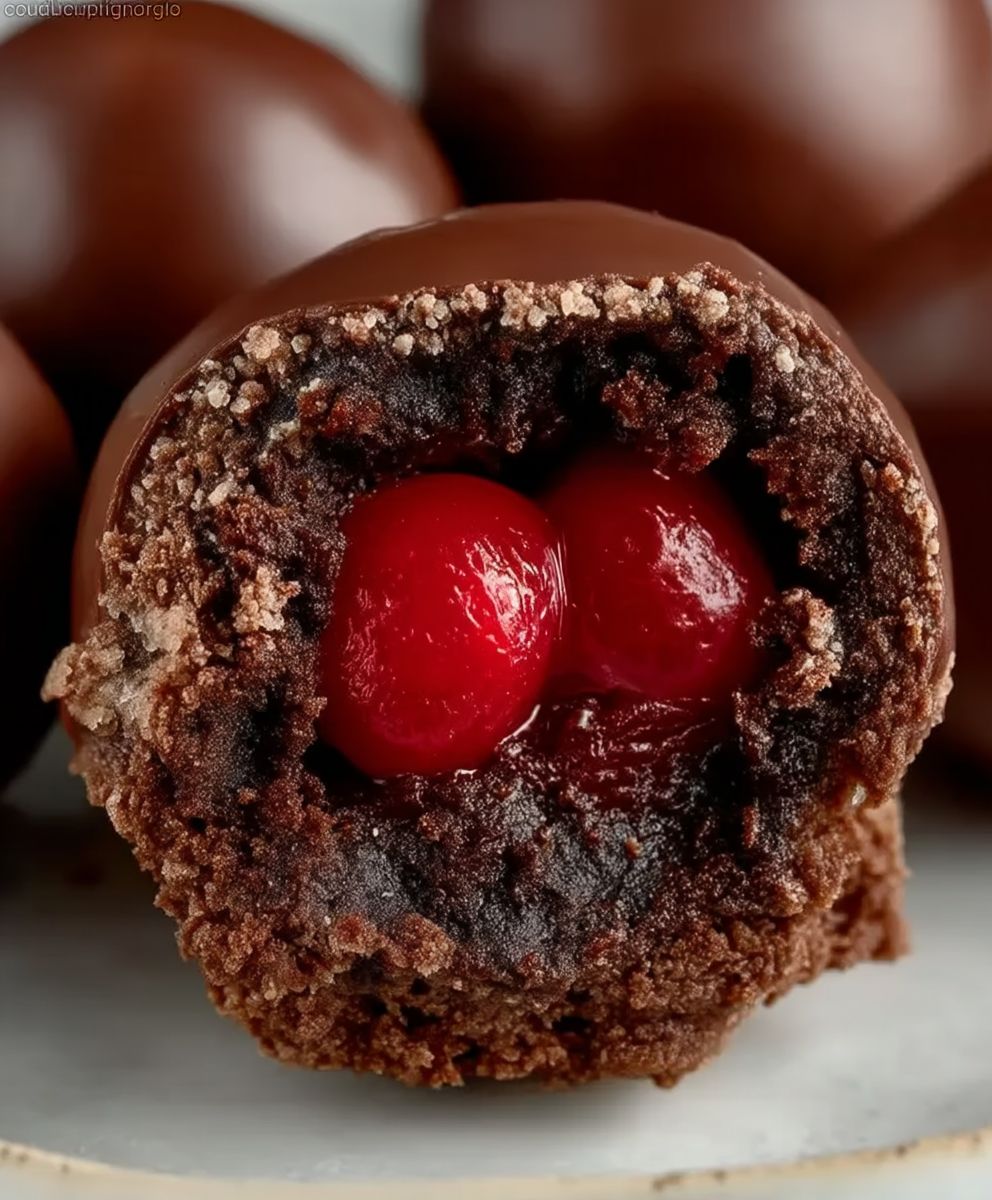
Chocolate Cherry Brownie Bombs: Prepare to have your dessert world rocked! Imagine biting into a fudgy, intensely chocolate brownie, only to discover a burst of sweet, juicy cherry nestled within. These aren’t your average brownies; they’re an explosion of flavor and texture in every single bite. I’m so excited to share this recipe with you!
While the exact origins of combining chocolate and cherries are a bit murky, this pairing has been a beloved classic for generations. Think Black Forest cake – a testament to the harmonious marriage of these two flavors. The richness of the chocolate perfectly complements the tartness of the cherries, creating a symphony of taste that’s simply irresistible.
What makes these Chocolate Cherry Brownie Bombs so special? It’s the perfect combination of textures: the chewy, fudgy brownie, the soft, yielding cherry, and the satisfyingly dense overall structure. Plus, they’re incredibly easy to make! Whether you’re a seasoned baker or a kitchen novice, you’ll find this recipe straightforward and rewarding. People adore these because they’re decadent, portable, and perfect for satisfying any chocolate craving. Get ready to impress your friends and family with these delightful treats!
Ingredients:
- For the Brownie Base:
- 1 cup (2 sticks) unsalted butter, melted
- 2 cups granulated sugar
- 1 cup unsweetened cocoa powder
- 1 teaspoon salt
- 1 teaspoon baking powder
- 1 tablespoon vanilla extract
- 4 large eggs
- 1 cup all-purpose flour
- For the Cherry Filling:
- 1 (10 ounce) jar maraschino cherries, drained and patted dry
- 1/4 cup cherry liqueur (optional, but highly recommended!)
- 1 tablespoon cornstarch
- For the Chocolate Coating:
- 12 ounces semi-sweet chocolate chips
- 2 tablespoons coconut oil (or vegetable shortening)
- For Decoration (Optional):
- Sprinkles
- Chopped nuts
- Sea salt flakes
Preparing the Brownie Base:
- Melt the Butter: First, melt the butter in a large, microwave-safe bowl. I usually do this in 30-second intervals, stirring in between, to prevent it from splattering everywhere. You can also melt it in a saucepan over low heat if you prefer.
- Combine Wet Ingredients: Once the butter is melted, whisk in the granulated sugar, cocoa powder, salt, and baking powder. Make sure to get rid of any lumps of cocoa powder. The mixture will be quite thick at this point, and that’s perfectly fine.
- Add Vanilla and Eggs: Stir in the vanilla extract. Then, add the eggs one at a time, mixing well after each addition. This is crucial for creating that fudgy brownie texture we all love. Don’t overmix, but make sure each egg is fully incorporated.
- Incorporate the Flour: Gradually add the all-purpose flour, mixing until just combined. Be careful not to overmix the batter, as this can lead to tough brownies. A few streaks of flour are okay; they’ll disappear during baking.
Preparing the Cherry Filling:
- Prepare the Cherries: Drain the maraschino cherries thoroughly and pat them dry with paper towels. This is important to prevent the filling from being too watery.
- Chop the Cherries: Roughly chop the cherries into smaller pieces. I like to quarter them, but you can chop them finer if you prefer a smoother filling.
- Combine with Liqueur and Cornstarch: In a small bowl, combine the chopped cherries, cherry liqueur (if using), and cornstarch. The cornstarch will help to thicken the filling during baking. Stir well to ensure the cherries are evenly coated.
Baking the Brownies:
- Preheat the Oven: Preheat your oven to 350°F (175°C).
- Prepare the Baking Pan: Grease and flour an 8×8 inch baking pan. You can also line the pan with parchment paper, leaving an overhang on the sides, for easy removal. This is my preferred method because it makes cleanup a breeze!
- Pour Half the Batter: Pour half of the brownie batter into the prepared baking pan and spread it evenly.
- Add the Cherry Filling: Spoon the cherry filling evenly over the brownie batter. Try to avoid getting the filling too close to the edges of the pan, as it can burn.
- Top with Remaining Batter: Carefully spoon the remaining brownie batter over the cherry filling. It’s okay if the filling isn’t completely covered; it will spread during baking. You can use a spatula to gently spread the batter as evenly as possible.
- Bake: Bake for 30-35 minutes, or until a toothpick inserted into the center comes out with moist crumbs attached. Be careful not to overbake, as this will result in dry brownies.
- Cool Completely: Let the brownies cool completely in the pan before cutting them into squares. This is important for preventing them from crumbling. I usually let them cool for at least an hour, or even longer if I have the time.
Creating the Brownie Bombs:
- Cut the Brownies: Once the brownies are completely cool, cut them into small squares, about 1-inch each. You should get around 64 squares from an 8×8 inch pan.
- Shape into Balls: Gently roll each brownie square into a ball. Don’t worry if they’re not perfectly round; they’ll still taste amazing! If the brownies are too soft to roll easily, you can chill them in the refrigerator for 30 minutes to firm them up.
- Place on Baking Sheet: Place the brownie balls on a baking sheet lined with parchment paper.
- Chill the Brownie Balls: Place the baking sheet with the brownie balls into the freezer for at least 30 minutes. This will help them firm up and make them easier to dip in the chocolate. This step is crucial!
Preparing the Chocolate Coating:
- Melt the Chocolate: In a double boiler or a microwave-safe bowl, combine the semi-sweet chocolate chips and coconut oil (or vegetable shortening). If using a double boiler, heat over medium heat, stirring occasionally, until the chocolate is completely melted and smooth. If using a microwave, heat in 30-second intervals, stirring in between, until melted. The coconut oil (or shortening) helps to thin the chocolate and gives it a nice shine.
- Ensure Smooth Consistency: Stir the melted chocolate until it is smooth and glossy. If the chocolate is too thick, you can add a little more coconut oil (or shortening), one teaspoon at a time, until you reach the desired consistency.
Dipping and Decorating:
- Dip the Brownie Balls: Remove the brownie balls from the freezer. One at a time, dip each brownie ball into the melted chocolate, using a fork or dipping tools to coat it completely.
- Remove Excess Chocolate: Gently tap the fork against the side of the bowl to remove any excess chocolate.
- Place on Parchment Paper: Place the chocolate-covered brownie ball back onto the parchment-lined baking sheet.
- Decorate (Optional): Immediately sprinkle the brownie balls with your desired decorations, such as sprinkles, chopped nuts, or sea salt flakes. The chocolate will set quickly, so you need to add the decorations right away.
- Chill to Set: Place the baking sheet with the chocolate-covered brownie balls in the refrigerator for at least 15-20 minutes, or until the chocolate is completely set.
Storage:
Store the Chocolate Cherry Brownie Bombs in an airtight container in the refrigerator for up to a week. They can also be frozen for longer storage. Just thaw them in the refrigerator before serving.
Conclusion:
And there you have it! These Chocolate Cherry Brownie Bombs are more than just a dessert; they’re an experience. From the rich, fudgy brownie base to the burst of sweet cherry in every bite, this recipe is a guaranteed crowd-pleaser. I truly believe this is a must-try recipe for anyone who loves chocolate, cherries, or just a really, really good brownie.
Why is it a must-try? Well, beyond the incredible flavor combination, it’s also surprisingly easy to make. You don’t need to be a master baker to whip up a batch of these beauties. The recipe is straightforward, and the results are consistently delicious. Plus, they’re perfectly portioned, making them ideal for parties, potlucks, or just a little self-indulgence (we all deserve it!). The combination of textures, from the slightly crisp exterior to the gooey interior, is simply divine. And let’s not forget the visual appeal! These little bombs look absolutely stunning on a dessert platter.
But the best part? The versatility! While I’m a huge fan of the classic chocolate cherry combination, feel free to get creative with your fillings.
Serving Suggestions and Variations:
* Ice Cream Dream: Serve these warm with a scoop of vanilla ice cream for an extra decadent treat. A dollop of whipped cream and a sprinkle of chocolate shavings wouldn’t hurt either!
* Nutty Delight: Add chopped walnuts or pecans to the brownie batter for a delightful crunch.
* Mint Chocolate Madness: Substitute the cherry filling with a mint chocolate ganache for a refreshing twist.
* Caramel Craze: Swirl in some caramel sauce before baking for a gooey, caramel-infused brownie bomb.
* Espresso Enhancement: Add a teaspoon of instant espresso powder to the brownie batter to deepen the chocolate flavor.
* White Chocolate Wonder: Drizzle melted white chocolate over the cooled brownie bombs for a beautiful and delicious finish.
* Boozy Bombs: Soak the cherries in Kirsch or another cherry liqueur for an extra kick (adults only, of course!).
These are just a few ideas to get you started. The possibilities are endless! Don’t be afraid to experiment and create your own signature brownie bomb. Think about what flavors you love and how you can incorporate them into this recipe. Maybe a raspberry filling? Or perhaps a peanut butter swirl? The only limit is your imagination!
I’m so excited for you to try this recipe. I know you’re going to love it as much as I do. The rich chocolate, the sweet cherries, the perfect texture – it’s a winning combination.
So, what are you waiting for? Head to the kitchen, gather your ingredients, and get baking! I promise you won’t regret it. And when you do, please, please, please share your experience with me! I’d love to hear what you think of the recipe, what variations you tried, and how much everyone enjoyed them. You can leave a comment below, tag me on social media, or even send me an email. I’m always eager to hear from fellow food lovers.
I truly believe that these Chocolate Cherry Brownie Bombs will become a new favorite in your household. They’re easy to make, incredibly delicious, and endlessly customizable. So go ahead, give them a try, and let me know what you think! Happy baking!
Chocolate Cherry Brownie Bombs: Decadent Recipe & Baking Tips
Fudgy chocolate brownie bites filled with sweet maraschino cherries and coated in a rich chocolate shell. Perfect for parties or a decadent dessert.
Ingredients
Instructions
Recipe Notes
- Draining and patting the cherries dry is crucial to prevent a watery filling.
- Don’t overmix the brownie batter, as this can lead to tough brownies.
- Chilling the brownie balls before dipping helps them hold their shape and makes them easier to work with.
- Store the Chocolate Cherry Brownie Bombs in an airtight container in the refrigerator for up to a week. They can also be frozen for longer storage. Just thaw them in the refrigerator before serving.

Leave a Comment