
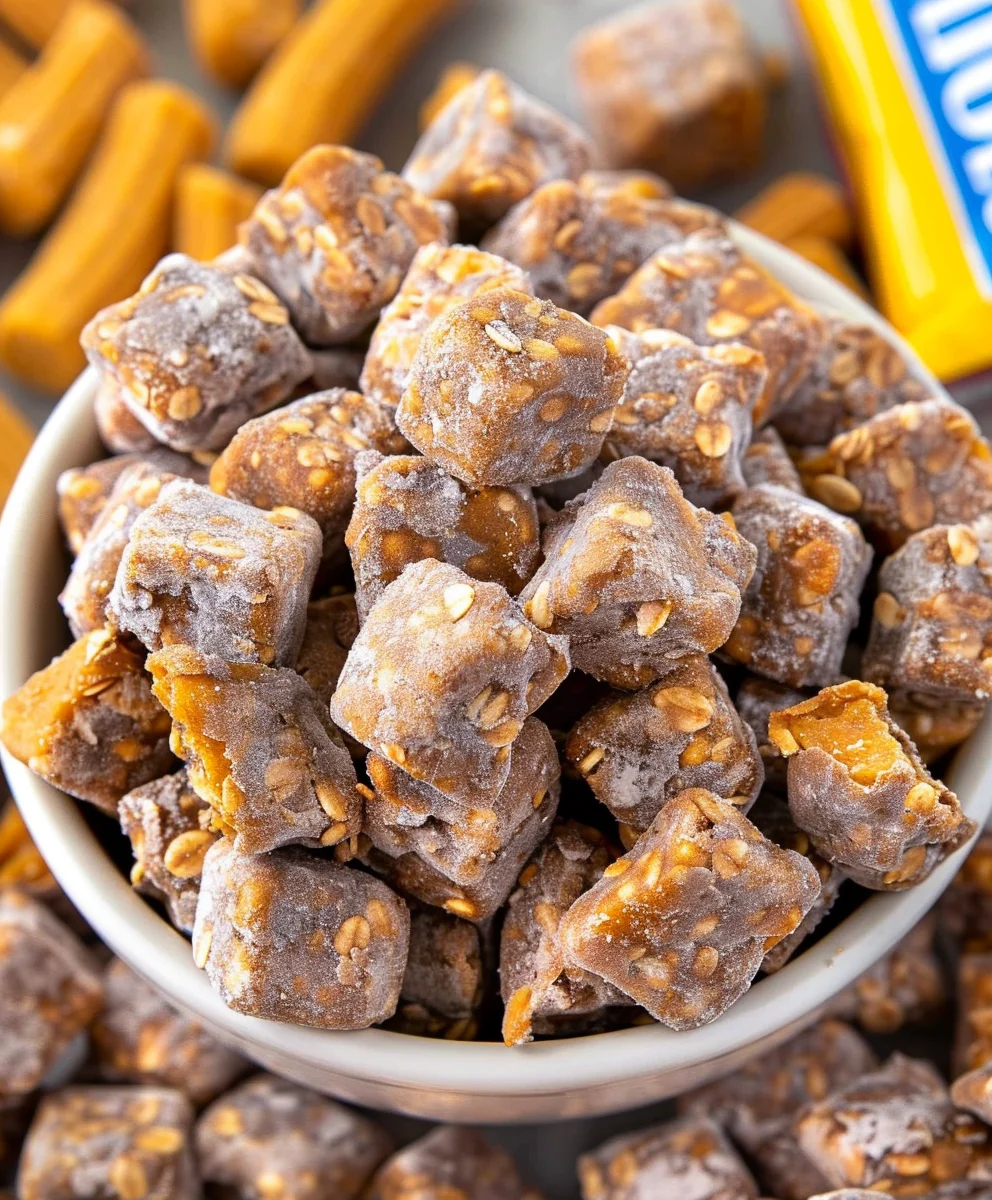
Butterfinger Puppy Chow is more than just a snack; it’s a delightful experience that promises pure, unadulterated joy with every crunchy, chocolatey bite. If you’ve ever sought a treat that perfectly marries irresistible flavors with satisfying textures, then you’ve arrived at your next favorite indulgence. This beloved confection, traditionally known as Muddy Buddies or Monkey Munch, has graced countless gatherings, potlucks, and cozy movie nights across America for generations. Its enduring appeal stems from its brilliant simplicity – a no-bake wonder that transforms humble cereal into an extraordinary dessert.
I find that the addition of crushed Butterfinger candy takes this classic to an entirely new level of deliciousness. The unique combination of sweet powdered sugar, rich melted chocolate, creamy peanut butter, and crisp Chex cereal pieces now becomes an exquisite canvas for the distinct, crunchy, and slightly salty peanut butter flavor of Butterfinger. This dish offers a symphony of sensations: the initial melt-in-your-mouth powder, followed by the satisfying crunch of the cereal, and then the delightful chew of the candy bits. It’s no wonder people adore this recipe; it’s incredibly easy to prepare, incredibly versatile, and simply impossible to stop eating. Butterfinger Puppy Chow truly stands out as a crowd-pleaser that I am confident will become a staple in your recipe collection.
Ingredients:
- 9 cups Chex cereal (I usually go for Rice Chex or Corn Chex; they hold up beautifully)
- 1 cup semi-sweet chocolate chips (good quality makes a difference, trust me!)
- ½ cup creamy peanut butter (fresh, good-quality peanut butter is key for the best texture)
- ¼ cup unsalted butter (this helps achieve that perfect smooth consistency)
- 1 teaspoon vanilla extract (pure vanilla extract elevates all the flavors)
- 1 ½ cups powdered sugar (also known as confectioners’ sugar)
- 6 standard-sized Butterfinger candy bars (about 1.9 ounces each), crushed into small, manageable pieces
Equipment You’ll Need:
Having the right tools ready before you start makes the whole process so much smoother and more enjoyable. Think of it as setting yourself up for success in creating the most irresistible Butterfinger Puppy Chow!
- Large Microwave-Safe Mixing Bowl: You’ll need one big enough to comfortably hold the chocolate, peanut butter, and butter for melting.
- Extra Large Mixing Bowl: This will be for gently tossing the cereal with the melted mixture. The bigger, the better, to avoid crushing the delicate cereal.
- Measuring Cups and Spoons: For precise measurements of all your delicious ingredients.
- Rubber Spatula: Essential for scraping down bowls and gently stirring.
- Large Resealable Plastic Bag (Gallon Size): At least two are usually helpful. This is my go-to for coating the cereal evenly with powdered sugar without making a huge mess.
- Baking Sheet(s): Lined with parchment paper or silicone mats, these are perfect for spreading out the finished Butterfinger Puppy Chow to cool and set.
- Mallet or Rolling Pin: For crushing those glorious Butterfinger candy bars.
- Ziploc Bag (Quart Size) or Food Processor: To contain the Butterfinger bars while you crush them.
- Fine-Mesh Sieve (Optional but Recommended): For sifting powdered sugar to prevent lumps.
Prepping Your Workspace: The Foundation for Delicious Butterfinger Puppy Chow
Before we dive into the fun stuff, let’s get organized. This step is often overlooked, but a well-prepped kitchen makes all the difference, especially when you’re making a treat as universally loved as Butterfinger Puppy Chow.
- Gather Your Ingredients: Lay out all your measured ingredients on the counter. Having everything at arm’s reach prevents frantic searches mid-recipe.
- Prepare Your Cereal: Measure out your 9 cups of Chex cereal and gently place them into the extra-large mixing bowl. Set this aside. This bowl needs to be large enough to allow you to toss the cereal without it spilling over the sides or getting overly compressed.
- Crush the Butterfinger Bars: This is a crucial step for achieving that signature Butterfinger crunch in your puppy chow. Unwrap all 6 standard-sized Butterfinger candy bars. Place them into a sturdy gallon-sized resealable plastic bag (or two quart-sized bags if you prefer smaller batches). Using a rolling pin or a meat mallet, gently but firmly crush the candy bars into small, irregular pieces. You want a mix of fine crumbs and small chunks – this provides both flavor dispersion and textural interest. Avoid turning them into a fine powder; we want some bite! Once crushed, set these aside.
- Line Baking Sheets: Line one or two large baking sheets with parchment paper or silicone baking mats. These will be used for cooling your finished puppy chow. Having them ready means you can quickly spread out your creation, allowing it to set properly.
- Measure Powdered Sugar: Measure your 1 ½ cups of powdered sugar and set it aside. If you’re prone to lumps, I highly recommend giving it a quick sift through a fine-mesh sieve. This ensures an even, beautiful coating later on.
Phase 1: Melting the Chocolate & Peanut Butter Mixture
This is where the magic begins, creating the rich, gooey base that will perfectly coat your cereal. We’re aiming for a silky-smooth mixture that will adhere beautifully without being too thick or too thin. Precision here ensures every piece of your Butterfinger Puppy Chow is coated in decadent flavor.
- Combine Melting Ingredients: In your large microwave-safe mixing bowl, combine the 1 cup of semi-sweet chocolate chips, ½ cup of creamy peanut butter, and ¼ cup of unsalted butter. I always make sure these are good quality ingredients because they are the heart of the flavor profile.
- Microwave in Intervals: Place the bowl in the microwave and heat on high for 30 seconds. Remove the bowl and stir the mixture with your rubber spatula. You’ll notice it’s starting to soften, but likely not fully melted yet.
- Continue Heating and Stirring: Return the bowl to the microwave and continue heating in 30-second intervals, stirring vigorously after each interval. It’s absolutely critical to stir after every 30 seconds to prevent the chocolate from burning or seizing. Chocolate can be finicky, and gentle, consistent heating is key.
- Achieve Silky Smoothness: Continue this process until the mixture is completely smooth and creamy, with no lumps of chocolate or butter remaining. This usually takes about 1 ½ to 2 minutes in total, depending on your microwave’s wattage. The consistency should be pourable but thick enough to coat a spoon.
- Stir in Vanilla Extract: Once the chocolate mixture is perfectly smooth, remove it from the microwave and stir in the 1 teaspoon of vanilla extract. The vanilla really brightens up the flavors and adds a lovely aromatic depth to your Butterfinger Puppy Chow. Mix until it’s fully incorporated.
Phase 2: Coating the Cereal Base – The Heart of Butterfinger Puppy Chow
Now for the fun part! This is where we transform plain Chex cereal into the delicious, chocolatey foundation of our Butterfinger Puppy Chow. The goal here is to coat every single piece of cereal evenly without crushing it, maintaining that satisfying crunch.
- Pour Mixture Over Cereal: Take your extra-large mixing bowl, where you’ve already placed your 9 cups of Chex cereal. Carefully pour the warm, smooth chocolate and peanut butter mixture evenly over the cereal. Try to distribute it as much as possible as you pour.
- Gentle Tossing is Key: Using your rubber spatula, gently fold and stir the cereal. The key word here is “gently.” You want to coat all the cereal pieces without breaking them. Start by scraping from the bottom of the bowl and folding upwards. Continue this process until all (or at least most) of the cereal pieces are thoroughly coated in the chocolatey goodness. This might take a few minutes of patient stirring. Don’t rush this step! An even coating is crucial for uniform flavor and texture in your finished Butterfinger Puppy Chow. If the mixture starts to cool and thicken too much, making it hard to coat, you can pop the bowl back into the microwave for 10-15 seconds to slightly warm it again, but be careful not to overheat the cereal.
Phase 3: Adding the Powdered Sugar & Butterfinger Bits – The Signature Finish
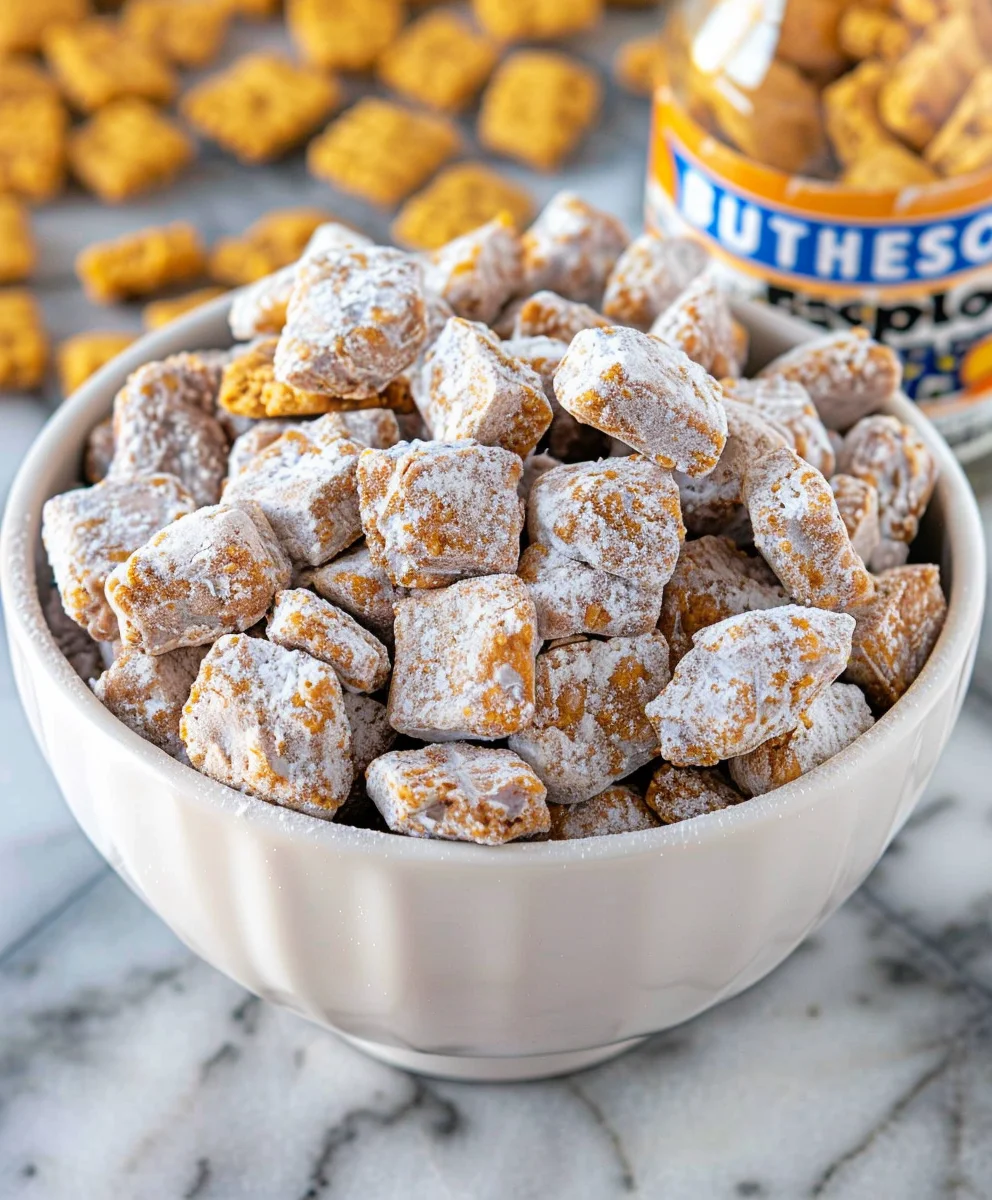
This phase is what gives Puppy Chow its iconic “muddy” or “dusty” appearance and, in our case, the incredible Butterfinger crunch! It’s messy but incredibly rewarding, resulting in that irresistible treat we all love.
- Prepare for Coating: Divide your chocolate-coated cereal mixture in half. Place one half into a large, gallon-sized resealable plastic bag. This method is, in my opinion, the absolute best for coating puppy chow evenly and with minimal mess.
- Add Powdered Sugar: Add half of your measured powdered sugar (approximately ¾ cup) into the bag with the cereal.
- Shake it Up!: Seal the bag tightly, making sure there’s plenty of air inside to allow for good tossing. Now, gently shake and tumble the bag. Shake it from side to side, up and down, and even give it a gentle roll. Continue shaking for about 1-2 minutes, or until the cereal pieces are completely coated in powdered sugar. They should look delightfully “snowy” and no longer shiny from the chocolate mixture.
- Incorporate Butterfinger Bits (First Batch): Once the first batch of cereal is fully coated with powdered sugar, open the bag. Add half of your crushed Butterfinger candy bar pieces into the bag. Gently shake the bag again for another 30 seconds to a minute. This light shake helps the Butterfinger pieces adhere to the powdered sugar and chocolate-coated cereal, ensuring they’re distributed throughout the mix and become an integral part of your Butterfinger Puppy Chow.
- Repeat for Second Batch: Pour the contents of the first bag onto one of your prepared baking sheets, spreading it out evenly. Repeat steps 1-4 with the remaining half of the chocolate-coated cereal, the rest of the powdered sugar, and the remaining crushed Butterfinger pieces.
- Combine and Gently Toss: Once both batches are done and spread on the baking sheets, I like to gently combine them on one large baking sheet (or leave them on separate ones if you prefer). Give them a final, very gentle toss with your hands (if clean!) or a spatula to ensure the Butterfinger pieces are evenly distributed throughout the entire batch of your delectable Butterfinger Puppy Chow. This also helps to break up any small clumps that might have formed.
Phase 4: Setting and Serving Your Irresistible Butterfinger Puppy Chow
After all that careful preparation, it’s time for the final stretch! This phase ensures your Butterfinger Puppy Chow sets up perfectly, making it easy to handle, store, and most importantly, enjoy.
- Allow to Set: Spread your finished Butterfinger Puppy Chow out in an even layer on the prepared baking sheets. Allow it to cool and set for at least 15-30 minutes at room temperature. For a quicker set or if your kitchen is warm, you can place the baking sheets in the refrigerator for about 10-15 minutes. The goal is for the chocolate-peanut butter coating to firm up, preventing the pieces from sticking together excessively and ensuring the powdered sugar and Butterfinger bits are well adhered.
- Breaking Up Clumps: Once set, you might find some pieces have stuck together. Gently break them apart with your hands. This is perfectly normal and easy to fix, creating those perfect bite-sized clusters of Butterfinger Puppy Chow.
- Storage: Store your magnificent Butterfinger Puppy Chow in an airtight container at room temperature for up to one week. While it’s best enjoyed fresh, it maintains its deliciousness for quite a while. If you want to extend its shelf life, you can store it in the refrigerator, but I find the texture is best at room temperature, as the chocolate and peanut butter remain slightly softer and more yielding.
- Serving Suggestions: This treat is absolutely fantastic on its own, perfect for snacking, movie nights, or parties. You can also serve it in small bowls as part of a dessert bar or even sprinkle it over a scoop of vanilla ice cream for an extra-indulgent treat. The crunch of the cereal combined with the sweet, nutty coating and the glorious Butterfinger pieces is simply divine. It’s a crowd-pleaser every single time, and I guarantee your friends and family will be asking for the recipe for this extraordinary Butterfinger Puppy Chow!
-
Troubleshooting Tips for Perfect Butterfinger Puppy Chow:
- Chocolate Mixture Too Thick to Coat? If your chocolate and peanut butter mixture has cooled too much, making it difficult to coat the cereal evenly, simply pop the bowl back into the microwave for 10-15 seconds. Give it a good stir, and it should loosen up nicely.
- Cereal Clumped Together After Coating? This can happen if the chocolate mixture was a bit too warm or if the powdered sugar wasn’t added quickly enough. Don’t worry! Once the puppy chow has set (either at room temp or briefly in the fridge), you can gently break apart the larger clumps with your hands to create individual pieces.
- Powdered Sugar Not Sticking? Ensure the chocolate-coated cereal is still slightly warm and tacky when you add it to the bag with the powdered sugar. If it’s too cool, the sugar won’t adhere as well. Also, make sure to shake the bag vigorously and for long enough to get an even coating.
- Butterfinger Bits Sinking to the Bottom? If you find the Butterfinger bits settling, try adding them in batches during the powdered sugar coating process. A final gentle toss after spreading on the baking sheet also helps redistribute them.
-
Making Ahead and Gifting:
This Butterfinger Puppy Chow is a fantastic make-ahead treat, perfect for potlucks, bake sales, or as a thoughtful homemade gift. Package it in pretty cellophane bags tied with a ribbon, or in festive airtight containers. It travels incredibly well and is always a welcome sight. I often make a double batch because it disappears so quickly!
Conclusion:
Well, my friends, we’ve reached the sweet finale of our culinary journey today, and I truly hope you’re as excited as I am about what we’ve just discussed! If you’re looking for a dessert that’s not just a treat but a whole experience, something that brings smiles and happy chatter, then this recipe is absolutely, without a doubt, a must-try. I genuinely believe that once you whip up a batch, you’ll understand why I’m so passionate about it. It’s more than just a snack; it’s a delightful concoction that perfectly balances rich chocolate, creamy peanut butter, and that irresistible, unique crunch of Butterfinger candy. Every single bite delivers a symphony of textures and flavors that will tantalize your taste buds and leave you reaching for just one more handful.
Why This Recipe is an Absolute Game-Changer
What makes this particular recipe stand out from the crowd? It’s the magical inclusion of Butterfinger, which transforms a beloved classic into something truly extraordinary. That signature crispy, peanut-butter-y, somewhat flaky texture of Butterfinger pieces, mixed into the familiar Chex-chocolate-peanut butter coating, adds a layer of complexity and fun that you simply won’t find in traditional versions. It’s nostalgic yet fresh, familiar yet exciting. Plus, let’s not forget the sheer convenience – it’s a no-bake wonder, meaning less time in the kitchen and more time enjoying your delicious creation. Perfect for busy schedules or when you need a show-stopping treat without all the fuss. Whether you’re a seasoned baker or a kitchen novice, this recipe is incredibly forgiving and guarantees fantastic results every single time. It truly is one of those recipes that looks impressive but is deceptively simple to execute.
I’ve found that this decadent snack is incredibly versatile, fitting into almost any occasion with ease. Planning a casual movie night with friends? Grab a big bowl of this. Hosting a lively game day get-together? Serve it in individual cups for easy snacking. Need a unique, homemade gift for a teacher or neighbor? Package it up in a cute cellophane bag with a ribbon. It’s also a fantastic addition to school lunchboxes (check for school nut policies first!) or as a pick-me-up during a long afternoon. The joy of making something so delicious and seeing the pure delight on people’s faces when they try it is, for me, one of the greatest rewards of cooking and baking. This isn’t just a recipe; it’s an invitation to create moments of joy and shared sweetness.
Creative Serving Suggestions and Exciting Variations
Beyond serving it straight from the bowl (which, let’s be honest, is perfectly acceptable!), there are so many fun ways to enjoy and even customize your Butterfinger Puppy Chow. For parties, consider serving it in mini paper cups or small clear plastic bags, tied with a festive ribbon, making it easy for guests to grab and mingle. For a more elegant presentation, you could layer it in small dessert shot glasses with a dollop of whipped cream or a sprinkle of additional Butterfinger bits on top. Imagine serving it alongside a scoop of vanilla ice cream – the warm, soft ice cream contrasting with the crunchy, sweet puppy chow is an absolute dream!
And now for the fun part: variations! While the core recipe for this delightful treat is stellar, feel free to experiment.
- For an extra layer of chocolatey goodness, drizzle a bit of melted dark or white chocolate over the finished puppy chow before it sets.
- If you love a little salt with your sweet, a handful of mini pretzel sticks tossed in at the end adds a fantastic savory crunch.
- Feeling festive? Add some holiday-themed sprinkles or M&M’s along with your powdered sugar. Red and green for Christmas, pastels for Easter, or orange and black for Halloween – the possibilities are endless!
- You could also try swapping out some of the Chex cereal for another kind, like Crispix, or even a different flavored Chex for a subtle twist.
- For those who can’t get enough peanut butter, consider adding a tiny bit of peanut butter powder to your powdered sugar mixture for an extra boost of nutty flavor.
- Want to explore other candy bar options? While the Butterfinger is truly special here, you could try crushed Heath bars or Snickers for different flavor profiles in future batches.
These small tweaks can make each batch a unique culinary adventure, perfectly suited to your mood or the occasion, and truly elevate your homemade snack experience.
Your Turn: Get in the Kitchen and Share the Sweetness!
So, what are you waiting for? I wholeheartedly encourage you to roll up your sleeves, gather your ingredients, and give this incredible recipe a try. You’ll be amazed at how quickly it comes together and how unbelievably delicious the results are. It’s a recipe that promises big flavor with minimal effort, making it a perfect project for a quiet afternoon or a fun activity with family. I can almost taste the irresistible combination of chocolate, peanut butter, and Butterfinger crunch already, and I’m confident you’ll feel the same way once you’ve made your own batch of this fantastic Butterfinger Puppy Chow.
Once you’ve made your delicious creation, I would absolutely love to hear about your experience! Did you stick to the original recipe, or did you venture into some of the variations? What did your friends and family think? Did it disappear as quickly as it does in my house? Please, don’t hesitate to leave a comment below or share your photos on social media – I love seeing your culinary triumphs and hearing your feedback. Your stories inspire me and help this wonderful community grow. Thank you for joining me on this sweet adventure, and happy snacking!
Butterfinger Puppy Chow
Butterfinger Puppy Chow is an irresistible no-bake treat combining crisp Chex cereal with a rich chocolate-peanut butter coating, powdered sugar, and crunchy Butterfinger candy bits. This beloved confection offers a symphony of sweet, salty, and satisfying textures, perfect for any gathering.
Ingredients
-
7 cups Rice Chex Cereal
-
1 cup semi-sweet chocolate chips
-
½ cup creamy peanut butter
-
¼ cup salted butter
-
1 teaspoon pure vanilla extract
-
18 fun size Butterfinger candy bars (15 crushed, 3 roughly chopped for garnish)
-
1 ¼ cup powdered sugar, sifted
Instructions
-
Step 1
Measure 7 cups Rice Chex cereal into an extra-large mixing bowl. Crush 15 fun size Butterfinger bars into small pieces; roughly chop 3 for garnish. Set aside. Line baking sheets with parchment paper. Measure 1 ¼ cups sifted powdered sugar. -
Step 2
In a microwave-safe bowl, combine 1 cup chocolate chips, ½ cup creamy peanut butter, and ¼ cup salted butter. Microwave in 30-second intervals, stirring vigorously after each, until completely smooth and creamy (approx. 1.5-2 minutes). Stir in 1 teaspoon pure vanilla extract. -
Step 3
Pour the warm chocolate mixture evenly over the Chex cereal in the extra-large bowl. Gently fold with a rubber spatula until the cereal pieces are thoroughly coated. Do not rush this step to avoid crushing the cereal. -
Step 4
Divide the chocolate-coated cereal in half. Place one half into a gallon-sized resealable plastic bag. Add half of the powdered sugar (approximately ⅝ cup) and half of the crushed Butterfinger pieces to the bag. Seal tightly and gently shake for 1-2 minutes until cereal is fully coated. Repeat for the second half of cereal, remaining powdered sugar, and crushed Butterfinger pieces. Spread the coated puppy chow onto the prepared baking sheets. -
Step 5
Allow the Butterfinger Puppy Chow to cool and set for 15-30 minutes at room temperature, or refrigerate for 10-15 minutes. Gently break apart any clumps. Garnish with the roughly chopped Butterfinger pieces. Store in an airtight container at room temperature for up to one week.
Important Information
Nutrition Facts (Per Serving)
It is important to consider this information as approximate and not to use it as definitive health advice.
Allergy Information
Please check ingredients for potential allergens and consult a health professional if in doubt.

Leave a Comment