
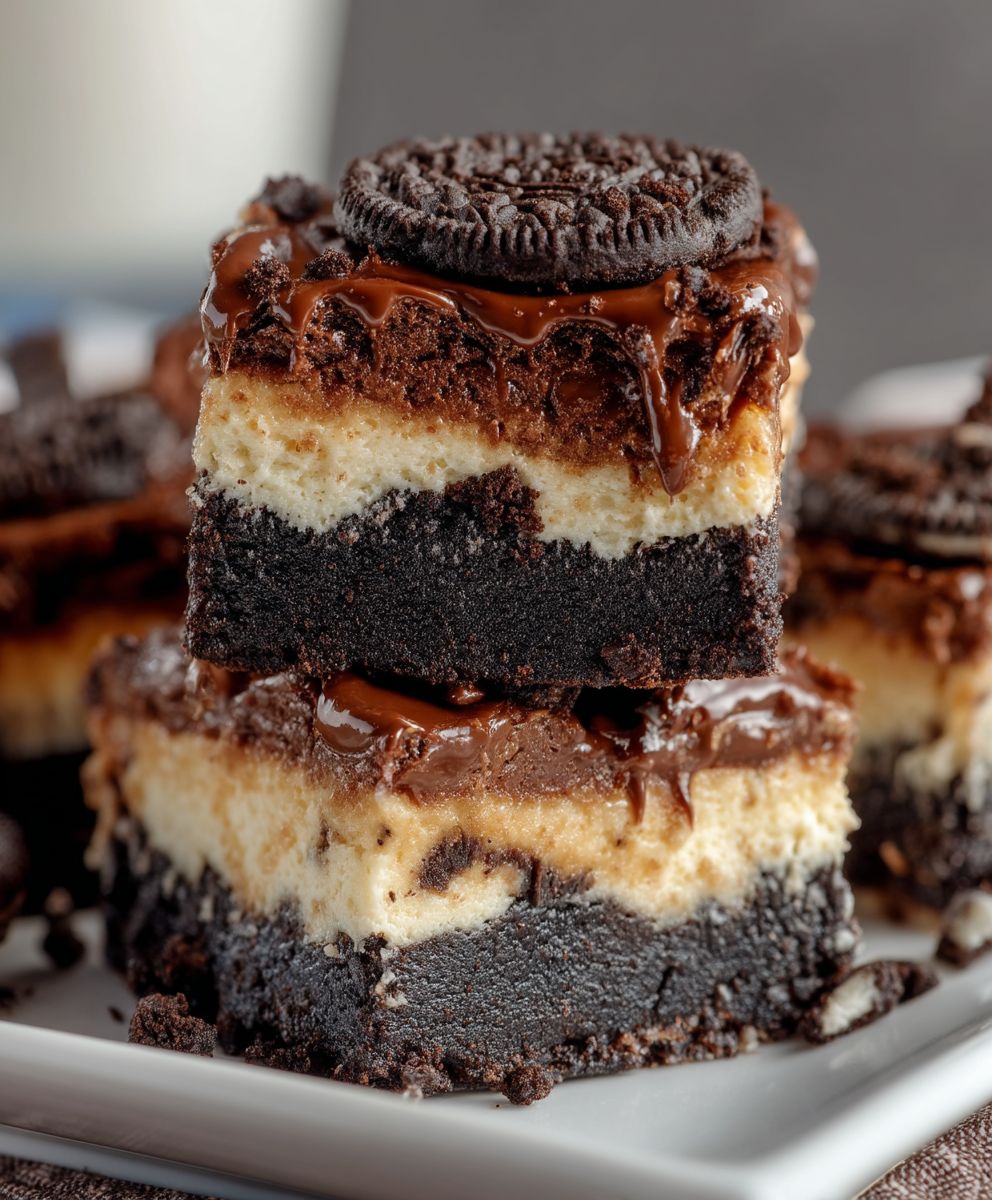
Brownie Cheesecake Bars: Prepare to meet your new dessert obsession! Imagine the fudgy, intense chocolate flavor of a rich brownie swirled with the creamy, tangy goodness of a classic cheesecake. It’s a match made in dessert heaven, and trust me, once you try these, you’ll be hooked.
While the exact origins of combining brownies and cheesecake are somewhat shrouded in mystery, the concept itself speaks to our inherent desire for the best of both worlds. Brownies, a distinctly American invention, have been a comforting staple since the late 19th century. Cheesecake, with its roots stretching back to ancient Greece, has evolved into countless variations across cultures. Marrying these two beloved desserts feels like a natural progression, a culinary evolution that satisfies even the most discerning sweet tooth.
What makes these Brownie Cheesecake Bars so irresistible? It’s the delightful contrast in textures – the chewy, dense brownie base against the smooth, velvety cheesecake topping. The flavor profile is equally captivating, with the deep chocolate notes perfectly balanced by the creamy tang of the cheesecake. Plus, they’re incredibly convenient! These bars are easy to slice, serve, and transport, making them perfect for potlucks, parties, or simply a delightful treat to enjoy at home. Get ready to bake up a batch of pure happiness!
Ingredients:
- For the Brownie Layer:
- 1 cup (2 sticks) unsalted butter, melted
- 2 cups granulated sugar
- 1 cup unsweetened cocoa powder
- 1 teaspoon salt
- 1 teaspoon vanilla extract
- 4 large eggs
- 1 cup all-purpose flour
- 1/2 cup chocolate chips (optional)
- For the Cheesecake Layer:
- 24 ounces cream cheese, softened to room temperature
- 3/4 cup granulated sugar
- 2 large eggs
- 1/4 cup sour cream
- 1 teaspoon vanilla extract
- Pinch of salt
- Optional Toppings:
- Chocolate ganache
- Caramel sauce
- Whipped cream
- Fresh berries
- Sprinkles
Preparing the Brownie Layer:
- Preheat your oven to 350°F (175°C). Grease and flour a 9×13 inch baking pan. This will prevent the brownies from sticking and make them easier to remove later. You can also line the pan with parchment paper, leaving an overhang on the sides, for even easier removal.
- In a large bowl, combine the melted butter and granulated sugar. Whisk them together until the mixture is smooth and well combined. This is the foundation of your brownie layer, so make sure everything is nicely incorporated.
- Add the unsweetened cocoa powder, salt, and vanilla extract to the butter and sugar mixture. Whisk again until everything is evenly distributed and you have a rich, chocolatey base. Be sure to scrape down the sides of the bowl to ensure all the cocoa powder is incorporated.
- Now, add the eggs one at a time, mixing well after each addition. It’s important to fully incorporate each egg before adding the next to create a smooth and emulsified batter. Overmixing at this stage can lead to tough brownies, so mix until just combined.
- Gradually add the all-purpose flour to the wet ingredients, mixing until just combined. Be careful not to overmix the batter, as this can develop the gluten in the flour and result in a tough brownie. A few streaks of flour are okay at this point.
- If you’re using chocolate chips, gently fold them into the brownie batter. This adds a little extra chocolatey goodness to the brownies. You can use any type of chocolate chips you like – milk chocolate, dark chocolate, or even white chocolate.
- Pour the brownie batter into the prepared baking pan and spread it evenly. Make sure the batter reaches all corners of the pan for even baking.
Preparing the Cheesecake Layer:
- In a separate large bowl, beat the softened cream cheese with an electric mixer until smooth and creamy. It’s crucial that the cream cheese is at room temperature to avoid lumps in the cheesecake layer. If it’s still cold, it won’t blend properly.
- Gradually add the granulated sugar to the cream cheese, beating until well combined. The mixture should be smooth and free of any lumps.
- Add the eggs one at a time, mixing on low speed after each addition. Again, be careful not to overmix the batter. Overmixing can incorporate too much air, which can cause the cheesecake to crack during baking.
- Stir in the sour cream, vanilla extract, and salt. Mix until just combined. The sour cream adds a tanginess and richness to the cheesecake layer, while the vanilla extract enhances the flavor.
Assembling and Baking:
- Gently pour the cheesecake batter over the brownie batter in the baking pan. Spread it evenly over the brownie layer. You can use a spatula or the back of a spoon to smooth it out.
- For a marbled effect, you can swirl the cheesecake batter into the brownie batter using a knife or a skewer. Be careful not to overmix, as this can muddy the colors. Just a few swirls will create a beautiful marbled pattern.
- Bake in the preheated oven for 30-35 minutes, or until the cheesecake layer is set and the edges are lightly golden brown. The center of the cheesecake should still have a slight jiggle.
- Turn off the oven and crack the oven door slightly. Let the brownie cheesecake bars cool in the oven for 1 hour. This helps prevent the cheesecake from cracking as it cools.
- Remove the baking pan from the oven and let the brownie cheesecake bars cool completely at room temperature.
- Once cooled, cover the baking pan with plastic wrap and refrigerate for at least 2 hours, or preferably overnight. This allows the cheesecake to set completely and the flavors to meld together.
Serving and Optional Toppings:
- Once the brownie cheesecake bars are chilled, lift them out of the baking pan using the parchment paper overhang (if you used it). If you didn’t use parchment paper, you can carefully cut around the edges of the pan with a knife to loosen the bars.
- Cut the brownie cheesecake bars into squares or rectangles. The size of the squares is up to you!
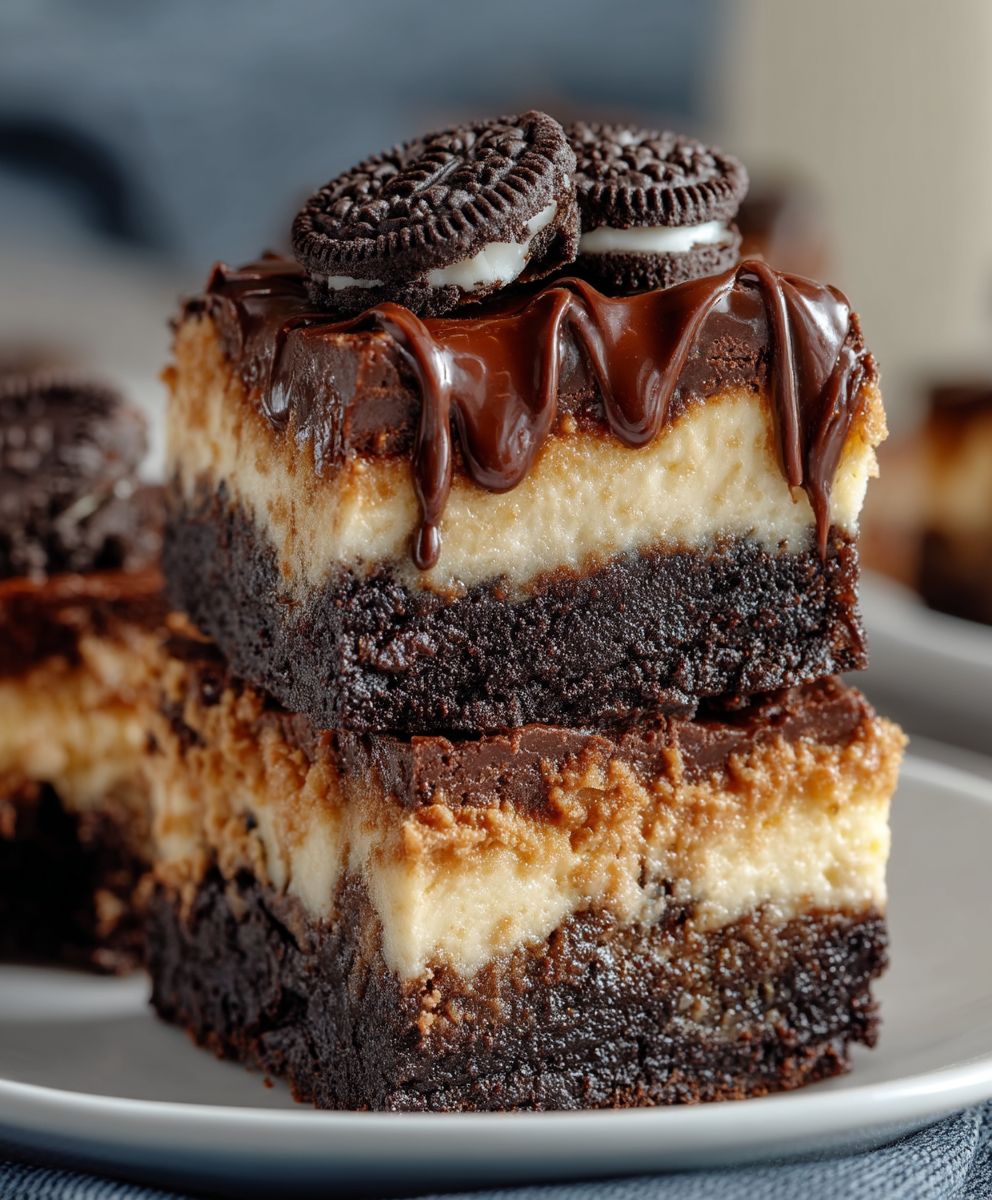
- Drizzle with chocolate ganache or caramel sauce, if desired. These toppings add extra flavor and visual appeal.
- Top with whipped cream and fresh berries for a beautiful presentation. The berries add a burst of freshness that complements the richness of the brownie and cheesecake.
- Sprinkle with sprinkles for a fun and festive touch.
- Serve and enjoy! These brownie cheesecake bars are best served chilled.
Tips for Success:
- Use room temperature ingredients: This is especially important for the cream cheese. Room temperature ingredients blend together more easily and create a smoother batter.
- Don’t overmix the batter: Overmixing can develop the gluten in the flour and result in tough brownies and a cracked cheesecake. Mix until just combined.
- Bake in a water bath (optional): For an even creamier cheesecake, you can bake the brownie cheesecake bars in a water bath. Wrap the bottom of the baking pan in aluminum foil to prevent water from seeping in. Place the wrapped pan in a larger baking pan and fill the larger pan with hot water until it reaches halfway up the sides of the baking pan. Bake as directed.
- Cool slowly: Cooling the brownie cheesecake bars slowly helps prevent cracking. Let them cool in the oven with the door cracked for 1 hour, then cool completely at room temperature before refrigerating.
- Refrigerate for at least 2 hours: Refrigerating the brownie cheesecake bars allows the cheesecake to set completely and the flavors to meld together.
Variations:
- Peanut Butter Brownie Cheesecake Bars: Add 1/2 cup of peanut butter to the brownie batter and swirl peanut butter into the cheesecake batter.
- Oreo Brownie Cheesecake Bars: Crush Oreo cookies and add them to the brownie batter and the cheesecake batter.
- Mint Chocolate Brownie Cheesecake Bars: Add mint extract to the brownie batter and top with chocolate ganache and crushed peppermint candies.
- Caramel Pecan Brownie Cheesecake Bars: Add chopped pecans to the brownie batter and drizzle with caramel sauce.
Storage:
- Store leftover brownie cheesecake bars in an airtight container in the refrigerator for up to 5 days.
- You can also freeze brownie cheesecake bars for up to 2 months. Wrap them individually in plastic wrap and then place them in a freezer-safe bag or container. Thaw in the refrigerator before serving.
Conclusion:
So, there you have it! These Brownie Cheesecake Bars are truly a must-try for anyone who loves a decadent dessert. The fudgy brownie base, the creamy cheesecake swirl, and the overall ease of preparation make them a winner in my book. I honestly can’t think of a better way to satisfy a sweet craving. They’re rich, they’re satisfying, and they’re guaranteed to impress.
But why are these bars so special? It’s the perfect marriage of textures and flavors. The brownie provides that intense chocolate hit and a delightful chewiness, while the cheesecake layer adds a tangy creaminess that cuts through the richness beautifully. It’s a symphony of deliciousness in every single bite! Plus, the visual appeal of the swirl is just stunning. They look like you spent hours slaving away in the kitchen, but trust me, they’re surprisingly simple to make.
And the best part? You can easily customize these bars to your liking! Feeling adventurous? Try adding a layer of salted caramel between the brownie and cheesecake layers for an extra touch of indulgence. Or, fold in some chopped nuts, like pecans or walnuts, into the brownie batter for added crunch. For a festive twist, sprinkle some crushed peppermint candies on top during the holidays. You could even use different flavored extracts in the cheesecake layer, like vanilla, almond, or lemon, to create unique flavor profiles. The possibilities are endless!
For serving suggestions, these Brownie Cheesecake Bars are fantastic on their own, but they’re even better with a scoop of vanilla ice cream or a dollop of whipped cream. A drizzle of chocolate sauce or a sprinkle of cocoa powder adds a touch of elegance. They’re perfect for parties, potlucks, or simply a special treat for yourself. I often make a batch on Sunday evenings to enjoy throughout the week (if they last that long!). They also make a wonderful homemade gift for friends and family.
I truly believe that everyone should experience the joy of these Brownie Cheesecake Bars. They’re a crowd-pleaser, a comfort food, and a guaranteed mood booster all rolled into one delicious package. The recipe is straightforward, the ingredients are readily available, and the results are simply divine.
So, what are you waiting for? Get in the kitchen and bake up a batch of these incredible bars! I promise you won’t regret it. And when you do, please, please, please share your experience with me! I’d love to hear how they turned out, what variations you tried, and what your friends and family thought. Tag me in your photos on social media, or leave a comment below. I’m always eager to see your creations and hear your feedback. Happy baking, and enjoy every single bite of these amazing Brownie Cheesecake Bars! I am sure you will love this recipe as much as I do.
Brownie Cheesecake Bars: The Ultimate Decadent Dessert Recipe
Decadent brownie cheesecake bars with a rich chocolate brownie base topped with a creamy cheesecake layer. Perfect for a special treat!
Ingredients
Instructions
Recipe Notes
- Use room temperature ingredients, especially cream cheese.
- Don’t overmix the batter.
- Bake in a water bath (optional) for an even creamier cheesecake.
- Cool slowly to prevent cracking.
- Refrigerate for at least 2 hours to allow the cheesecake to set.
- Store leftover bars in an airtight container in the refrigerator for up to 5 days.
- Freeze for up to 2 months. Wrap individually in plastic wrap and then place them in a freezer-safe bag or container. Thaw in the refrigerator before serving.

Leave a Comment