
Apple Cider Cookies Recipe – there’s something truly magical about the aroma of warm spices and baked apples filling your kitchen, especially as the crisp autumn air begins to settle in. These aren’t just any cookies; they’re a delightful celebration of fall, embodying the very essence of cozy comfort.
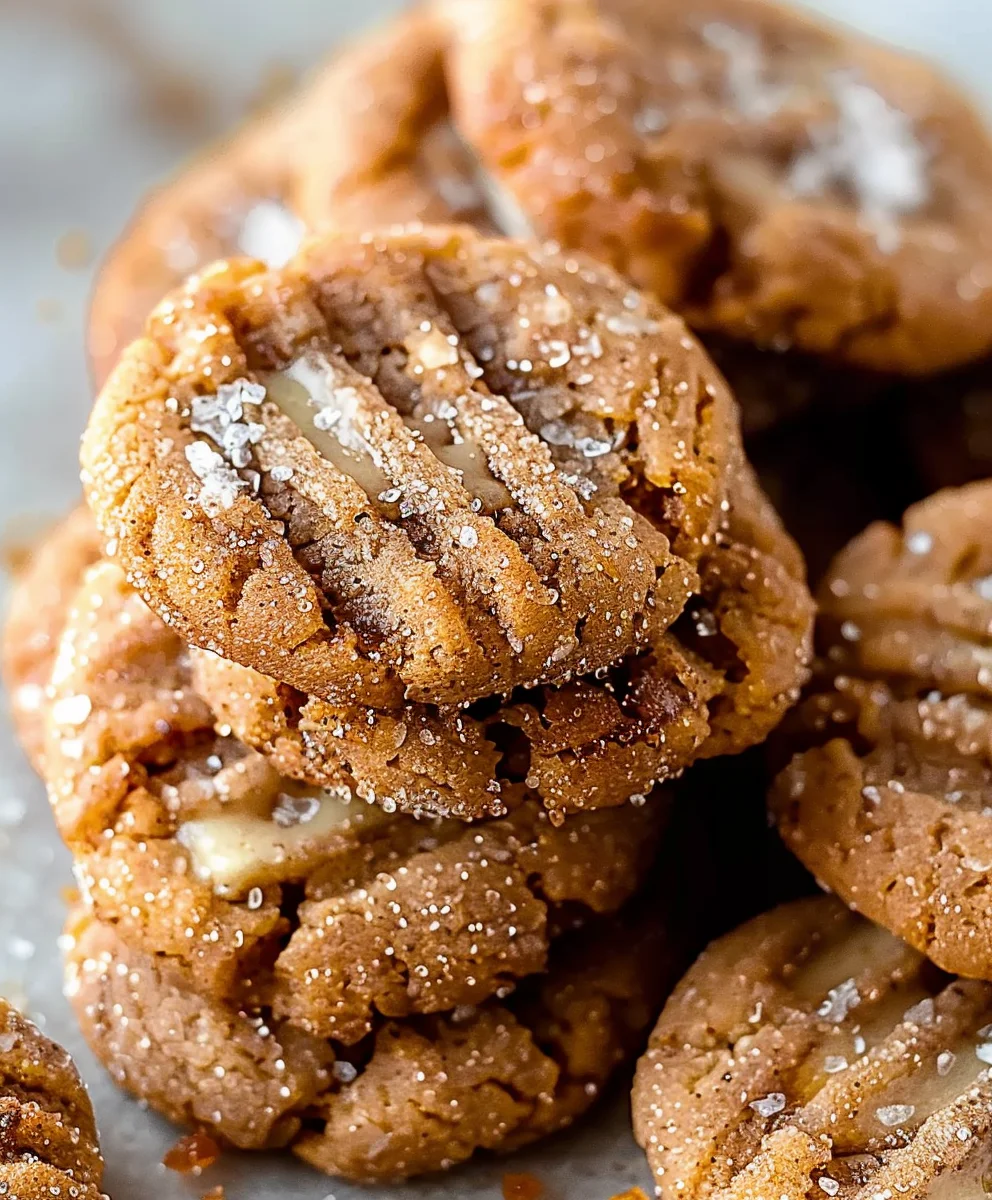
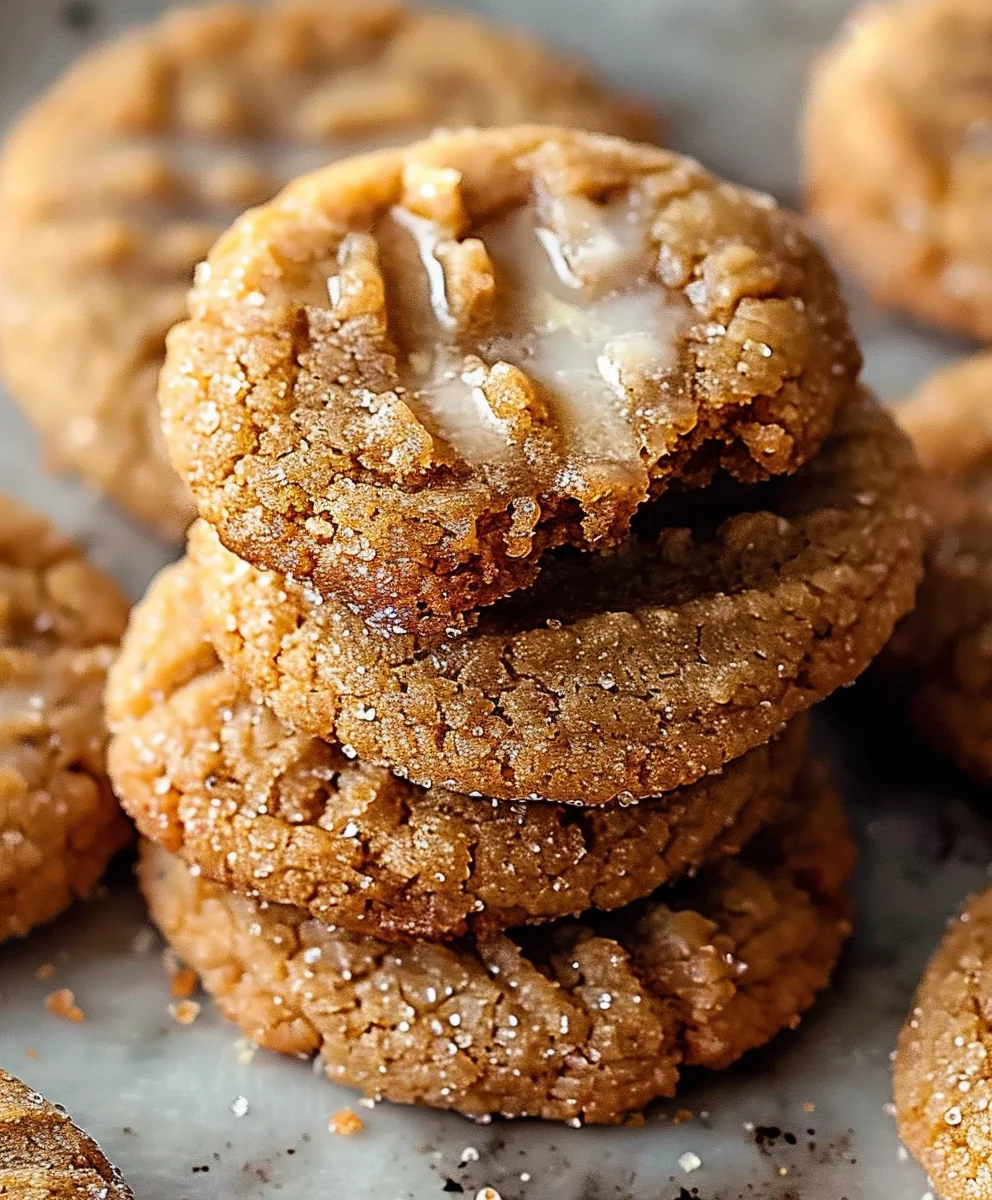
Imagine sinking your teeth into a soft, chewy cookie, bursting with the tangy sweetness of concentrated apple cider, perfectly balanced with notes of cinnamon and nutmeg. It’s an experience that transports you straight to an apple orchard on a sunny afternoon, evoking feelings of warmth and nostalgia with every bite.
Historically, apples and cider have been central to harvest festivals and communal gatherings across many cultures, symbolizing abundance and the welcoming of colder seasons. Transforming that beloved autumnal beverage into a baked treat feels like a natural evolution, bringing generations of comfort food traditions right to your plate.
That’s precisely why our Apple Cider Cookies Recipe has become a cherished favorite for so many. They offer a unique, sophisticated twist on classic fall flavors, making them an ideal treat for holiday gatherings, potlucks, or simply a quiet evening with a hot cup of tea. Their irresistible taste and comforting texture are sure to delight anyone who tries them.
Ingredients:
- For the Apple Cider Cookies:
- Unsalted Butter: 1 cup (2 sticks), softened completely to room temperature. This is absolutely crucial for achieving that light, airy texture when creamed with sugar. It needs to be pliable, but not melted.
- Granulated Sugar: 1 cup. Provides essential sweetness and helps create a delicately crisp edge that contrasts beautifully with the soft interior of our “Apple Cider Cookies Recipe.”
- Light Brown Sugar: ½ cup, packed. This adds a wonderful depth of flavor with its molasses notes, contributing moisture and a delightful chewiness that complements the apple cider profile.
- Large Egg: 1, also at room temperature. A room-temperature egg emulsifies better with the other ingredients, leading to a more uniform and smoother cookie dough.
- Pure Vanilla Extract: 2 teaspoons. I always opt for pure vanilla for its rich, aromatic quality that enhances all the other flavors without overpowering them. It’s a subtle but essential addition.
- Apple Cider Concentrate: ½ cup. This is the heart and soul of our “Apple Cider Cookies Recipe”! To achieve a truly potent apple flavor, I recommend reducing regular apple cider yourself. Simply simmer 2 cups of good quality apple cider in a small saucepan over medium-low heat until it has reduced to about ½ cup of thick, syrupy concentrate. This usually takes about 20-30 minutes. Let it cool completely before using. If you’re short on time, a high-quality store-bought apple cider syrup can be a substitute, but the homemade concentrate truly elevates the flavor.
- All-Purpose Flour: 2 ½ cups. The primary structural component of our cookies. Make sure to measure it correctly by spooning it into your measuring cup and then leveling off the top with a straight edge, rather than scooping directly from the bag, which can compact the flour and lead to too much flour.
- Baking Powder: 1 teaspoon. Our leavening agent that works to give the cookies a beautiful lift and tender crumb.
- Baking Soda: ½ teaspoon. This also contributes to leavening and tenderness, reacting with the acidic apple cider and brown sugar to create a soft, pillowy texture.
- Ground Cinnamon: 1 teaspoon. A classic, warming spice that pairs perfectly with apple. It brings that quintessential cozy fall flavor to every bite.
- Ground Nutmeg: ½ teaspoon. Offers another layer of warm, sweet spice complexity that truly rounds out the autumnal profile of these cookies.
- Fine Sea Salt: ½ teaspoon. Crucial for balancing the sweetness, enhancing all the individual flavors, and making the apple cider notes truly sing.
- For the Apple Cider Glaze:
- Powdered Sugar: 2 cups, sifted. Sifting is a non-negotiable step here to ensure a silky smooth, lump-free glaze that coats our cookies beautifully.
- Apple Cider (unreduced): 3-4 tablespoons. This will be the liquid base for our glaze, providing a subtle tang and reinforcing the apple flavor without being overly sweet.
- Pure Vanilla Extract: ¼ teaspoon (optional). A small touch of vanilla can add a little extra aroma and depth to the glaze, though it’s perfectly delicious without it too!
Preparing the Flavorful Apple Cider Cookie Dough
- Getting Started with the Wet Ingredients and Achieving Perfect Creaminess: First things first, ensure your butter is properly softened. I usually leave it out on the counter for at least an hour before I start baking. If you’re ever short on time, you can cut it into smaller pieces or even gently microwave it for about 10-15 seconds, flipping it halfway through, but be extremely careful not to melt it! Melted butter will result in a greasy, flat cookie, not the delightful chewiness we’re after for our “Apple Cider Cookies Recipe.” In a large mixing bowl, or the bowl of your stand mixer fitted with the paddle attachment, combine the 1 cup of softened unsalted butter with the 1 cup of granulated sugar and the ½ cup of packed light brown sugar. I always start on low speed to prevent the sugars from flying out of the bowl, then gradually increase to medium-high. You’ll want to beat this mixture for a solid 3-5 minutes, until it transforms into a wonderfully light, fluffy, and pale-yellow cream. This essential process, known as creaming, incorporates crucial air into the butter and sugar, which is fundamental for achieving tender, airy cookies with a lovely crumb structure. Don’t rush this step; it truly makes a significant difference in the final texture of your cookies. It’s the foundation of a great cookie!
- Incorporating the Liquid Gold and Aromatic Enhancers: Once your butter and sugar mixture is impeccably light and airy, it’s time to incorporate the remaining wet ingredients that give these “Apple Cider Cookies Recipe” their distinctive flavor. Crack the large egg into a separate small bowl first to ensure no shell fragments inadvertently make their way into your precious dough, then add it to the creamed mixture. Beat on medium speed until the egg is fully incorporated, which usually takes about 30 seconds to a minute. The mixture should look cohesive and smooth. Next, drizzle in the 2 teaspoons of pure vanilla extract, followed by the star ingredient: the ½ cup of concentrated apple cider. This apple cider concentrate, whether homemade or a quality store-bought version, is what infuses an intensely autumnal, sweet-tart apple flavor right into the heart of every cookie. Mix until just combined. It’s important not to overmix at this stage; overworking the mixture can start to develop gluten prematurely, which we absolutely want to avoid for soft, tender cookies. Once everything is mostly incorporated, use a rubber spatula to scrape down the sides of the bowl, ensuring all the buttery-sugary goodness and apple cider concentrate are evenly distributed.
- Combining the Dry Ingredients for a Harmonious Blend: In a separate medium bowl, take a moment to meticulously whisk together the 2 ½ cups of all-purpose flour, 1 teaspoon of baking powder, ½ teaspoon of baking soda, 1 teaspoon of ground cinnamon, ½ teaspoon of ground nutmeg, and ½ teaspoon of fine sea salt. I can’t stress enough the importance of thoroughly whisking these dry ingredients, or even better, sifting them together. This step is vital because it not only ensures there are no annoying lumps of flour or leavening agents but also guarantees that the baking powder, baking soda, and all those fragrant spices are perfectly and evenly distributed throughout the flour. This even distribution means that every single cookie in your “Apple Cider Cookies Recipe” batch will rise consistently and boast a uniform, delightful flavor. The aroma alone of cinnamon and nutmeg instantly makes these cookies feel like a warm, comforting fall treat, even before they hit the oven!
- Marrying Wet and Dry to Form the Perfect Dough: Now for the delicate dance of bringing our two carefully prepared mixtures together. With your mixer on the absolute lowest speed, or by hand with a sturdy spatula, gradually add the whisked dry ingredient mixture to the wet ingredients. Do this in about three additions, mixing only until just combined after each addition. The moment you see no more visible streaks of dry flour, stop the mixer immediately. This is perhaps the most crucial step for the texture of your “Apple Cider Cookies Recipe” – it’s absolutely vital not to overmix the dough at this stage. Overmixing will develop the gluten in the flour excessively, which can lead to tough, dense, and chewy cookies, rather than the tender, melt-in-your-mouth texture we are striving for. I often find it helpful to finish mixing the last bit by hand with a spatula, gently folding until just combined, to ensure I don’t overdo it. The resulting dough will be thick and slightly sticky, but it should be easily scoopable and uniform in color and texture.
- The Essential Chill Time for Optimal Cookie Structure and Flavor: This step is genuinely non-negotiable for achieving perfectly shaped cookies that maintain their integrity and don’t spread excessively in the oven. Once your dough is mixed, gently form it into a disk, cover the bowl tightly with plastic wrap, and refrigerate the cookie dough for at least 1 hour, or ideally, for 2-4 hours. You can even chill it for up to 24 hours for deeper flavor development. Chilling the dough serves several important purposes: it solidifies the butter, which helps the cookies hold their shape much better during baking, preventing them from spreading into thin, flat discs. It also allows the flour to fully hydrate, resulting in a more tender crumb. Perhaps most importantly, it gives all those wonderful flavors, especially the potent apple cider notes, time to meld and deepen, creating a more complex and satisfying cookie. If you’re chilling for longer than an hour, the dough might become quite firm; in that case, simply let it sit at room temperature for 10-15 minutes before attempting to scoop it to make it more manageable. Trust me, the brief wait is undeniably worth it for these perfectly structured and flavorful “Apple Cider Cookies Recipe.”
Baking the Delightful Apple Cider Cookies to Golden Perfection
- Preheating and Preparing Your Baking Station: Approximately 15-20 minutes before you’re ready to scoop and bake your chilled cookie dough, take a moment to preheat your oven to 375°F (190°C). While the oven heats up, prepare your baking sheets. I always recommend lining them with parchment paper or high-quality silicone baking mats. Parchment paper is my personal preference as it prevents any sticking whatsoever, ensures easy cleanup, and allows your beautiful “Apple Cider Cookies Recipe” to slide right off the sheet without any fuss. Avoid the temptation to grease the pans directly, as this can sometimes contribute to cookies spreading more than desired, especially if you’re using butter or cooking spray. Having your baking sheets ready beforehand makes the process smooth and efficient.
- Scooping, Rolling, and Thoughtful Spacing: Retrieve your chilled cookie dough from the refrigerator. Using a 1 ½-tablespoon cookie scoop (which typically holds about 2 tablespoons of dough), scoop out uniform balls of dough. Using a scoop ensures that each cookie is roughly the same size, which is essential for even baking across the entire batch. For an even neater appearance and to encourage a rounder cookie, I often gently roll each scoop of dough between my palms to create a smooth, perfectly round ball. Place these dough balls about 2 inches apart on your prepared baking sheets. Remember, these cookies will expand slightly in the oven, so providing adequate space is key to preventing them from merging into one giant, misshapen cookie. I generally fit about 12 cookies comfortably on a standard half-sheet pan. If you prefer a slightly flatter cookie with a crisper edge, you can gently press the tops of the dough balls slightly before baking; however, I often leave them as balls for a slightly thicker, chewier center.
- Baking to Golden Perfection and Recognizing Doneness: Carefully transfer your prepared baking sheets to the preheated oven. Bake the cookies for 9-11 minutes. What you’re looking for is subtly golden-brown edges and centers that appear just set. The very centers might still look a touch soft or slightly underbaked, but trust me, that’s perfectly normal and exactly what we want for a wonderfully chewy interior. They will continue to firm up and set as they cool on the baking sheet. It’s incredibly important to avoid overbaking these “Apple Cider Cookies Recipe,” as overdone cookies will lose their tenderness and become hard. Keep a close eye on them, especially during the last few minutes, as oven temperatures can vary significantly. I frequently rotate my baking sheets halfway through the baking time (after about 5 minutes) to ensure uniform cooking, particularly if I know my oven has hot spots or tends to bake unevenly.
- The Critical Cooling Process: Once your cookies have reached that perfect golden-edged stage, carefully remove the baking sheets from the oven. Let the cookies rest on the hot sheets for about 5 minutes. This brief resting period is crucial as it allows them to firm up just enough to be safely handled without breaking or crumbling. The residual heat from the baking sheet continues to cook them ever so slightly, further setting their structure. After 5 minutes, carefully transfer the warm “Apple Cider Cookies Recipe” using a thin spatula to a wire cooling rack. Arrange them in a single layer on the rack to allow for proper air circulation all around each cookie. This prevents the bottoms from becoming soggy and promotes an even, pleasant texture throughout. Resist the strong urge to glaze these beauties while they are still warm! Any glaze applied to warm cookies will simply melt, run off, and create a sticky, uneven mess instead of a beautiful, set topping. Patience truly is a virtue here; allow them to cool completely before proceeding to the next step.
Crafting the Sweet and Tangy Apple Cider Glaze
- Whipping up the Silky Glaze: While your “Apple Cider Cookies Recipe” are diligently cooling to room temperature, you can prepare the simple yet utterly delicious and essential apple cider glaze. In a medium bowl, combine the 2 cups of sifted powdered sugar with 3 tablespoons of unreduced, regular apple cider. I always, always recommend sifting the powdered sugar first; this extra step prevents any pesky lumps from forming in your glaze, ensuring a perfectly smooth, velvety consistency that will coat your cookies beautifully. Start with just 3 tablespoons of apple cider, then whisk thoroughly using a small whisk or fork until the mixture is completely smooth and creamy. If you find the glaze is too thick to drizzle or dip effectively, add the remaining 1 tablespoon of apple cider, one teaspoon at a time, whisking well after each addition, until you achieve your desired consistency. What you’re aiming for is a glaze that is thick enough to coat the back of a spoon and hold its shape slightly when drizzled, but still thin enough to flow smoothly and evenly. Finally, stir in the optional ¼ teaspoon of pure vanilla extract and give it one final whisk. The aroma of this glaze alone is enough to make your mouth water in anticipation!
-
The Grand Finale: Glazing Our Masterpieces: Once your “Apple Cider Cookies Recipe” are completely and unequivocally cool – and I truly mean no lingering warmth whatsoever – it’s time for the crowning glory, the apple cider glaze. You have a couple of wonderful options for how to apply this delightful topping, each yielding a slightly different aesthetic:
- The Drizzling Method: For a more rustic, delicate, and artfully imperfect look, you can use a spoon, a fork, or even a small whisk to decoratively drizzle the prepared glaze over the tops of the cooled cookies. This method creates beautiful, intricate lines and allows some of the cookie’s inviting golden surface to peek through. It’s perfect if you prefer a lighter touch of sweetness.
- The Dipping Method: For a more uniform, generous, and visually striking coating, gently dip the entire top surface of each cooled cookie directly into the bowl of glaze. Allow any excess glaze to drip off back into the bowl for a few seconds before carefully placing the glazed cookie back onto the wire cooling rack (which I always recommend setting over a piece of parchment paper or a baking sheet to catch any drips and minimize cleanup). This method provides a lovely, full coverage, creating a beautiful, opaque finish.
Personally, I usually opt for the dipping method because I adore a good, thick, sweet-tart layer of glaze on these apple cider wonders! The contrast between the soft cookie and the slightly firm glaze is just divine.
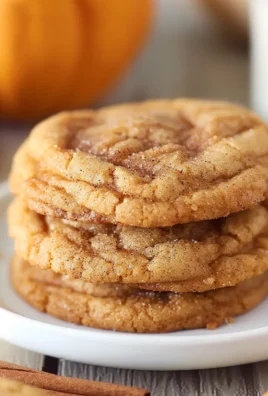
- Setting the Glaze and Savoring Your Creation: After glazing, allow your beautiful “Apple Cider Cookies Recipe” to sit undisturbed on the wire rack for at least 30 minutes, or until the glaze has fully set and hardened to the touch. This creates a beautiful, slightly crackly top layer that provides a wonderful textural contrast to the soft, chewy cookie underneath. Once the glaze is completely set, these delightful cookies are ready to be eagerly devoured! For optimal freshness and texture, store your finished cookies in an airtight container at room temperature. They will remain wonderfully delicious for up to 3-4 days. In my experience, they often taste even better on the second day, as the flavors have had more time to meld and deepen. I find them absolutely irresistible with a steaming cup of hot coffee, a comforting mug of tea, or, of course, a refreshing glass of fresh apple cider. Enjoy every single, flavorful bite of your homemade apple cider cookies – a true taste of autumn in every morsel!
Conclusion:
This isn’t just another cookie recipe; it’s a culinary hug, a warm embrace of autumn’s finest flavors. I truly believe that once you try this, you’ll understand why it’s become a staple in my kitchen, especially as the leaves start to turn and there’s a crispness in the air. The delicate balance of sweet apple, tangy cider, and warming spices creates a symphony of taste that is both comforting and incredibly exciting. We’ve worked hard to perfect the chewiness, the subtle crunch from the edges, and that incredibly aromatic finish that fills your home with the most inviting scent. This isn’t just about baking; it’s about crafting memories, about bringing that unique harvest festival feel right into your home. The way the concentrated apple cider reduces to a syrupy essence, infusing every crumb with its distinct, bright, yet deep flavor, is pure magic. It’s an elevated take on a classic, offering a sophisticated twist that will impress everyone who takes a bite. You might think, “Oh, just another cookie,” but I promise you, this Apple Cider Cookies Recipe transcends the ordinary, delivering an experience that’s truly special and utterly unforgettable. It’s the kind of treat that makes you close your eyes and savor every single moment, a little slice of autumn joy that you’ll want to recreate year after year.
Now that you’re dreaming of these delicious cookies, let’s talk about how to best enjoy them. While they are absolutely divine straight from the cooling rack, still slightly warm with that intoxicating aroma, there are so many wonderful ways to serve them. Imagine pairing one of these soft, spiced delights with a steaming mug of black coffee on a brisk morning, or perhaps a fragrant cup of Earl Grey in the afternoon. For a truly autumnal experience, I love to serve them alongside a piping hot glass of mulled apple cider – the flavors complement each other beautifully, creating a double dose of cozy goodness that’s perfect for a chilly evening. They also make an excellent addition to any dessert spread, perhaps nestled next to a scoop of vanilla bean ice cream, allowing the cool creaminess to contrast with the warm spice of the cookie for a truly decadent treat. Don’t forget their potential as a thoughtful homemade gift! Stack them neatly in a charming tin, tie it with a festive ribbon, and you’ve got a perfect, heartfelt present for neighbors, friends, or teachers during the holiday season. They’re also fantastic for bake sales, potlucks, or just a simple, well-deserved treat after a long day. I often arrange them artfully on a rustic wooden board for gatherings, sometimes with a sprinkle of extra cinnamon or a light dusting of powdered sugar to enhance their visual appeal and make them even more inviting.
But wait, the fun doesn’t stop there! One of the joys of baking is making a recipe truly your own, and this one is wonderfully adaptable, inviting you to unleash your creativity. If you’re feeling adventurous, consider adding a handful of chopped walnuts or pecans to the dough for an extra layer of texture and nutty flavor – about half a cup usually does the trick to provide a satisfying crunch without overwhelming the main flavors. Dried cranberries or golden raisins would also be a lovely addition, bringing a tart chewiness that plays wonderfully with the bright apple notes and warming spices. For a truly decadent twist, white chocolate chips melt beautifully into the dough, creating creamy pockets of sweetness that are simply irresistible and pair exquisitely with the cider’s tang. Feel free to play with the spices too. A pinch more nutmeg, a touch of ground cloves, or even a hint of cardamom can deepen the flavor profile to your liking, allowing you to customize the warmth and complexity. And let’s not forget the glaze! While the cider glaze we discussed is perfectly balanced, offering an additional layer of apple goodness, you could try a simple vanilla bean glaze for a classic touch, a rich brown butter glaze for added depth and nuttiness, or even a tangy cream cheese frosting if you’re aiming for something more indulgent and cake-like. For those who prefer a crisper cookie, bake them for an extra minute or two until the edges are golden brown and firm to the touch. If you like them chewier, pull them out just as the edges are set and the centers still look slightly soft – they will firm up as they cool. The possibilities are truly endless, allowing you to tailor this perfect treat to your exact preferences and seasonal whims.
So, there you have it. My heartfelt plea for you to open your pantry, roll up your sleeves, and dive into the wonderful world of these incredible cookies. Trust me when I say that the aroma alone is worth the effort, but the taste? The taste is pure, unadulterated bliss, a comforting echo of autumn’s best offerings. This is more than just a recipe; it’s an invitation to create, to share, and to savor the simple pleasures of life with those you love. I am genuinely excited for you to experience the warmth and comfort they bring, and I have no doubt they will become a cherished part of your own fall traditions. Once you’ve baked a batch (or two!), please, please share your experience with me and our wonderful community. Did you add something special? How did you serve them? We absolutely adore seeing your creations! Snap a photo, drop a comment, or simply tell us about the smiles these cookies brought to your family’s faces. Your feedback and stories inspire me and help others discover the joy of baking these seasonal delights. Don’t let another autumn pass without making these a cherished part of your seasonal traditions; they are truly something special. Go ahead, give them a try – I promise you won’t regret it. They are truly a testament to the magic that happens when simple ingredients are combined with a little love and a touch of cider-infused enchantment. Happy baking, my friends!
Apple Cider Cookies Recipe: Delicious Fall Treat!
These Apple Cider Cookies are a delightful celebration of fall, embodying the very essence of cozy comfort. Imagine sinking your teeth into a soft, chewy cookie, bursting with the tangy sweetness of concentrated apple cider, perfectly balanced with notes of warming spices. A unique, sophisticated twist on classic fall flavors, ideal for holiday gatherings or a quiet evening with tea.
Ingredients
-
20 tablespoons unsalted butter, softened
-
¾ cup granulated sugar
-
1¼ cups light brown sugar, packed
-
1 large egg, room temperature
-
2 teaspoons pure vanilla extract (for cookies)
-
2 cups non-alcoholic apple cider (for concentrate and glaze)
-
2½ cups all-purpose flour
-
1 teaspoon baking powder
-
½ teaspoon baking soda
-
2 teaspoons apple pie spice or pumpkin spice
-
½ teaspoon fine sea salt
-
2 cups powdered sugar, sifted (for glaze)
-
¼ teaspoon pure vanilla extract (optional, for glaze)
-
Optional: Ground cinnamon, for topping
Instructions
-
Step 1
Reduce 2 cups of non-alcoholic apple cider to ½ cup concentrate by simmering in a small saucepan over medium-low heat for 20-30 minutes. Let cool completely. (This concentrate is for the cookie dough.) -
Step 2
In a large mixing bowl, cream 20 tablespoons softened unsalted butter with ¾ cup granulated sugar and 1¼ cups packed light brown sugar until light, fluffy, and pale yellow (3-5 minutes). -
Step 3
Beat in 1 large room-temperature egg, 2 teaspoons pure vanilla extract, and the ½ cup cooled apple cider concentrate. Mix until just combined, scraping down the bowl. -
Step 4
In a separate medium bowl, whisk together 2½ cups all-purpose flour, 1 teaspoon baking powder, ½ teaspoon baking soda, 2 teaspoons apple pie spice (or pumpkin spice), and ½ teaspoon fine sea salt. -
Step 5
Gradually add the whisked dry ingredients to the wet mixture on the lowest speed, mixing only until no dry streaks of flour remain. Do not overmix. -
Step 6
Form the dough into a disk, cover tightly with plastic wrap, and refrigerate for at least 1-4 hours (or up to 24 hours). Chilling is crucial for cookie shape and flavor. -
Step 7
Preheat your oven to 375°F (190°C) and line baking sheets with parchment paper or silicone mats. -
Step 8
Scoop 1½-tablespoon balls of chilled dough. Gently roll each scoop to form a smooth ball. Place dough balls about 2 inches apart on prepared baking sheets. Bake for 9-11 minutes, until edges are subtly golden and centers are just set. Do not overbake. -
Step 9
Remove from oven and let cookies rest on the hot baking sheets for 5 minutes. Then, transfer them to a wire cooling rack to cool completely before glazing. -
Step 10
While cookies cool, prepare the glaze: In a medium bowl, whisk together 2 cups sifted powdered sugar with 3-4 tablespoons unreduced non-alcoholic apple cider and optional ¼ teaspoon pure vanilla extract. Whisk until completely smooth and creamy, adjusting cider amount for desired consistency. -
Step 11
Once cookies are completely cool, drizzle or dip the top surface of each cookie into the glaze. If desired, sprinkle with ground cinnamon (optional topping). Let the glazed cookies sit on the wire rack for at least 30 minutes, or until the glaze has fully set and hardened. Store in an airtight container at room temperature for up to 3-4 days.
Important Information
Nutrition Facts (Per Serving)
It is important to consider this information as approximate and not to use it as definitive health advice.
Allergy Information
Please check ingredients for potential allergens and consult a health professional if in doubt.


Leave a Comment