
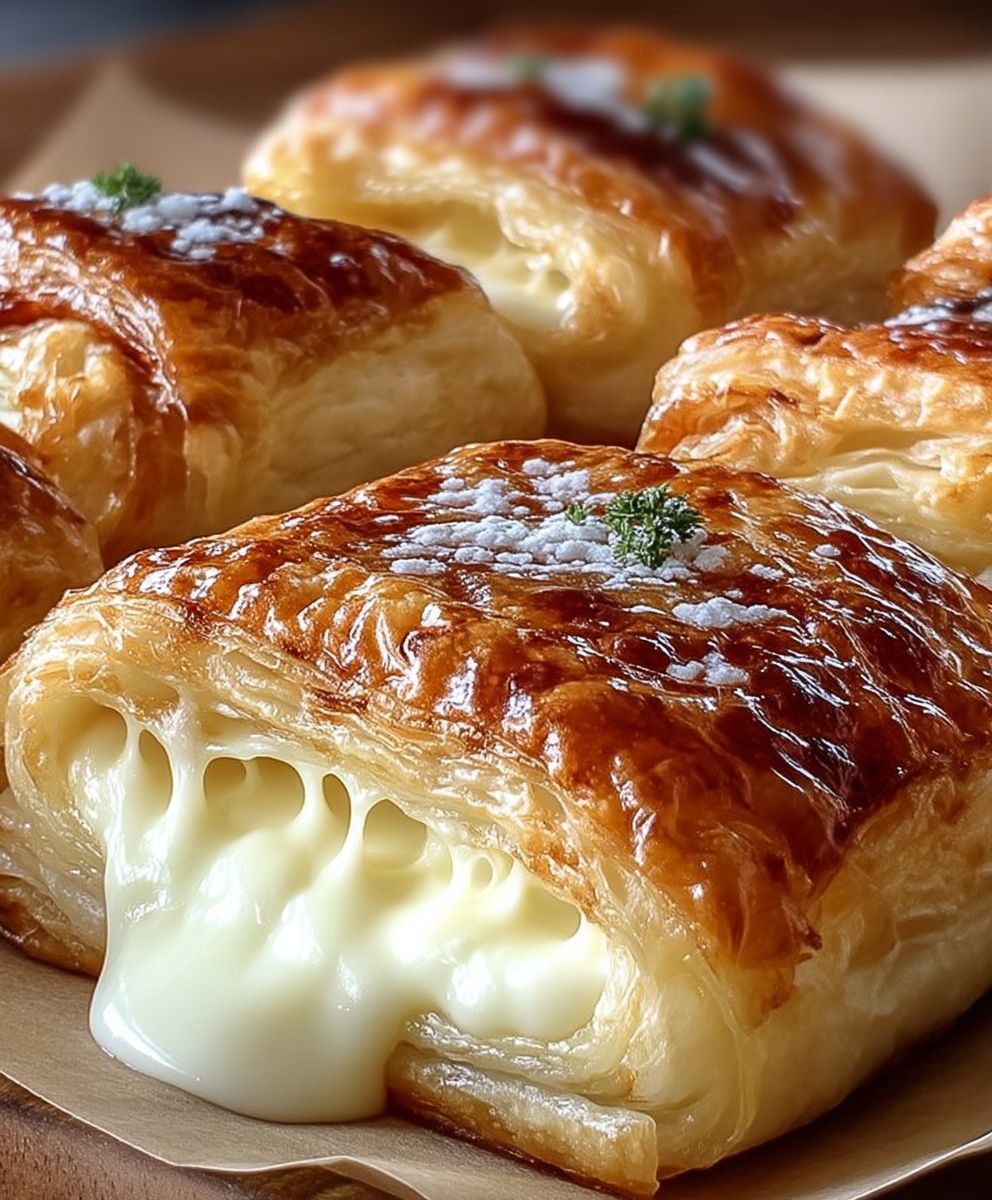
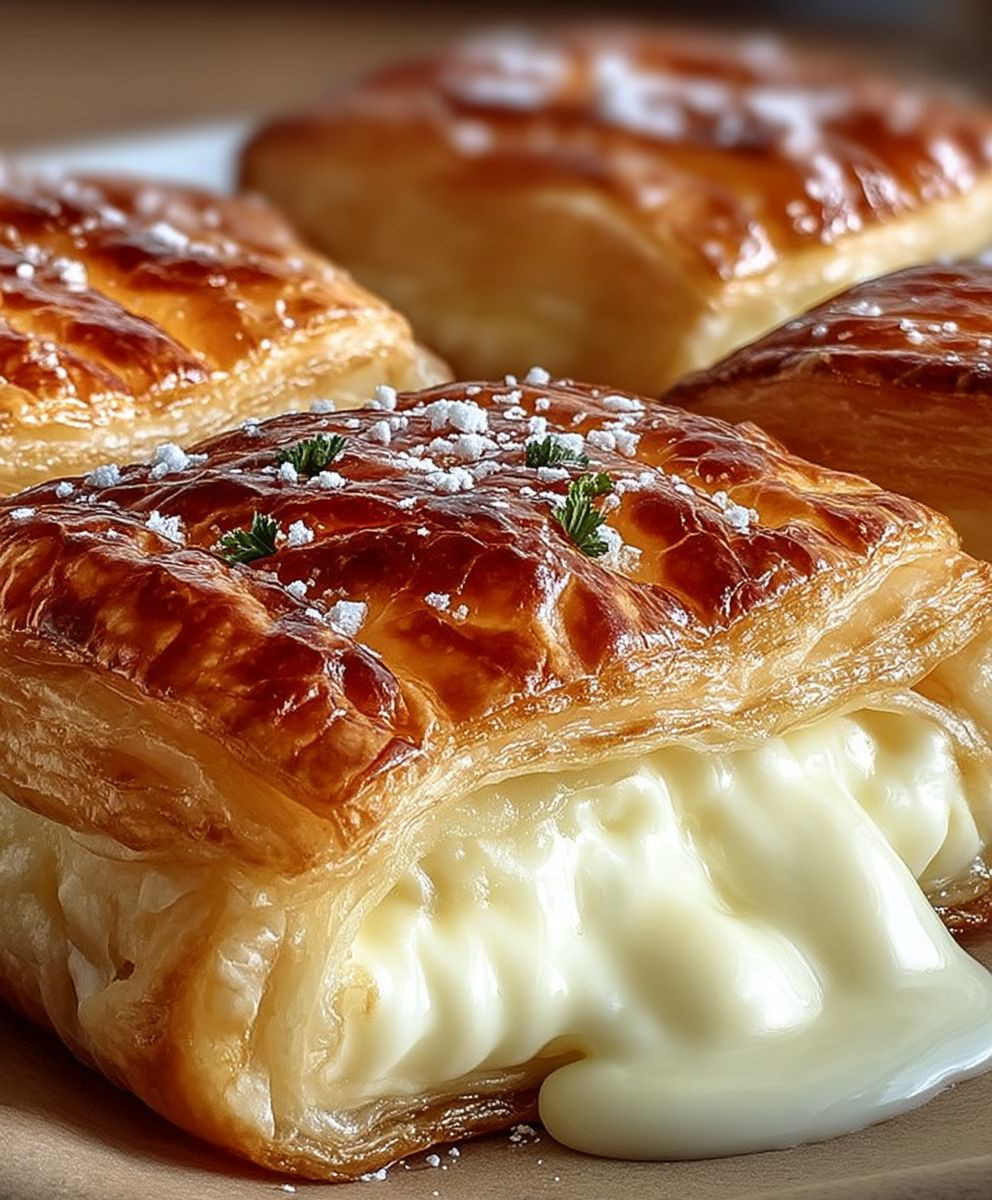
Breakfast Cheese Danish: the mere mention of these words conjures images of flaky, golden pastry, oozing with a sweet and tangy cream cheese filling. Have you ever wondered how something so utterly decadent could be perfectly acceptable (and even encouraged!) for breakfast? I certainly have! These delightful pastries are more than just a morning treat; they’re a little piece of history.
While often associated with Denmark, the story of the Danish pastry actually begins in Austria. Bakers from Vienna brought their techniques to Denmark in the mid-19th century, and Danish bakers quickly adapted and refined the recipe, creating what we now know and love as the Breakfast Cheese Danish. This adaptation led to the creation of a uniquely Danish pastry, characterized by its layers of buttery dough and diverse fillings.
What makes the Breakfast Cheese Danish so irresistible? It’s the perfect combination of textures: the crisp, delicate layers of the pastry give way to a smooth, creamy filling. The slight tang of the cream cheese complements the sweetness of the pastry, creating a flavor profile that’s both satisfying and addictive. Plus, they’re incredibly versatile! Enjoy them warm from the oven, or grab one on the go for a quick and delicious breakfast. Whether you’re a seasoned baker or a novice in the kitchen, this recipe will guide you through creating your own batch of these delightful pastries. Get ready to impress your friends and family with your homemade Breakfast Cheese Danish!
Ingredients:
- For the Dough:
- 2 1/4 cups (281g) all-purpose flour, plus more for dusting
- 1/4 cup (50g) granulated sugar
- 1 teaspoon salt
- 1/4 ounce (7g) active dry yeast (about 2 1/4 teaspoons)
- 1/2 cup (120ml) warm milk (105-115°F)
- 1/4 cup (60ml) water
- 1 large egg
- 4 tablespoons (57g) unsalted butter, softened
- For the Butter Block:
- 1 cup (226g) unsalted butter, cold
- For the Cheese Filling:
- 8 ounces (226g) cream cheese, softened
- 1/4 cup (50g) granulated sugar
- 1 large egg yolk
- 1 teaspoon vanilla extract
- 1/4 teaspoon lemon zest (optional)
- For the Egg Wash:
- 1 large egg
- 1 tablespoon milk or water
- For the Glaze (optional):
- 1 cup (120g) powdered sugar
- 2-3 tablespoons milk or water
- 1/2 teaspoon vanilla extract (optional)
Preparing the Dough:
- Combine Dry Ingredients: In a large bowl, whisk together the flour, sugar, and salt. This ensures everything is evenly distributed before adding the wet ingredients.
- Activate the Yeast: In a separate small bowl, dissolve the yeast in the warm milk and water mixture. Let it stand for 5-10 minutes, or until foamy. This indicates that the yeast is active and ready to go. If it doesn’t foam, your yeast might be old and you’ll need to get new yeast.
- Combine Wet and Dry Ingredients: Add the foamy yeast mixture, egg, and softened butter to the bowl with the dry ingredients.
- Mix the Dough: Using a stand mixer fitted with a dough hook (or by hand), mix the ingredients until a shaggy dough forms. If using a mixer, knead on low speed for 8-10 minutes. If kneading by hand, turn the dough out onto a lightly floured surface and knead for 10-12 minutes. The dough should be smooth and elastic. It will be slightly sticky, but not overly so.
- First Rise: Place the dough in a lightly oiled bowl, turning to coat. Cover with plastic wrap or a clean kitchen towel and let rise in a warm place for 1-1.5 hours, or until doubled in size. This is crucial for developing the flavor and texture of the danish.
Preparing the Butter Block:
- Pound the Butter: Place the cold butter between two sheets of parchment paper. Using a rolling pin, pound the butter into a 6×8 inch rectangle. The butter should be cold but pliable. This step is important for creating the distinct layers in the danish. If the butter is too soft, it will melt into the dough instead of creating layers.
- Chill the Butter: Place the butter block in the refrigerator to keep it cold while you prepare the dough for lamination.
Laminating the Dough:
- Roll Out the Dough: Once the dough has doubled in size, gently punch it down to release the air. Turn the dough out onto a lightly floured surface and roll it into a 12×16 inch rectangle.
- Place the Butter Block: Place the cold butter block in the center of the dough rectangle.
- Fold the Dough: Fold one side of the dough over the butter, covering half of it. Then, fold the other side of the dough over the butter, completely enclosing it. You should now have a neat little package.
- First Turn: Gently press down on the dough package with your rolling pin to seal the edges. Roll the dough into a 10×18 inch rectangle. Be careful not to press too hard, as you don’t want to squeeze the butter out.
- Book Fold: Fold the dough into thirds, like folding a letter. This is called a book fold.
- Wrap and Chill: Wrap the dough tightly in plastic wrap and refrigerate for 30 minutes. This allows the gluten to relax and the butter to firm up, preventing it from melting during the next rolling.
- Second Turn: After 30 minutes, remove the dough from the refrigerator. Place it on a lightly floured surface with the short end facing you. Roll the dough into a 10×18 inch rectangle again.
- Book Fold Again: Fold the dough into thirds again, like a book.
- Wrap and Chill Again: Wrap the dough tightly in plastic wrap and refrigerate for another 30 minutes.
- Third Turn: Repeat the rolling and folding process one more time. Roll the dough into a 10×18 inch rectangle, perform a book fold, wrap in plastic wrap, and refrigerate for a final 30 minutes. This completes the lamination process, creating hundreds of thin layers of butter and dough.
Preparing the Cheese Filling:
- Cream Cheese Mixture: In a medium bowl, beat the softened cream cheese and sugar together until smooth and creamy.
- Add Egg Yolk and Flavorings: Add the egg yolk, vanilla extract, and lemon zest (if using) to the cream cheese mixture. Beat until well combined. The filling should be smooth and free of lumps.
- Chill the Filling: Cover the bowl with plastic wrap and refrigerate the cheese filling until ready to use. This will help it hold its shape during baking.
Assembling the Danishes:
- Roll Out the Dough: After the final chilling, remove the dough from the refrigerator. On a lightly floured surface, roll the dough into a 12×18 inch rectangle. The dough should be about 1/4 inch thick.
- Cut the Dough: Using a sharp knife or pizza cutter, cut the dough into 3×3 inch squares. You should get about 24 squares.
- Shape the Danishes: There are a few ways to shape the danishes:
- Classic Square: Place a spoonful of cheese filling in the center of each square. Bring two opposite corners of the square towards the center and pinch them together. Repeat with the other two corners.
- Envelope Style: Place a spoonful of cheese filling in the center of each square. Fold two opposite corners towards the center, overlapping slightly. Press gently to seal.
- Pinwheel: Make diagonal cuts from each corner towards the center, stopping about 1/2 inch from the center. Place a spoonful of cheese filling in the center. Fold every other point towards the center, pressing gently to secure.
- Place on Baking Sheet: Place the shaped danishes on a baking sheet lined with parchment paper, leaving some space between each one.
- Second Rise: Cover the baking sheet with plastic wrap and let the danishes rise in a warm place for 30-45 minutes, or until slightly puffy. This second rise is important for achieving a light and airy texture.
Baking the Danishes:
- Preheat Oven: Preheat your oven to 375°F (190°C).
- Prepare Egg Wash: In a small bowl, whisk together the egg and milk (or water) for the egg wash.
- Brush with Egg Wash: Gently brush the tops of the danishes with the egg wash. This will give them a beautiful golden-brown color.
- Bake: Bake the danishes for 18-22 minutes, or until golden brown and the filling is set. Keep a close eye on them, as baking times may vary depending on your oven.
- Cool: Remove the danishes from the oven and let them cool on the baking sheet for a few minutes before transferring them to a wire rack to cool completely.
Glazing (Optional):
- Prepare Glaze: While the danishes are cooling, prepare the glaze. In a small bowl, whisk together the powdered sugar, milk (or water), and vanilla

Conclusion:
This Breakfast Cheese Danish recipe is more than just a breakfast treat; it’s an experience. The flaky, buttery pastry combined with the sweet and tangy cream cheese filling creates a symphony of flavors and textures that will tantalize your taste buds and leave you craving more. It’s the perfect way to start your day, impress your brunch guests, or simply indulge in a little bit of homemade goodness. Trust me, once you try this, store-bought danishes will never quite measure up!
Why is this a must-try? Because it’s surprisingly easy to make, even for beginner bakers. The recipe is straightforward, and the results are incredibly rewarding. Imagine the aroma of freshly baked danishes filling your kitchen, the golden-brown crust beckoning you to take a bite. It’s a simple pleasure that can elevate any morning. Plus, the homemade touch adds a special element of love and care that you just can’t find in a bakery.
But the best part? The versatility! While the classic cream cheese filling is divine, feel free to experiment with different variations to suit your taste. Add a swirl of raspberry jam for a fruity twist, sprinkle some chopped nuts on top for added crunch, or incorporate a hint of lemon zest into the filling for a bright and zesty flavor. For a more decadent treat, drizzle melted chocolate over the cooled danishes. You could even try a savory version with spinach and feta cheese for a delightful brunch option.
Serving suggestions are endless. Enjoy your warm Breakfast Cheese Danish with a cup of freshly brewed coffee or tea for a classic pairing. It’s also delicious with a glass of cold milk or a refreshing fruit smoothie. For a more elegant presentation, dust the danishes with powdered sugar and arrange them on a pretty platter. They’re perfect for potlucks, holiday gatherings, or any occasion where you want to share a delicious homemade treat.
Serving Suggestions:
- Serve warm with coffee or tea.
- Dust with powdered sugar for an elegant touch.
- Pair with fresh fruit for a balanced breakfast.
- Enjoy as a dessert with a scoop of vanilla ice cream.
Variations to Explore:
- Add raspberry jam to the cream cheese filling.
- Sprinkle chopped nuts on top before baking.
- Incorporate lemon zest into the filling for a citrusy flavor.
- Drizzle with melted chocolate after baking.
- Try a savory version with spinach and feta cheese.
I’m so excited for you to try this recipe! I know you’ll love it as much as I do. Don’t be intimidated by the thought of making your own danishes. With a little patience and this easy-to-follow recipe, you’ll be whipping up batches of deliciousness in no time.
So, go ahead, gather your ingredients, preheat your oven, and get ready to embark on a baking adventure. And most importantly, don’t forget to share your experience! I’d love to hear how your Breakfast Cheese Danish turned out, what variations you tried, and any tips or tricks you discovered along the way. Share your photos and stories in the comments below – I can’t wait to see your creations! Happy baking! Let me know if you have any questions, and I’ll do my best to help. Enjoy!
Breakfast Cheese Danish: The Ultimate Guide to a Perfect Pastry
Flaky, buttery homemade cheese danishes with a creamy, sweet filling. These pastries are perfect for breakfast, brunch, or a special treat.
Ingredients
- 2 1/4 cups (281g) all-purpose flour, plus more for dusting
- 1/4 cup (50g) granulated sugar
- 1 teaspoon salt
- 1/4 ounce (7g) active dry yeast (about 2 1/4 teaspoons)
- 1/2 cup (120ml) warm milk (105-115°F)
- 1/4 cup (60ml) water
- 1 large egg
- 4 tablespoons (57g) unsalted butter, softened
- 1 cup (226g) unsalted butter, cold
- 8 ounces (226g) cream cheese, softened
- 1/4 cup (50g) granulated sugar
- 1 large egg yolk
- 1 teaspoon vanilla extract
- 1/4 teaspoon lemon zest (optional)
- 1 large egg
- 1 tablespoon milk or water
- 1 cup (120g) powdered sugar
- 2-3 tablespoons milk or water
- 1/2 teaspoon vanilla extract (optional)
Instructions
- Combine Dry Ingredients: In a large bowl, whisk together the flour, sugar, and salt.
- Activate the Yeast: In a separate small bowl, dissolve the yeast in the warm milk and water mixture. Let it stand for 5-10 minutes, or until foamy.
- Combine Wet and Dry Ingredients: Add the foamy yeast mixture, egg, and softened butter to the bowl with the dry ingredients.
- Mix the Dough: Using a stand mixer fitted with a dough hook (or by hand), mix the ingredients until a shaggy dough forms. If using a mixer, knead on low speed for 8-10 minutes. If kneading by hand, turn the dough out onto a lightly floured surface and knead for 10-12 minutes. The dough should be smooth and elastic.
- First Rise: Place the dough in a lightly oiled bowl, turning to coat. Cover with plastic wrap or a clean kitchen towel and let rise in a warm place for 1-1.5 hours, or until doubled in size.
- Pound the Butter: Place the cold butter between two sheets of parchment paper. Using a rolling pin, pound the butter into a 6×8 inch rectangle.
- Chill the Butter: Place the butter block in the refrigerator to keep it cold.
- Roll Out the Dough: Once the dough has doubled in size, gently punch it down to release the air. Turn the dough out onto a lightly floured surface and roll it into a 12×16 inch rectangle.
- Place the Butter Block: Place the cold butter block in the center of the dough rectangle.
- Fold the Dough: Fold one side of the dough over the butter, covering half of it. Then, fold the other side of the dough over the butter, completely enclosing it.
- First Turn: Gently press down on the dough package with your rolling pin to seal the edges. Roll the dough into a 10×18 inch rectangle.
- Book Fold: Fold the dough into thirds, like folding a letter.
- Wrap and Chill: Wrap the dough tightly in plastic wrap and refrigerate for 30 minutes.
- Second Turn: After 30 minutes, remove the dough from the refrigerator. Place it on a lightly floured surface with the short end facing you. Roll the dough into a 10×18 inch rectangle again.
- Book Fold Again: Fold the dough into thirds again, like a book.
- Wrap and Chill Again: Wrap the dough tightly in plastic wrap and refrigerate for another 30 minutes.
- Third Turn: Repeat the rolling and folding process one more time. Roll the dough into a 10×18 inch rectangle, perform a book fold, wrap in plastic wrap, and refrigerate for a final 30 minutes.
- Cream Cheese Mixture: In a medium bowl, beat the softened cream cheese and sugar together until smooth and creamy.
- Add Egg Yolk and Flavorings: Add the egg yolk, vanilla extract, and lemon zest (if using) to the cream cheese mixture. Beat until well combined.
- Chill the Filling: Cover the bowl with plastic wrap and refrigerate the cheese filling until ready to use.
- Roll Out the Dough: After the final chilling, remove the dough from the refrigerator. On a lightly floured surface, roll the dough into a 12×18 inch rectangle.
- Cut the Dough: Using a sharp knife or pizza cutter, cut the dough into 3×3 inch squares.
- Shape the Danishes:
- Classic Square: Place a spoonful of cheese filling in the center of each square. Bring two opposite corners of the square towards the center and pinch them together. Repeat with the other two corners.
- Envelope Style: Place a spoonful of cheese filling in the center of each square. Fold two opposite corners towards the center, overlapping slightly. Press gently to seal.
- Pinwheel: Make diagonal cuts from each corner towards the center, stopping about 1/2 inch from the center. Place a spoonful of cheese filling in the center. Fold every other point towards the center, pressing gently to secure.
- Place on Baking Sheet: Place the shaped danishes on a baking sheet lined with parchment paper, leaving some space between each one.
- Second Rise: Cover the baking sheet with plastic wrap and let the danishes rise in a warm place for 30-45 minutes, or until slightly puffy.
- Preheat Oven: Preheat your oven to 375°F (190°C).
- Prepare Egg Wash: In a small bowl, whisk together the egg and milk (or water) for the egg wash.
- Brush with Egg Wash: Gently brush the tops of the danishes with the egg wash.
- Bake: Bake the danishes for 18-22 minutes, or until golden brown and the filling is set.
- Cool: Remove the danishes from the oven and let them cool on the baking sheet for a few minutes before transferring them to a wire rack to cool completely.
- Prepare Glaze: While the danishes are cooling, prepare the glaze. In a small bowl, whisk together the powdered sugar, milk (or water), and vanilla extract (if using) until smooth.
- Glaze the Danishes: Drizzle the glaze over the cooled danishes.
Notes
- Make sure your yeast is active. If it doesn’t foam when mixed with warm milk and water, it’s likely old and needs to be replaced.
- Keep the butter cold during the lamination process. If the butter gets too soft, it will melt into the dough and you won’t get distinct layers.
- Don’t overwork the dough when rolling it out. Be gentle and avoid pressing too hard, as this can squeeze the butter out.
- Chilling the dough between turns is essential for relaxing the gluten and firming up the butter.
- Baking times may vary depending on your oven, so keep a close eye on the danishes.
Leave a Comment