
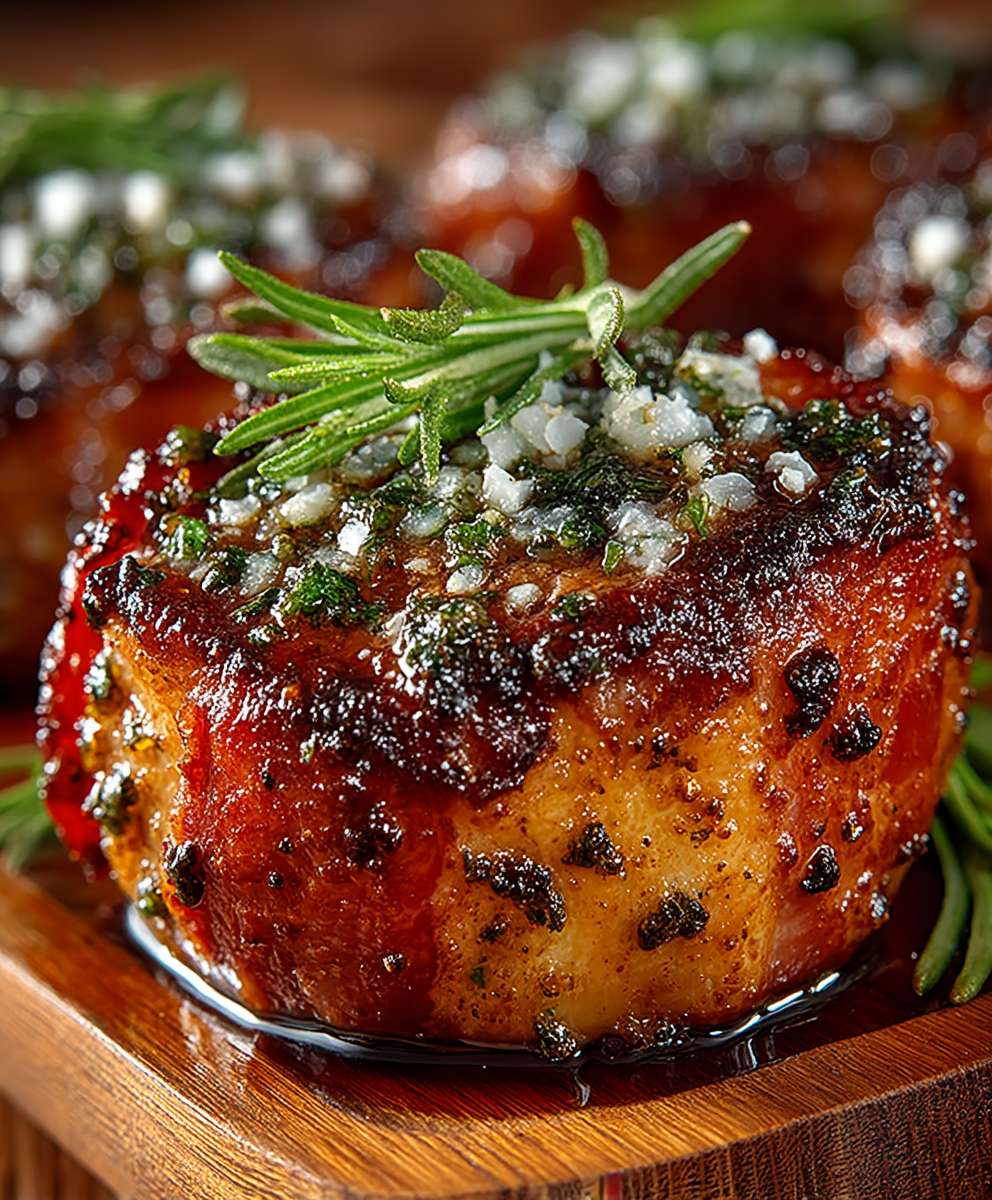
Bacon Bombs: Prepare to have your taste buds detonated! These aren’t your average appetizers; they’re a flavor explosion wrapped in crispy, smoky bacon. Imagine biting into a juicy, cheesy center, perfectly complemented by the salty, savory crunch of perfectly cooked bacon. It’s an experience that’s both comforting and utterly irresistible.
While the exact origins of bacon bombs are shrouded in delicious mystery, their popularity has exploded in recent years, fueled by the internet’s love for all things bacon. They represent a modern take on comfort food, combining familiar flavors in a fun and exciting way. Think of them as the ultimate party snack, perfect for game day, barbecues, or any occasion that calls for a crowd-pleasing treat.
What makes these little bundles of joy so beloved? It’s the perfect combination of textures and tastes. The creamy, melted cheese contrasts beautifully with the crispy bacon, while the savory filling adds another layer of depth. They’re also incredibly convenient to make ahead of time and bake just before serving, making them a stress-free option for entertaining. Plus, let’s be honest, who can resist anything wrapped in bacon?
Ingredients:
- 1 pound thick-cut bacon
- 1 pound ground beef (80/20 blend recommended)
- 1/2 pound Italian sausage (sweet or hot, your preference)
- 1 cup shredded cheddar cheese
- 1/2 cup shredded Monterey Jack cheese
- 1/4 cup finely diced onion
- 1/4 cup finely diced bell pepper (any color)
- 2 cloves garlic, minced
- 1 tablespoon Worcestershire sauce
- 1 teaspoon smoked paprika
- 1/2 teaspoon garlic powder
- 1/2 teaspoon onion powder
- 1/4 teaspoon black pepper
- 1/4 teaspoon cayenne pepper (optional, for a little heat)
- 1/4 cup barbecue sauce (your favorite brand)
- Toothpicks
Preparing the Meat Mixture:
- In a large bowl, combine the ground beef and Italian sausage. Make sure to remove the sausage from its casing before adding it to the bowl. I like to use my hands to really get in there and break up the meat, ensuring it’s evenly distributed.
- Add the diced onion, bell pepper, and minced garlic to the meat mixture. These aromatics will add a wonderful depth of flavor to the bacon bombs. Don’t skimp on the mincing – you want them to be small enough that they cook evenly and don’t overpower the meat.
- Now, it’s time to add the Worcestershire sauce, smoked paprika, garlic powder, onion powder, black pepper, and cayenne pepper (if using). The Worcestershire sauce adds a savory umami flavor, while the spices provide a delicious smoky and slightly spicy kick. Be careful with the cayenne pepper – a little goes a long way!
- Using your hands (or a sturdy spoon), thoroughly mix all the ingredients together until they are evenly combined. Be careful not to overmix, as this can make the meat tough. You want everything to be just incorporated.
- Once the mixture is well combined, cover the bowl with plastic wrap and refrigerate for at least 30 minutes. This allows the flavors to meld together and helps the meat mixture firm up, making it easier to form the bacon bombs. You can even refrigerate it for a few hours or overnight for even better flavor.
Assembling the Bacon Bombs:
- Remove the meat mixture from the refrigerator.
- Prepare your bacon. You’ll want to use thick-cut bacon for this recipe, as it holds up better during cooking and provides a nice, crispy exterior. Lay out several strips of bacon on a clean work surface, slightly overlapping each other. You’ll need enough bacon to completely wrap each meatball. I usually use about 4-5 strips per bacon bomb, depending on the size of the strips and the size of the meatball.
- Take a handful of the meat mixture (about 1/4 cup) and form it into a ball. Make sure the ball is tightly packed so it doesn’t fall apart during cooking.
- Create a small indentation in the center of the meatball. This is where we’ll add the cheese!
- Fill the indentation with a generous amount of shredded cheddar and Monterey Jack cheese. Don’t be shy – the more cheese, the better! I like to use a combination of cheddar and Monterey Jack for a good balance of flavor and meltiness, but you can use any cheese you like.
- Carefully close the meatball around the cheese, making sure the cheese is completely sealed inside. Reshape the meatball if necessary to ensure it’s a nice, round shape.
- Place the meatball on top of the overlapping bacon strips.
- Carefully wrap the bacon around the meatball, ensuring it’s completely covered. You may need to use multiple strips of bacon to achieve full coverage. Overlap the ends of the bacon strips to create a secure seal.
- Secure the bacon with toothpicks. Insert the toothpicks through the bacon and into the meatball to hold everything in place. Use as many toothpicks as needed to ensure the bacon stays wrapped around the meatball during cooking. I usually use 2-3 toothpicks per bacon bomb.
- Repeat steps 3-9 until all the meat mixture has been used.
Cooking the Bacon Bombs:
There are several ways you can cook these bacon bombs. I will describe three methods: baking, grilling, and smoking. Each method will give you a slightly different result, so choose the one that best suits your preferences and equipment.
Baking:
- Preheat your oven to 375°F (190°C).
- Line a baking sheet with parchment paper. This will prevent the bacon bombs from sticking to the pan and make cleanup easier.
- Place the bacon bombs on the prepared baking sheet, making sure they are not touching each other.
- Bake for 30-40 minutes, or until the bacon is crispy and the meat is cooked through. The internal temperature of the meat should reach 160°F (71°C). Use a meat thermometer to check the temperature.
- During the last 5-10 minutes of cooking, brush the bacon bombs with your favorite barbecue sauce. This will add a delicious sweet and tangy glaze to the bacon.
- Remove the bacon bombs from the oven and let them rest for a few minutes before serving.
Grilling:
- Preheat your grill to medium heat (about 350°F or 175°C).
- Lightly oil the grill grates to prevent the bacon bombs from sticking.
- Place the bacon bombs on the grill, making sure they are not directly over the flames.
- Grill for 20-30 minutes, turning occasionally, until the bacon is crispy and the meat is cooked through. The internal temperature of the meat should reach 160°F (71°C). Use a meat thermometer to check the temperature.
- During the last 5-10 minutes of grilling, brush the bacon bombs with your favorite barbecue sauce. This will add a delicious sweet and tangy glaze to the bacon.
- Remove the bacon bombs from the grill and let them rest for a few minutes before serving.
Smoking:
- Preheat your smoker to 225°F (107°C).
- Add your favorite wood chips to the smoker. I recommend using hickory or applewood for a smoky flavor that complements the bacon and meat.
- Place the bacon bombs on the smoker rack, making sure they are not touching each other.
- Smoke for 2-3 hours, or until the bacon is crispy and the meat is cooked through. The internal temperature of the meat should reach 160°F (71°C). Use a meat thermometer to check the temperature.
- During the last 30 minutes of smoking, brush the bacon bombs with your favorite barbecue sauce. This will add a delicious sweet and tangy glaze to the bacon.
- Remove the bacon bombs from the smoker and let them rest for a few minutes before serving.
Serving:
- Remove the toothpicks from the bacon bombs before serving.
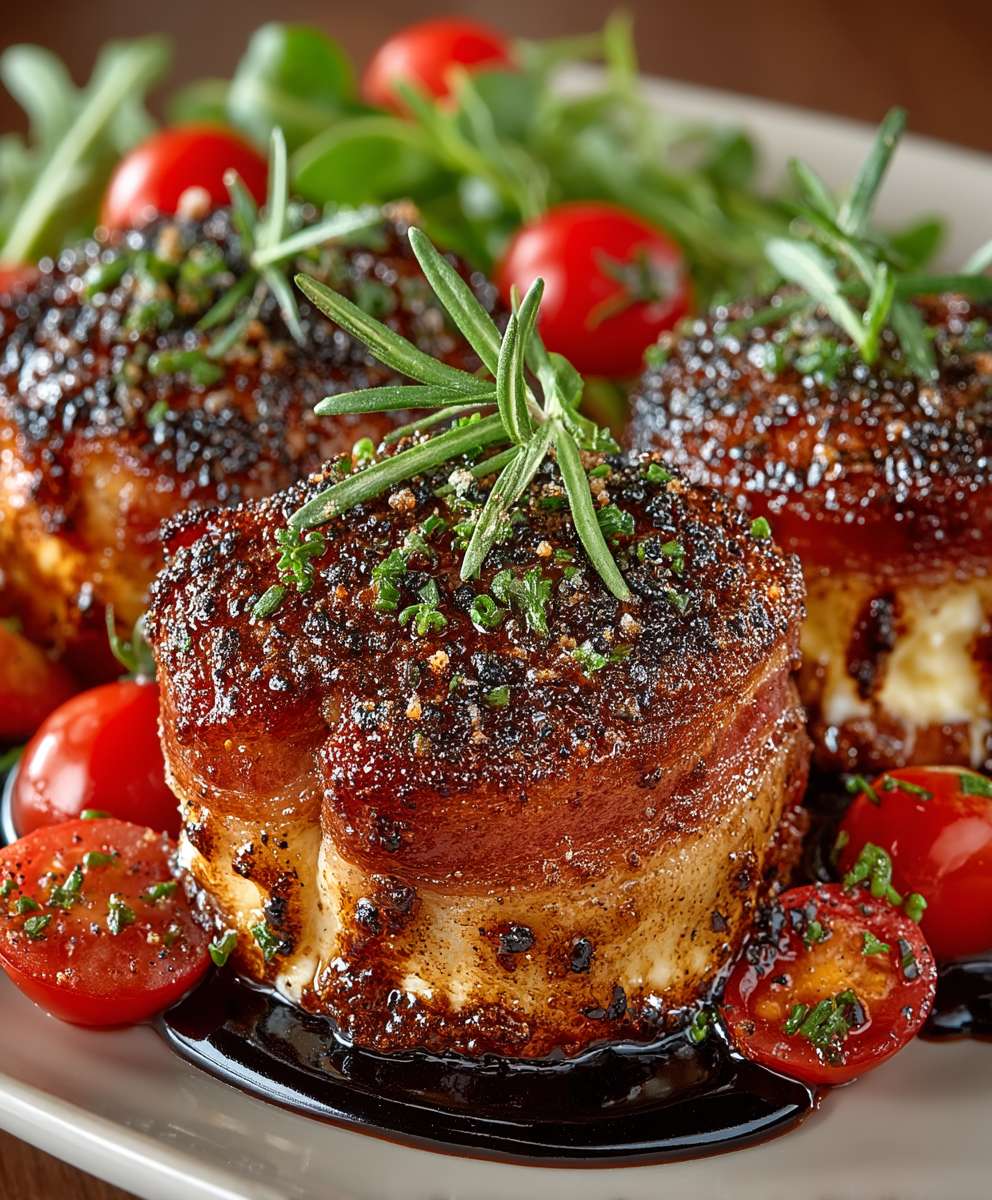
- Serve the bacon bombs hot, as an appetizer or main course.
- They are delicious on their own, or with your favorite dipping sauces, such as barbecue sauce, ranch dressing, or blue cheese dressing.
- Enjoy!
Conclusion:
This isn’t just another recipe; it’s an experience! These bacon bombs are a guaranteed crowd-pleaser, offering an explosion of flavor in every single bite. The combination of crispy bacon, savory filling, and that hint of sweetness is simply irresistible. Trust me, once you try them, you’ll be making them again and again.
But why are these bacon bombs a must-try? It’s simple: they’re incredibly versatile, surprisingly easy to make, and deliver a wow factor that’s hard to beat. Whether you’re hosting a game-day party, planning a backyard barbecue, or just looking for a fun and delicious weekend treat, these little bundles of joy are the perfect solution. The smoky aroma alone will have everyone drooling!
And the best part? You can easily customize them to suit your own taste. Feeling adventurous? Try adding some diced jalapeños to the filling for a spicy kick. Want something a little sweeter? A drizzle of maple syrup over the cooked bacon bombs is pure heaven. You could even experiment with different cheeses – a sharp cheddar or a creamy Gruyere would be fantastic. For a Mediterranean twist, consider adding sun-dried tomatoes, feta cheese, and a sprinkle of oregano to the filling. The possibilities are truly endless!
Serving suggestions are just as varied. These bacon bombs are delicious on their own as an appetizer or snack. But they also pair perfectly with a variety of sides. Think creamy coleslaw, potato salad, or even a simple green salad with a light vinaigrette. For a more substantial meal, serve them alongside grilled corn on the cob or baked beans. And don’t forget the dipping sauces! Barbecue sauce, ranch dressing, or even a spicy sriracha mayo would be amazing.
I personally love to serve them with a homemade honey mustard dipping sauce. The sweetness of the honey perfectly complements the savory bacon and filling. Another favorite of mine is to crumble them over a loaded baked potato – talk about comfort food!
Don’t be intimidated by the name; these bacon bombs are actually quite simple to make. With just a few ingredients and a little bit of patience, you can create a dish that will impress your friends and family. The key is to use good quality bacon and to make sure the filling is well seasoned. And remember to cook them until the bacon is nice and crispy – that’s where the magic happens!
So, what are you waiting for? Grab your ingredients and get cooking! I’m confident that you’ll love these bacon bombs as much as I do. They’re the perfect combination of savory, sweet, and smoky, and they’re guaranteed to be a hit at your next gathering.
I’m so excited for you to try this recipe! Once you do, I’d love to hear about your experience. Did you make any variations? What were your favorite dipping sauces? Share your photos and stories in the comments below. Let’s create a community of bacon bomb enthusiasts! Happy cooking, and enjoy the explosion of flavor! I can’t wait to see your creations and hear all about your bacon bombs success stories!
Bacon Bombs: The Ultimate Guide to Delicious, Smoky Perfection
Juicy, cheese-filled meatballs wrapped in crispy bacon and glazed with barbecue sauce. These bacon bombs are a flavor explosion!
Ingredients
- 1 pound thick-cut bacon
- 1 pound ground beef (80/20 blend recommended)
- 1/2 pound Italian sausage (sweet or hot, your preference)
- 1 cup shredded cheddar cheese
- 1/2 cup shredded Monterey Jack cheese
- 1/4 cup finely diced onion
- 1/4 cup finely diced bell pepper (any color)
- 2 cloves garlic, minced
- 1 tablespoon Worcestershire sauce
- 1 teaspoon smoked paprika
- 1/2 teaspoon garlic powder
- 1/2 teaspoon onion powder
- 1/4 teaspoon black pepper
- 1/4 teaspoon cayenne pepper (optional, for a little heat)
- 1/4 cup barbecue sauce (your favorite brand)
- Toothpicks
Instructions
- In a large bowl, combine the ground beef and Italian sausage. Remove the sausage from its casing before adding it to the bowl. Use your hands to break up the meat, ensuring it’s evenly distributed.
- Add the diced onion, bell pepper, and minced garlic to the meat mixture.
- Add the Worcestershire sauce, smoked paprika, garlic powder, onion powder, black pepper, and cayenne pepper (if using).
- Thoroughly mix all the ingredients together until they are evenly combined. Be careful not to overmix.
- Cover the bowl with plastic wrap and refrigerate for at least 30 minutes (or up to overnight).
- Remove the meat mixture from the refrigerator.
- Lay out several strips of bacon on a clean work surface, slightly overlapping each other. You’ll need enough bacon to completely wrap each meatball (about 4-5 strips per bacon bomb).
- Take a handful of the meat mixture (about 1/4 cup) and form it into a ball. Make sure the ball is tightly packed.
- Create a small indentation in the center of the meatball.
- Fill the indentation with a generous amount of shredded cheddar and Monterey Jack cheese.
- Carefully close the meatball around the cheese, making sure the cheese is completely sealed inside. Reshape the meatball if necessary.
- Place the meatball on top of the overlapping bacon strips.
- Carefully wrap the bacon around the meatball, ensuring it’s completely covered. Overlap the ends of the bacon strips to create a secure seal.
- Secure the bacon with toothpicks. Use as many toothpicks as needed to ensure the bacon stays wrapped around the meatball during cooking (usually 2-3 per bacon bomb).
- Repeat steps 3-9 until all the meat mixture has been used.
- Preheat your oven to 375°F (190°C).
- Line a baking sheet with parchment paper.
- Place the bacon bombs on the prepared baking sheet, making sure they are not touching each other.
- Bake for 30-40 minutes, or until the bacon is crispy and the meat is cooked through. The internal temperature of the meat should reach 160°F (71°C). Use a meat thermometer to check the temperature.
- During the last 5-10 minutes of cooking, brush the bacon bombs with your favorite barbecue sauce.
- Remove the bacon bombs from the oven and let them rest for a few minutes before serving.
- Preheat your grill to medium heat (about 350°F or 175°C).
- Lightly oil the grill grates to prevent the bacon bombs from sticking.
- Place the bacon bombs on the grill, making sure they are not directly over the flames.
- Grill for 20-30 minutes, turning occasionally, until the bacon is crispy and the meat is cooked through. The internal temperature of the meat should reach 160°F (71°C). Use a meat thermometer to check the temperature.
- During the last 5-10 minutes of grilling, brush the bacon bombs with your favorite barbecue sauce.
- Remove the bacon bombs from the grill and let them rest for a few minutes before serving.
- Preheat your smoker to 225°F (107°C).
- Add your favorite wood chips to the smoker. I recommend using hickory or applewood for a smoky flavor that complements the bacon and meat.
- Place the bacon bombs on the smoker rack, making sure they are not touching each other.
- Smoke for 2-3 hours, or until the bacon is crispy and the meat is cooked through. The internal temperature of the meat should reach 160°F (71°C). Use a meat thermometer to check the temperature.
- During the last 30 minutes of smoking, brush the bacon bombs with your favorite barbecue sauce.
- Remove the bacon bombs from the smoker and let them rest for a few minutes before serving.
- Remove the toothpicks from the bacon bombs before serving.
- Serve the bacon bombs hot, as an appetizer or main course.
- They are delicious on their own, or with your favorite dipping sauces, such as barbecue sauce, ranch dressing, or blue cheese dressing.
- Enjoy!
Notes
- For a spicier kick, add more cayenne pepper to the meat mixture.
- Feel free to experiment with different cheeses. Pepper jack, gouda, or even cream cheese would be delicious.
- If you don’t have time to refrigerate the meat mixture, you can skip that step, but the flavors will be more developed if you do.
- Make sure the internal temperature of the meat reaches 160°F (71°C) to ensure it is cooked through.
- Be careful when removing the toothpicks, as the bacon bombs will be hot.
Leave a Comment