
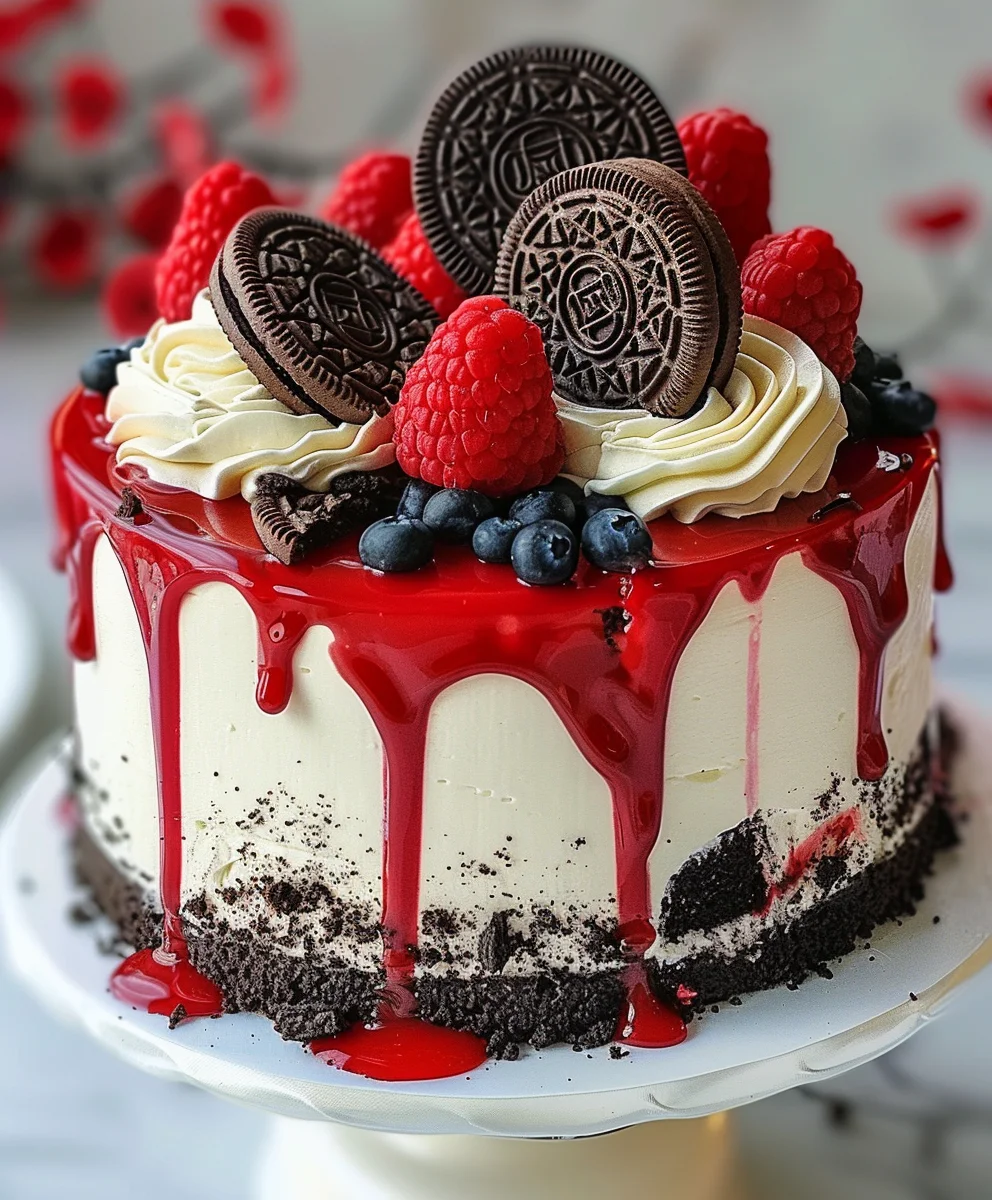
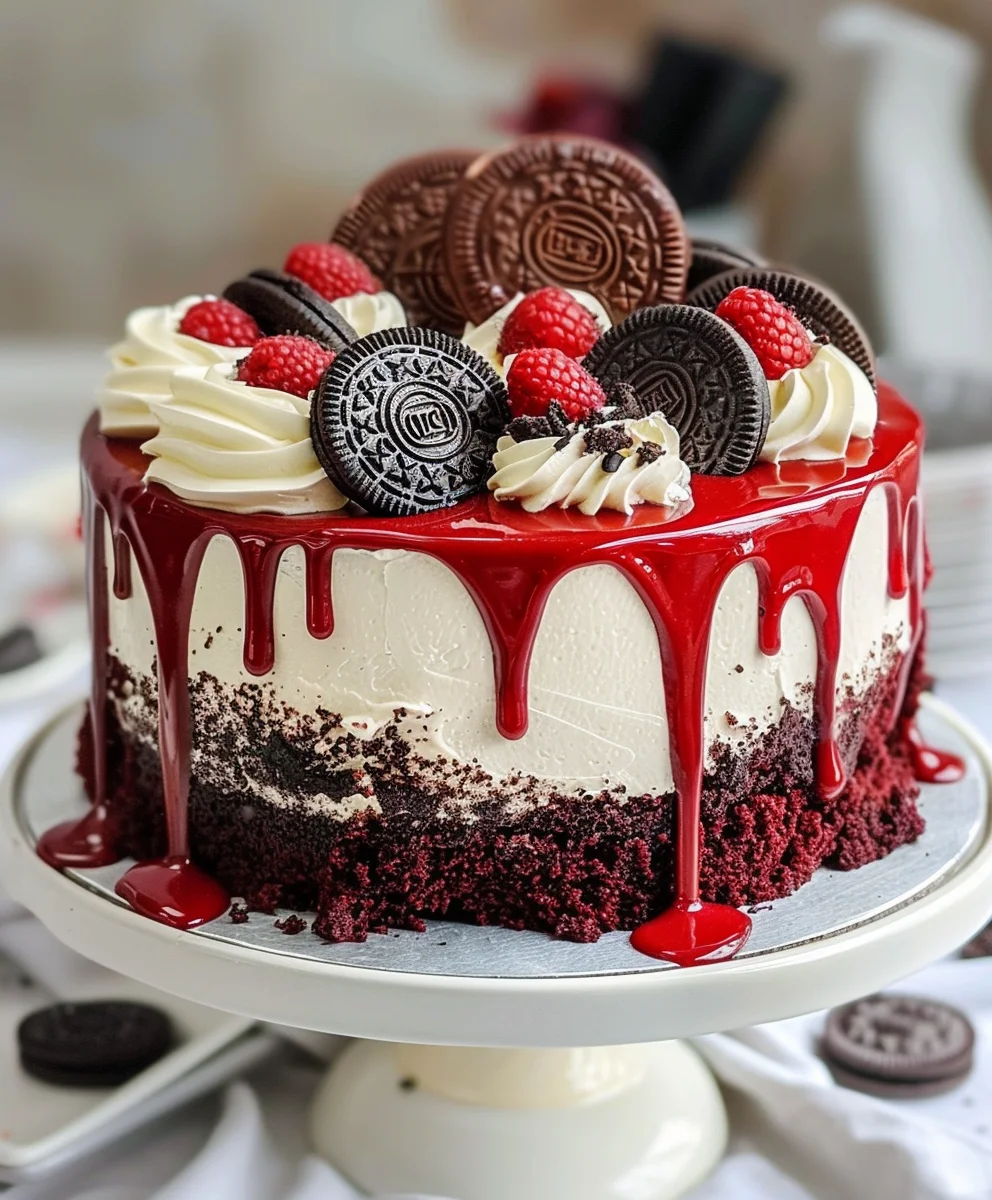
Decadent Oreo Red Velvet Cheesecake Drip Cake Recipe is not merely a dessert; it’s an edible masterpiece designed to captivate every sense and leave a lasting impression. As a passionate home baker, I understand the thrill of presenting a show-stopping creation, and this particular cake guarantees an unforgettable experience. Imagine sinking your fork through layers of impossibly moist, vibrant red velvet cake, followed by a creamy, tangy cheesecake filling generously studded with crunchy Oreo pieces, all crowned with a rich chocolate ganache drip. It’s a symphony of textures and flavors that will undoubtedly steal the spotlight at any gathering.
The journey of red velvet cake itself is rich with history, evolving from the “velvet cakes” of the Victorian era to becoming a celebrated Southern staple, known for its distinctive hue and subtle cocoa notes. Cheesecake, with its ancient origins, has found countless expressions, but pairing it with the beloved Oreo cookie is a modern stroke of genius that resonates with dessert lovers worldwide. This recipe takes those classic elements and elevates them into a truly luxurious fusion, representing the best of both worlds. People adore this dish not just for its stunning visual appeal and the delightful contrast of its components—the tender cake, the silky cheesecake, the satisfying crunch of Oreos—but also for the sheer indulgence it offers. Every bite is a celebration, a perfect blend of sweet, tangy, and rich. If you’re ready to impress and delight, diving into this Decadent Oreo Red Velvet Cheesecake Drip Cake Recipe is your ultimate culinary adventure.
Ingredients:
For the Decadent Red Velvet Cake Layers:
- 2 ½ cups (300g) all-purpose flour
- 1 ½ teaspoons baking soda
- 1 teaspoon cocoa powder (unsweetened, natural)
- ½ teaspoon salt
- 1 cup (226g) unsalted butter, softened to room temperature
- 2 cups (400g) granulated sugar
- 2 large eggs, room temperature
- 1 teaspoon vanilla extract
- 1 cup (240ml) buttermilk, room temperature
- 2 tablespoons red food coloring (liquid or gel, gel is more vibrant)
- 1 teaspoon distilled white vinegar
For the Irresistible Oreo Cheesecake Layer:
- 1 ½ cups Oreo cookie crumbs (about 15-18 cookies, finely crushed)
- ¼ cup (56g) unsalted butter, melted
- 24 ounces (678g) cream cheese, softened to room temperature
- ¾ cup (150g) granulated sugar
- 2 large eggs, room temperature
- 1 teaspoon vanilla extract
- ½ cup (approx. 6-8 cookies) chopped Oreo cookies (for mixing into the batter)
For the Velvety Cream Cheese Frosting:
- 16 ounces (452g) cream cheese, softened to room temperature
- 1 cup (226g) unsalted butter, softened to room temperature
- 4-5 cups (480-600g) powdered sugar (confectioners’ sugar), sifted
- 2 teaspoons vanilla extract
- 1-2 tablespoons heavy cream or milk (if needed for consistency)
For the Rich Chocolate Ganache Drip:
- ½ cup (120ml) heavy cream
- 4 ounces (113g) semi-sweet chocolate, finely chopped or chocolate chips
For Decoration:
- 10-12 whole Oreo cookies
- ½ cup crushed Oreo cookies
Preparation:
Baking the Decadent Red Velvet Cake Layers
- Preheat and Prepare: My first step is always to preheat my oven to 350°F (175°C). Then, I generously grease and flour three 8-inch round cake pans. For an extra layer of security against sticking, I like to line the bottoms with parchment paper circles. This ensures my beautiful red velvet layers release perfectly from the pans without any fuss, which is essential for a beautiful stacked cake.
- Combine Dry Ingredients: In a medium bowl, I whisk together the all-purpose flour, baking soda, cocoa powder, and salt. It’s important to make sure these are well combined so the leavening agents are evenly distributed throughout the mixture, leading to a perfectly risen, consistent cake. I set this aside for now, ready for later incorporation.
- Cream Butter and Sugar: In the bowl of my stand mixer, fitted with the paddle attachment, or using a large bowl with an electric hand mixer, I beat the softened unsalted butter and granulated sugar together on medium-high speed. I let this go for about 3-5 minutes, until the mixture is truly light, fluffy, and noticeably pale yellow. This creaming process incorporates a lot of air, which will contribute significantly to the cake’s tender and airy texture, a hallmark of a great red velvet cake.
- Add Eggs and Vanilla: I add the eggs one at a time, beating well after each addition until each egg is fully incorporated into the butter and sugar mixture. Then, I stir in the vanilla extract, ensuring it’s evenly dispersed for that lovely aromatic quality. It’s important not to overmix at this stage; I just mix until everything is combined, stopping as soon as the egg yolks disappear.
- Alternate Wet and Dry: Now comes the red velvet magic! In a small bowl or liquid measuring cup, I combine the buttermilk with the vibrant red food coloring. You can start with 2 tablespoons of liquid coloring or a good dollop of gel, and add more if you desire a deeper, more intense hue – I love a really rich red. With the mixer on low speed, I gradually add the dry ingredients to the wet mixture in three additions, alternating with the buttermilk mixture in two additions. I always begin and end with the dry ingredients. For example, I’ll add about a third of the flour mixture, mix until just combined, then half the buttermilk mixture, mix gently, another third of the flour, mix, the remaining buttermilk, mix, and finally the last third of the flour, mixing just until no streaks of flour remain visible. Be careful not to overmix; overmixing can develop too much gluten, leading to a tough, dense cake, and we want a light, tender crumb!
- The Vinegar Secret: In a separate tiny bowl, I quickly stir the distilled white vinegar into the batter. This step is a classic red velvet secret! The vinegar reacts with the baking soda, creating a lovely rise and contributing to the characteristic tang and tender crumb that red velvet is known for. I gently fold it in by hand using a spatula until just combined, ensuring it’s evenly distributed without deflating the batter.
- Bake the Layers: I divide the batter evenly among the three prepared cake pans. I like to use a kitchen scale for this to ensure my layers are perfectly uniform in height and size, which makes stacking much easier and results in a more professional-looking cake. I bake for 25-30 minutes, or until a wooden skewer or toothpick inserted into the center of a cake comes out clean, with no wet batter clinging to it.
- Cooling Process: Once baked, I immediately remove the cakes from the oven and let them cool in their pans on a wire rack for about 10-15 minutes. This allows them to firm up slightly and contract from the sides of the pan, making them easier to handle without breaking. After this initial cooling, I carefully invert them onto the wire rack, remove the parchment paper, and let them cool completely before even thinking about frosting. It’s absolutely crucial that the cakes are completely cool, not even slightly warm, before you even think about frosting them, otherwise, your beautiful cream cheese frosting will melt and slide right off, creating a messy situation! This can take a couple of hours, so plan accordingly.
Crafting the Irresistible Oreo Cheesecake Layer
- Prepare the Crust: While the red velvet cakes are cooling, or even before I start them, I begin on the cheesecake. First, I preheat my oven to 325°F (160°C). In a medium bowl, I combine the Oreo cookie crumbs with the melted butter. I press this mixture firmly and evenly into the bottom of an 8-inch springform pan. I like to use the bottom of a flat-bottomed glass or a measuring cup to get a really compact and even crust, extending slightly up the sides if desired. I then bake this for 8-10 minutes to set it, which helps prevent a soggy crust, then remove it from the oven and let it cool completely.
- Make the Cheesecake Batter: In the bowl of my stand mixer, fitted with the paddle attachment, or using a large bowl with an electric hand mixer, I beat the softened cream cheese and granulated sugar together on medium speed until the mixture is completely smooth and creamy. It’s absolutely vital that the cream cheese is at room temperature to avoid any annoying lumps in your finished cheesecake. I make sure to scrape down the sides of the bowl frequently to ensure everything is thoroughly incorporated and uniform.
- Add Eggs and Vanilla: I add the eggs one at a time, beating on low speed until just combined after each addition. The key here is to avoid overmixing; overmixing can introduce too much air into the batter, which can cause the cheesecake to puff up too much during baking and then crack as it cools. Finally, I gently fold in the vanilla extract, ensuring it’s well distributed for that classic rich flavor.
- Incorporate Oreos: Now for the delicious Oreo chunks! I gently fold in the chopped Oreo cookies using a spatula. This adds fantastic texture and delightful bursts of Oreo flavor throughout the creamy cheesecake, making it truly special.
- Pour and Bake: I pour the cheesecake batter evenly over the cooled Oreo crust in the springform pan. To ensure a smooth top and help prevent cracks, I often bake my cheesecakes in a water bath. To do this, I wrap the bottom and sides of the springform pan securely with several layers of heavy-duty aluminum foil (making sure there are no gaps) to prevent water from seeping in. Then, I place the wrapped springform pan in a larger roasting pan and pour hot water into the roasting pan until it comes about halfway up the sides of the springform. I carefully transfer this setup to the preheated oven.
- Baking and Cooling the Cheesecake: I bake the cheesecake for 50-60 minutes, or until the edges are set but the center still has a slight jiggle when gently shaken. The internal temperature should be around 150°F (65°C). Once baked, I turn off the oven, crack the door open slightly (about 2-3 inches), and let the cheesecake cool in the oven for about an hour. This slow cooling helps dramatically in preventing cracks on the surface. After an hour, I carefully remove it from the water bath (if using), unwrap the foil, and let it cool completely on a wire rack at room temperature. Once fully cooled, I cover it loosely with plastic wrap and refrigerate it for at least 4 hours, or preferably overnight. A properly chilled cheesecake is absolutely essential for easy handling, clean removal from the pan, and a firm, beautiful slice in your “Decadent Oreo Red Velvet Cheesecake Drip Cake Recipe.” Don’t rush this step!
Whipping Up the Velvety Cream Cheese Frosting
- Cream Cheese and Butter: In the bowl of my stand mixer, fitted with the paddle attachment, or using a large bowl with an electric hand mixer, I beat the softened cream cheese and softened unsalted butter together on medium speed until completely smooth and creamy. This should take about 3-4 minutes, and I frequently scrape down the sides of the bowl to ensure no lumps remain. It’s crucial for both ingredients to be at proper room temperature to achieve a lump-free, silky frosting that spreads beautifully.
- Add Vanilla and Sugar: I add the vanilla extract for that lovely aroma, and then gradually add the sifted powdered sugar, one cup at a time, beating on low speed until combined after each addition. Sifting the sugar prevents lumps. Once all the sugar is incorporated, I increase the speed to medium-high and beat for another 2-3 minutes until the frosting is wonderfully light, fluffy, and well aerated. If the frosting seems too stiff to spread easily, I add a tablespoon of heavy cream or milk at a time until I reach my desired spreading consistency. If it’s too soft, a bit more sifted powdered sugar can firm it up. Trust your judgment here, as different brands of cream cheese and butter can affect consistency.
- Ready to Frost: This velvety frosting is now ready to be generously applied to our cake layers. I make sure to keep it covered if I’m not using it immediately to prevent it from drying out and forming a crust.
Preparing the Rich Chocolate Ganache Drip
- Heat Cream: In a small saucepan, I heat the heavy cream over medium heat until it just begins to simmer around the edges, with small bubbles forming. I make sure not to bring it to a vigorous rolling boil, as this can affect the ganache’s texture.
- Melt Chocolate: I immediately remove the cream from the heat and pour it directly over the finely chopped semi-sweet chocolate (or chocolate chips) in a heatproof bowl. Let it sit undisturbed for 5 minutes. This allows the hot cream to effectively melt the chocolate evenly, without needing to stir too much.
- Whisk to Combine: After 5 minutes, I gently whisk the mixture from the center outwards until it’s completely smooth, glossy, and emulsified. Keep whisking until there are absolutely no lumps and the mixture is uniform.
- Cool to Drizzling Consistency: I let the ganache cool at room temperature for about 20-30 minutes, stirring occasionally. The goal is for it to reach a thick, pourable, yet still warm consistency. It should be thick enough to cling to a spoon but thin enough to drip slowly and beautifully down the sides of the cake. If it’s too thick, I can gently warm it over a double boiler or in the microwave in 5-second increments, stirring after each. If it’s too thin, I let it cool a bit longer. The perfect consistency is absolutely key for achieving a beautiful, controlled drip on your “Decadent Oreo Red Velvet Cheesecake Drip Cake Recipe,” so be patient with this step!
Assembling the Decadent Oreo Red Velvet Cheesecake Drip Cake
- Level the Cakes: First, I use a long serrated knife or a specialized cake leveler to carefully level the tops of my red velvet cake layers if they domed slightly during baking. This creates a flat, even surface for easy, stable stacking and contributes significantly to a professional, polished look.
- Prepare the Cheesecake: Carefully remove the thoroughly chilled Oreo cheesecake from its springform pan. You might need to run a thin, sharp knife around the inner edge of the pan before releasing the spring to ensure a clean release without damaging the cheesecake.
- First Cake Layer: Place one leveled red velvet cake layer on your desired serving plate or cake stand. I like to put a small dollop of frosting in the center of the plate first, then place the cake layer on top. This acts as an edible “glue” to secure the cake and prevent it from sliding around while you’re frosting and decorating.
- Frosting Layer 1: Spread about 1 cup of cream cheese frosting evenly over the first cake layer. Use an offset spatula to get a nice, smooth, consistent layer right to the edges.
- Add the Cheesecake: Carefully place the Oreo cheesecake layer on top of the frosting. Try to center it as best as possible. The cheesecake is substantial and a bit heavy, so be gentle and precise to avoid shifting the cake layers below.
- Frosting Layer 2: Spread another cup of cream cheese frosting evenly over the cheesecake layer. This will create a nice, even surface and a solid base for the next red velvet cake layer.
- Second Cake Layer: Place the second red velvet cake layer on top, pressing down very gently to secure it and ensure it’s level.
- Crumb Coat: Apply a thin, even layer of cream cheese frosting all over the top and sides of the entire cake. This is called a “crumb coat,” and its crucial purpose is to trap any loose crumbs from the cake layers, preventing them from mixing into your final, pristine frosting layer. Don’t worry about perfection here; it’s just the base layer.
- Chill the Crumb Coat: Transfer the crumb-coated cake to the refrigerator for at least 20-30 minutes. This allows the crumb coat to firm up completely, creating a stable foundation and making the final frosting application much smoother, cleaner, and easier to achieve.
- Final Frosting Layer: Once the crumb coat is firm to the touch, apply the remaining cream cheese frosting to the top and sides of the cake. Use an offset spatula or a bench scraper to smooth out the frosting as much as possible, aiming for an even, polished finish. I usually start by getting the top surface nice and flat, then move to the sides, using the scraper to achieve smooth, straight edges. Take your time for the most professional-looking finish.
- Prepare for the Drip: Place the fully frosted cake back in the refrigerator for another 15-20 minutes to thoroughly chill and firm up the exterior frosting. This critical step will help the ganache drip beautifully without melting the underlying cream cheese frosting, ensuring distinct, clean drips.
- Apply the Chocolate Ganache Drip: Once the cake is chilled and the ganache has cooled to the perfect drizzling consistency (as described earlier), it’s time for the signature drip! You can use a squeeze bottle for more precise control over the drips, or a small spoon for a more rustic, organic look. I usually start by spooning some ganache around the top edge of the cake, gently pushing it slightly over the edge with the back of the spoon, allowing it to slowly and gracefully drip down the sides. Then, I fill in the top center of the cake with the remaining ganache, spreading it gently with an offset spatula to create a smooth, rich surface. Don’t be afraid to let some drips go further than others – it truly adds to the homemade charm and organic beauty of the cake!
- Decorate with Oreos: While the ganache is still slightly wet (it will set quite quickly once it hits the cold cake), arrange the whole Oreo cookies artfully around the top edge of the cake, pressing them gently into the ganache. Then, sprinkle the crushed Oreo cookies generously over the top of the cake, filling in any gaps and adding wonderful texture and an extra layer of Oreo goodness. You can also press some crushed Oreos onto the sides of the cake if you like an extra crunchy coating or a more uniform finish.
- Final Chill: For best results, return the finished “Decadent Oreo Red Velvet Cheesecake Drip Cake Recipe” to the refrigerator for at least 30 minutes to allow the ganache to set completely and for all the incredible flavors to meld beautifully together. This also helps all the layers to firm up, making for cleaner slicing.
- Serve and Enjoy: When ready to serve, remove the cake from the refrigerator about 15-20 minutes beforehand to allow the frosting and cake to soften slightly, which makes for easier slicing and a more pleasant eating experience. Slice with a sharp knife, wiping the blade clean between each slice for the cleanest possible presentation. Enjoy every glorious, decadent bite of this showstopping creation!
Conclusion:
And there you have it, my friends! We’ve reached the grand finale of our baking adventure, and I truly hope you’re feeling as inspired as I am to whip up this show-stopping creation. This isn’t just another dessert; it’s an experience, a masterpiece that brings together three universally adored treats into one harmonious, unbelievably delicious package. What makes this particular recipe a must-try, you ask? Well, it’s the irresistible trio: the rich, deep cocoa notes of classic red velvet cake, perfectly complemented by the creamy, tangy indulgence of cheesecake, all enrobed in a luscious chocolate drip and adorned with the satisfying crunch of Oreo cookies. It’s a symphony of textures and flavors that will tantalize every single taste bud, leaving everyone who tries it utterly speechless.
I know the name might sound a little intimidating, but trust me when I say that the effort you put into crafting this beauty is rewarded tenfold by the sheer delight it brings. Imagine the gasp of awe as you present it, the excited chatter as everyone digs in, and the blissful silence that follows as they savor each perfect bite. It’s more than just a cake; it’s a celebration, a moment-maker, and a true testament to the magic that happens when you combine classic flavors with a touch of baking artistry. The vibrant red layers peeking through, the stark white of the cheesecake, and the dark, speckled Oreos create a visual feast that is almost too pretty to eat – almost! It’s truly a centerpiece dessert designed to impress, delight, and satisfy even the most discerning sweet tooth.
Serving Suggestions to Elevate Your Experience:
Once your magnificent cake is chilled and ready, the ways you can serve it are as varied as your imagination. For a truly elegant presentation, I love serving slices on simple white plates, perhaps with a dusting of cocoa powder or a few fresh raspberries scattered around the base. The tartness of the berries provides a lovely contrast to the cake’s richness. For a more indulgent twist, a small scoop of vanilla bean ice cream or a dollop of freshly whipped cream alongside each slice can elevate the experience even further, adding another layer of creamy decadence. Don’t underestimate the power of a good beverage pairing either; a strong cup of coffee, a steaming mug of hot chocolate, or even a glass of cold milk makes a wonderful companion to this rich dessert. For larger gatherings, pre-slicing the cake into generous portions makes serving a breeze, ensuring everyone gets a beautiful piece of this edible art.
Endless Variations to Make It Your Own:
One of the things I love most about baking is the freedom to customize and experiment, and this recipe is incredibly adaptable. While I adore the original combination, don’t hesitate to put your unique spin on it. For the Oreo element, consider using different flavored Oreos – perhaps mint Oreos for a refreshing twist, golden Oreos for a vanilla-forward profile, or even peanut butter Oreos for an added nutty depth. You could also mix other crushed cookies into the cheesecake layer or sprinkle them on top. When it comes to the drip, feel free to get creative! A white chocolate drip, perhaps colored with a little red food coloring to match the cake, would look stunning, or even a caramel drip for an extra layer of sweetness.
For the red velvet cake itself, you might experiment with different extracts, like almond or raspberry, to subtly alter the flavor profile. If you’re feeling extra adventurous, you could even swirl a fruit puree into the cheesecake layer before baking for a fruity surprise. And don’t forget the toppings! Beyond Oreos, think about adding chocolate shavings, mini chocolate chips, edible glitter, or even a scattering of mini marshmallows for a different texture. This cake can also be adapted into different formats; imagine making individual red velvet cheesecake trifles layered with Oreo crumbles, or even a stunning red velvet cheesecake sheet cake if you’re feeding a very large crowd. The possibilities are truly endless, allowing you to tailor this incredible dessert to any occasion or preference.
Your Turn to Create and Share!
Now that you’re armed with all the tips, tricks, and inspiration you need, it’s your turn to step into the kitchen and create this spectacular dessert. I truly believe that trying this Decadent Oreo Red Velvet Cheesecake Drip Cake Recipe will be a rewarding experience, not just for your taste buds, but for your soul. There’s an immense sense of accomplishment that comes from creating something so beautiful and utterly delicious from scratch. Don’t be afraid to dive in; every step is manageable, and the end result is absolutely worth every moment of your time and effort. I’m genuinely excited for you to experience the joy of baking and sharing this incredible cake. Once you’ve made it, I would absolutely love to hear all about your experience! Did you stick to the recipe, or did you add your own creative twists? What did your friends and family think? Please feel free to share your photos and stories with me. Your baking triumphs inspire me, and I can’t wait to see the stunning creations you bring to life. Happy baking, my dear friends!
Oreo Red Velvet Cheesecake Drip Cake
An unforgettable edible masterpiece, this Oreo Red Velvet Cheesecake Drip Cake features layers of moist red velvet cake, creamy, tangy cheesecake with Oreo pieces, and a rich chocolate ganache drip, offering a symphony of textures and flavors.
Ingredients
-
2 ½ cups (300g) all-purpose flour
-
1 ½ teaspoons baking soda
-
1 teaspoon unsweetened cocoa powder
-
½ teaspoon salt
-
1 cup (226g) unsalted butter, softened
-
2 cups (400g) granulated sugar
-
2 large eggs
-
1 teaspoon vanilla extract
-
1 cup (240ml) buttermilk
-
2 tablespoons red food coloring
-
1 teaspoon distilled white vinegar
-
1 ½ cups Oreo cookie crumbs
-
¼ cup (56g) unsalted butter, melted
-
24 ounces (678g) cream cheese, softened
-
¾ cup (150g) granulated sugar
-
2 large eggs
-
1 teaspoon vanilla extract
-
½ cup chopped Oreo cookies
-
16 ounces (452g) cream cheese, softened
-
1 cup (226g) unsalted butter, softened
-
4-5 cups (480-600g) powdered sugar, sifted
-
2 teaspoons vanilla extract
-
1-2 tablespoons heavy cream or milk (optional)
-
½ cup (120ml) heavy cream
-
4 ounces (113g) semi-sweet chocolate, chopped
-
10-12 whole Oreo cookies
-
½ cup crushed Oreo cookies
Instructions
-
Step 1
Preheat oven to 350°F (175°C). Grease and flour three 8-inch cake pans; line with parchment. -
Step 2
Whisk flour, baking soda, cocoa powder, and salt. Set aside. -
Step 3
In a stand mixer, cream softened butter and granulated sugar until light and fluffy (3-5 min). -
Step 4
Beat in eggs one at a time, then vanilla extract. -
Step 5
Combine buttermilk and red food coloring. Alternately add dry ingredients (in 3 parts) and buttermilk mixture (in 2 parts) to wet ingredients, starting and ending with dry. Mix until just combined. -
Step 6
Gently fold in distilled white vinegar. -
Step 7
Divide batter evenly among pans. Bake 25-30 min, or until a toothpick comes out clean. -
Step 8
Cool cakes in pans 10-15 min, then invert onto a wire rack to cool completely. Ensure cakes are completely cool before frosting. -
Step 9
For the cheesecake crust: Preheat oven to 325°F (160°C). Combine Oreo crumbs and melted butter; press into an 8-inch springform pan. Bake 8-10 min, then cool. -
Step 10
For the cheesecake batter: Beat softened cream cheese and granulated sugar until smooth. Beat in eggs one at a time on low speed until just combined. Fold in vanilla extract. Gently fold in chopped Oreo cookies. -
Step 11
Pour cheesecake batter over cooled crust. (Optional: Bake in a water bath). Bake 50-60 min until edges are set with a slight jiggle in the center. Turn off oven, crack door, and cool in oven for 1 hour. Remove, cool completely, then refrigerate for at least 4 hours. -
Step 12
For the cream cheese frosting: Beat softened cream cheese and butter until smooth and creamy (3-4 min). Add vanilla extract, then gradually beat in sifted powdered sugar. Increase speed and beat 2-3 min until light and fluffy. Adjust consistency with cream/milk or powdered sugar if needed. -
Step 13
For the chocolate ganache: Heat heavy cream until it simmers. Remove from heat, pour over chopped semi-sweet chocolate. Let sit 5 min, then whisk until smooth. Cool at room temperature 20-30 min, stirring occasionally, until thick and pourable. -
Step 14
Assembly: Level red velvet cake layers. Remove chilled cheesecake from pan. Place one cake layer on a serving plate, secure with frosting, and spread ~1 cup frosting evenly over it. -
Step 15
Carefully place cheesecake layer on top. Spread ~1 cup frosting evenly over cheesecake. -
Step 16
Place second red velvet cake layer on top, pressing gently. -
Step 17
Apply a thin ‘crumb coat’ of frosting over the entire cake. Refrigerate 20-30 min. -
Step 18
Apply remaining frosting to the top and sides, smoothing for a polished finish. Refrigerate 15-20 min. -
Step 19
Apply ganache drip: Spoon or squeeze ganache around the top edge to create drips, then fill the center. -
Step 20
Decorate with whole Oreo cookies around the edge and sprinkle crushed Oreos generously over the top. -
Step 21
Refrigerate for at least 30 min before serving. Remove 15-20 min before slicing for easier cutting and enjoyment.
Important Information
Nutrition Facts (Per Serving)
It is important to consider this information as approximate and not to use it as definitive health advice.
Allergy Information
Please check ingredients for potential allergens and consult a health professional if in doubt.
Leave a Comment