
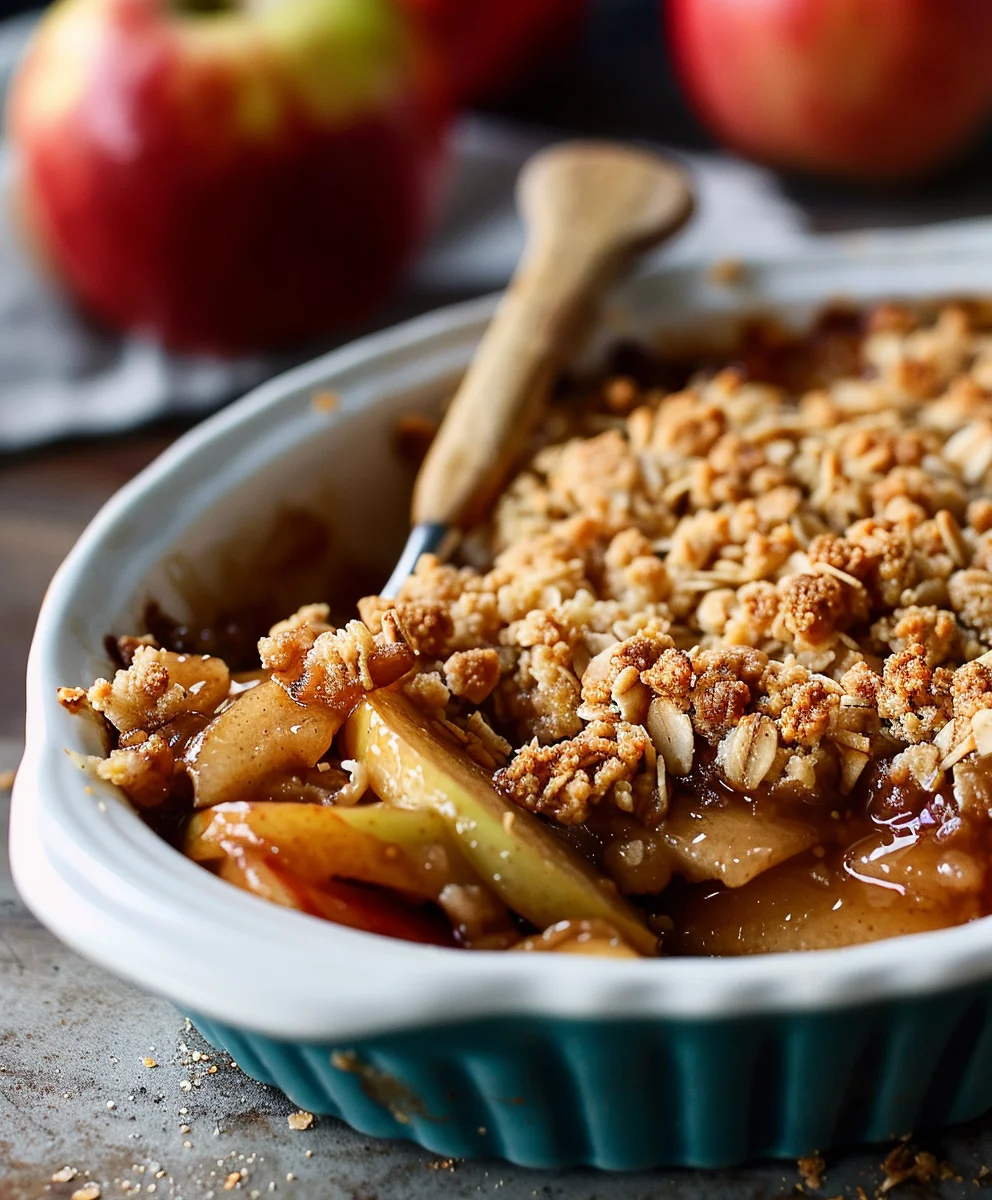
Pioneer Woman Apple Crisp Recipe – just hearing those words conjures images of warm, spiced apples bubbling under a golden, crunchy topping, doesn’t it? There’s an undeniable magic in a perfectly executed apple crisp, a dessert that speaks to the soul of home cooking and simple pleasures. For generations, apple crisp has been a beloved staple, particularly in American kitchens, cherished for its ability to transform humble ingredients into an extraordinary treat. It’s the quintessential comfort food, often a centerpiece at family gatherings or a soothing indulgence on a crisp autumn evening. I’ve always found it remarkable how this classic dessert, with its roots in making the most of seasonal produce, continues to captivate hearts with its irresistible blend of sweet, tender fruit and a contrasting buttery oat crumble.
Why is this particular Pioneer Woman Apple Crisp Recipe so adored? It’s more than just a dessert; it’s an experience. People adore the harmonious balance of tart apples, softened to perfection, mingling with warm cinnamon and nutmeg. This is beautifully crowned by a generously thick, crunchy topping that provides a delightful textural contrast with every spoonful. It’s incredibly forgiving to bake, surprisingly easy to prepare, and promises a comforting aroma that fills your entire home. Get ready to create a truly memorable dessert that will have everyone asking for seconds!
Ingredients:
-
For the Apple Filling:
- 6-8 large baking apples (about 3-3.5 pounds total), a mix of Granny Smith (for tartness and firmness) and Honeycrisp or Fuji (for sweetness and complementary texture) works absolutely beautifully. My personal preference leans towards a 60/40 split of Granny Smith to sweeter apples.
- 1/2 cup granulated sugar – Adjust this slightly depending on the natural sweetness of your chosen apples.
- 1/4 cup packed light brown sugar – This adds a lovely depth of molasses flavor that granulated sugar alone can’t quite achieve.
- 2 tablespoons all-purpose flour (or cornstarch for a gluten-free option) – This is our secret weapon for a perfectly thickened, not watery, apple filling.
- 1 teaspoon ground cinnamon – A classic, warm spice that is non-negotiable for apple crisp.
- 1/4 teaspoon ground nutmeg – Just a hint to complement the cinnamon. Freshly grated is always superior if you have it!
- 1/8 teaspoon ground allspice (optional, but highly recommended for an extra layer of warmth) – It’s subtle but makes a difference.
- 1 tablespoon fresh lemon juice – This isn’t just to prevent browning; it brightens the apple flavor and cuts through the sweetness.
- 1 teaspoon vanilla extract – Pure vanilla extract, please! It adds another layer of aromatic goodness to the filling.
- Pinch of salt – A small amount, but crucial for balancing and enhancing all the other flavors.
-
For the Crisp Topping:
- 1 1/2 cups old-fashioned rolled oats (ensure they are not instant or quick oats; we want that chewy, substantial texture).
- 1 cup all-purpose flour – This forms the structure of our crumbly topping.
- 1/2 cup packed light brown sugar – For that signature caramelized, sweet crispness.
- 1/4 cup granulated sugar – Adds a bit more sweetness and helps with browning.
- 1 teaspoon ground cinnamon – To marry the topping flavors with the filling.
- 1/2 teaspoon salt – Absolutely essential in the topping to balance the sweetness and bring out the buttery flavor. Don’t skip it!
- 1 cup (2 sticks) unsalted butter, very cold and cut into 1/2-inch cubes. This cold butter is key for a truly crumbly, tender topping.
Prepare the Apple Filling:
-
Preheat Your Oven and Prepare Your Dish: Before we even touch those glorious apples, let’s get our oven ready. Preheat your oven to a cozy 375°F (190°C). While it’s warming up, lightly butter or grease a 9×13-inch baking dish. I often find a little non-stick spray followed by a light dusting of flour works wonders to ensure no sticky situations later, making clean-up a breeze. This classic Pioneer Woman Apple Crisp Recipe is all about comfort, and that starts with easy preparation.
-
Peel, Core, and Slice the Apples: This is arguably the most time-consuming part, but it’s meditative once you get into a rhythm! Using a sturdy vegetable peeler, carefully remove all the skin from your chosen apples. Next, use an apple corer or a small paring knife to remove the core. Then, slice the apples into even 1/4-inch thick slices. Consistency is key here; uniform slices ensure that all the apples cook at the same rate, preventing some from becoming mushy while others are still too firm. I usually slice them into half-moons, but thin wedges work beautifully too. Aim for around 8-10 cups of sliced apples once they’re all prepped.
-
Toss with Lemon Juice: As you slice the apples, immediately place them into a very large mixing bowl. Once all apples are sliced, drizzle the 1 tablespoon of fresh lemon juice over them. Gently toss the apples with your hands or a rubber spatula until each slice is lightly coated. Not only does this prevent the apples from browning (which isn’t strictly necessary for flavor, but certainly makes for a prettier filling!), but it also adds a bright, zesty counterpoint to the sweetness we’re about to add.
-
Combine Dry Filling Ingredients: In a separate, medium-sized bowl, whisk together the 1/2 cup granulated sugar, 1/4 cup packed light brown sugar, 2 tablespoons all-purpose flour, 1 teaspoon ground cinnamon, 1/4 teaspoon ground nutmeg, 1/8 teaspoon ground allspice (if using), and a pinch of salt. Whisk thoroughly until all the ingredients are well combined and there are no lumps, especially from the brown sugar. This ensures even distribution of flavor and thickener throughout our apple filling.
-
Coat the Apples: Pour this aromatic dry mixture over your lemon-tossed apple slices in the large bowl. Using your hands (which I find is the best tool for this job, just make sure they’re clean!) or a large spatula, gently toss the apples until every single slice is beautifully coated with the sugar and spice mixture. You want to see that lovely sheen on each apple, indicating that the flavors will be perfectly distributed. Take your time with this step; it truly pays off. Finally, add the 1 teaspoon of vanilla extract and give it one last gentle toss. Oh, the aroma already filling your kitchen is just a preview of the deliciousness to come!
Craft the Crisp Topping:
-
Combine Dry Topping Ingredients: In a separate large mixing bowl, combine the 1 1/2 cups old-fashioned rolled oats, 1 cup all-purpose flour, 1/2 cup packed light brown sugar, 1/4 cup granulated sugar, 1 teaspoon ground cinnamon, and 1/2 teaspoon salt. Give these dry ingredients a good whisk with a fork or a balloon whisk until everything is thoroughly mixed. You’re looking for a uniform color and texture, ensuring all the flavors are evenly distributed before we introduce the star of the topping: butter!
-
Incorporate the Cold Butter: Now for the magic! Add the 1 cup (2 sticks) of very cold, cubed unsalted butter to the dry mixture. This is arguably the most crucial step for a perfect crisp topping. The butter MUST be cold; this prevents it from melting too quickly and allows it to create those wonderful pockets of steam during baking, leading to a truly light and crispy texture. If your butter is too warm, you’ll end up with a greasy, dense topping instead of a crumbly one, and that’s just not the classic Pioneer Woman Apple Crisp Recipe experience we’re aiming for!
-
Cut in the Butter: There are a few methods for cutting in butter, and I encourage you to use what you’re most comfortable with.
- Pastry Blender: If you have one, this is my preferred tool. Work the pastry blender through the mixture, pressing down and twisting, until the butter is broken down into pea-sized crumbs.
- Two Knives: Hold a knife in each hand and use a criss-cross motion to cut the butter into the flour mixture until small crumbs form.
- Your Fingertips: This is a hands-on approach! Using just your fingertips (the coolest part of your hands), quickly rub the butter into the dry ingredients. The key is to work quickly so the butter doesn’t melt from the heat of your hands. You’ll feel the texture transform from large chunks to coarse crumbs.
The goal is to have the mixture resemble coarse crumbs, with some pieces of butter still visible, ranging from the size of small peas to tiny flakes. Do not overmix! Overmixing develops the gluten in the flour and warms the butter too much, which will result in a tough rather than tender crisp. The entire process should take about 3-5 minutes, leaving you with a glorious, shaggy, crumbly topping that promises pure deliciousness.
Assemble and Bake:
-
Transfer Apples to Baking Dish: Pour the beautifully coated apple mixture into your prepared 9×13-inch baking dish. Use a spatula to spread the apples evenly across the bottom. Don’t worry if they seem mounded; they will cook down considerably as they release their juices and soften in the oven.
-
Apply the Crisp Topping: Now for the grand finale before baking! Evenly sprinkle the glorious, crumbly crisp topping over the entire surface of the apples. I like to gently crumble it with my hands as I go, ensuring no large clumps and good coverage. You want a generous layer of that buttery oat mixture, as this is where all that signature “crisp” texture comes from. Make sure it’s spread from edge to edge to create a uniform golden crust.
-
Bake to Golden Perfection: Place your baking dish on a rimmed baking sheet (this is a great trick to catch any potential drips or bubbly overflow, saving your oven from a messy clean-up!). Carefully transfer it to your preheated 375°F (190°C) oven. Bake for approximately 45-60 minutes.
- For the first 30 minutes, I often loosely cover the dish with aluminum foil. This helps the apples to really steam and soften without the topping getting too dark too quickly.
- After 30 minutes, remove the foil and continue baking for another 15-30 minutes, or until the topping is a gorgeous golden brown, the filling is bubbling thickly around the edges, and the apples are fork-tender.
You can gently insert a sharp knife or a skewer into the center of the crisp to test the tenderness of the apples. If it slides in easily, they’re perfectly cooked. The aroma filling your kitchen will be absolutely intoxicating – that’s your cue that something wonderful is happening!
A Note on Doneness:
Look for the visual cues: the topping will be deeply golden and irresistible, and you should see the apple juices visibly bubbling up around the edges of the dish. This means your thickener has done its job, and the filling is rich and luscious. The delightful sizzle and golden hue are signs of a perfect Pioneer Woman Apple Crisp Recipe coming to life.
Cooling and Serving:
-
The Art of Cooling: This step, while requiring patience, is absolutely crucial for the best possible apple crisp experience. Once your crisp emerges from the oven, bubbling and fragrant, resist the urge to dive in immediately! Carefully remove the baking dish from the oven and place it on a wire cooling rack. Allow the crisp to cool for at least 20-30 minutes, or even longer if you can manage it.
- Why cool? During this cooling period, the apple filling will continue to thicken and set, transforming from a runny liquid into a lovely, cohesive, saucy consistency. The topping will also become firmer and even more delightfully crisp. If you cut into it too soon, the filling might be too hot and watery, and the crisp won’t hold its shape as well. Patience truly is a virtue here, leading to a much more satisfying dessert.
-
Serve Warm, with a Flourish: While some people enjoy apple crisp at room temperature (and it’s still fantastic!), I firmly believe this dessert shines brightest when served warm. There’s something undeniably comforting about that warmth. Scoop generous portions into bowls.
- Classic Accompaniments: For the ultimate indulgence, serve your warm apple crisp with a scoop of premium vanilla bean ice cream. The cold, creamy ice cream melting into the warm, spiced apples and crunchy topping is a match made in heaven.
- Other Options: A dollop of freshly whipped cream, a drizzle of caramel sauce, or even a sprinkle of toasted pecans can elevate this already wonderful dessert to new heights. Each spoonful will be a perfect symphony of textures and flavors – tender, spiced apples, buttery, crunchy oats, and a cool, creamy contrast. Enjoy every single bite of this quintessential Pioneer Woman Apple Crisp Recipe, it’s a true taste of home!
Chef’s Notes and Tips for the Perfect Apple Crisp:
-
Choosing Your Apples Wisely: The type of apples you use can drastically impact the final texture and flavor of your crisp. As mentioned, a mix is generally best. Granny Smith apples are fantastic because they hold their shape well during baking and provide a tartness that cuts through the sweetness of the sugars and complements the spices beautifully. Other great baking apples include Honeycrisp (sweet, crisp, and holds shape), Fuji (sweet and firm), Braeburn (tart and sweet), or Golden Delicious (sweet and soft). Avoid apples that turn too mushy, like Red Delicious. Experiment with different combinations to find your favorite!
-
Don’t Skimp on the Lemon Juice: Beyond preventing browning, the lemon juice in the filling isn’t just an optional addition; it’s a critical flavor enhancer. It brightens the natural apple flavor, balances the sweetness of the sugars, and adds a subtle tang that truly elevates the crisp. It’s a small detail that makes a big difference in achieving that perfectly balanced Pioneer Woman Apple Crisp Recipe taste.
-
The Importance of Cold Butter for the Topping: I cannot stress this enough! Using very cold butter, cut into small cubes, is the secret to a light, crumbly, and truly “crisp” topping. When cold butter hits the hot oven, the water within it quickly evaporates, creating steam that puffs up the flour and oats, resulting in a tender, flaky texture. If your butter is too warm, it will melt into the dry ingredients too quickly, leading to a dense, greasy topping. If your kitchen is warm, you can even pop the cubed butter into the freezer for 10-15 minutes before mixing.
-
Avoiding a Watery Filling: The 2 tablespoons of flour (or cornstarch) in the apple filling are there specifically to absorb excess moisture released by the apples during baking. If you’re concerned about a watery filling, especially if your apples are very juicy, you can increase the flour by another half tablespoon. However, remember that the crisp will thicken considerably as it cools, so don’t overdo it with the thickener.
-
Spice Adjustments: While the spice measurements provided are classic and balanced, feel free to adjust them to your personal preference. Love cinnamon? Add a little more! Prefer a hint of ginger or cardamom? A tiny pinch can add a wonderful complexity. Just be careful not to overpower the natural apple flavor. This is your kitchen, so have fun with it!
-
Storage and Reheating: Leftover apple crisp is a delight! Store any leftovers covered in the refrigerator for up to 3-4 days. To reheat, you can warm individual portions in the microwave for a minute or two, though the topping might lose some of its crispness. For a truly revived crisp, reheat the entire dish (or a larger portion) in a 350°F (175°C) oven for 15-20 minutes, or until warmed through and the topping has re-crisped slightly. This is the best way to enjoy it like it’s fresh out of the oven again.
-
Making Ahead: You can prepare the apple filling and the crisp topping separately a day in advance. Store the prepared apples (covered) in the refrigerator and the topping in an airtight container in the refrigerator (or even the freezer if making further in advance). When you’re ready to bake, simply combine and proceed with the baking instructions. This is a fantastic time-saver for entertaining!
-
Serving Suggestions Beyond Ice Cream: While vanilla ice cream is a classic pairing, consider other delicious options: a spoonful of crème fraîche for a sophisticated tang, a drizzle of warm maple syrup, or even a dollop of Greek yogurt for a slightly healthier, yet equally delicious, touch. A truly versatile dessert, this Pioneer Woman Apple Crisp Recipe shines with many accompaniments.
Conclusion:
And there you have it, my friends! We’ve journeyed through the simple magic and profound comfort that this incredible apple crisp brings to any table. It’s truly more than just a dessert; it’s an experience, a warm hug in a bowl that promises to delight with every single spoonful. I wholeheartedly believe this recipe is an absolute must-try for anyone who appreciates the classics, elevated to perfection. Its unparalleled balance of tender, spiced apples bubbling beneath a golden, buttery, and utterly irresistible oat-pecan crumble is, in my humble opinion, nothing short of culinary genius. From the moment the aroma begins to waft through your kitchen, filling every nook and cranny with notes of cinnamon, brown sugar, and sweet apples, you’ll understand why I’m so enthusiastic about it. It’s that quintessential dessert that instantly evokes feelings of warmth, nostalgia, and pure, unadulterated comfort, making it a perfect end to any meal, from a casual weeknight dinner to a grand holiday feast.
What truly sets this particular Pioneer Woman Apple Crisp Recipe apart is its straightforward approach that yields consistently spectacular results. You don’t need to be a seasoned baker to achieve that perfectly crisp topping and those tender, flavorful apples. The beauty of it lies in its simplicity, proving that sometimes, the most extraordinary pleasures come from the most honest and unpretentious ingredients. It’s comforting in its familiarity yet exciting in its flawless execution, making it a recipe you’ll want to return to again and again. The apples hold their shape beautifully, offering a slight tartness that perfectly cuts through the richness of the topping, creating a symphony of textures and flavors that dance on your palate.
Now, let’s talk about how to truly elevate your apple crisp experience. While it’s utterly divine on its own, a scoop of creamy vanilla bean ice cream melting languidly over the warm, bubbling fruit is a classic pairing for a reason – it’s pure heaven. The cold creaminess against the hot, crisp topping and soft apples creates an unparalleled sensation. But why stop there? For an extra layer of decadence, consider drizzling a generous amount of warm caramel sauce over your serving, or perhaps a dollop of fresh, lightly sweetened whipped cream. If you’re feeling a bit adventurous, a sprinkle of toasted pecans or walnuts can add an extra crunch and a nutty depth that complements the apples beautifully. For a touch of sophistication, try pairing it with a scoop of cinnamon or ginger ice cream, or even a spoonful of tangy crème fraîche to balance the sweetness. In the cooler months, a tiny dusting of freshly grated nutmeg or a hint of allspice can enhance those cozy, autumnal vibes even further.
Creative Twists and Seasonal Variations
Beyond serving suggestions, this recipe is wonderfully adaptable for variations. Don’t be afraid to experiment with different apple varieties, mixing sweet with tart for a more complex flavor profile. Granny Smith is a must for that essential tang, but Honeycrisp, Fuji, or Gala can add lovely sweetness and texture. If you want to introduce other fruits, pears, especially Bosc or Anjou, can be a fantastic addition, pairing wonderfully with apples. In the summer, consider a peach and apple crisp, or even adding a handful of fresh berries like raspberries or blueberries for a burst of color and a different kind of tartness. For those who prefer a nuttier topping, adding a generous amount of finely chopped pecans, walnuts, or even almonds to the oat mixture adds another dimension of flavor and crunch. You could also play with spices – a pinch of cardamom or a touch of star anise could add an unexpected and delightful twist to the traditional cinnamon. For those with dietary restrictions, a gluten-free oat blend and a plant-based butter substitute can make this delicious dessert accessible to everyone without sacrificing flavor.
So, my dear readers, I implore you: don’t just read about this incredible dessert – make it! Seriously, clear your schedule, gather your ingredients, and immerse yourself in the joyful process of creating this masterpiece. The aroma alone is worth the effort, and the taste? Well, the taste is simply unforgettable. I promise you, it will become a cherished recipe in your culinary repertoire, a go-to for comfort, celebration, or simply because you deserve something truly delicious. Once you’ve pulled that golden, bubbling goodness from your oven, taken that first glorious bite, and experienced the magic for yourself, I would absolutely love, love, love to hear all about it. Share your triumphs, your serving ideas, or any creative twists you added in the comments below. Did you serve it with ice cream, whipped cream, or something entirely unique? Did you swap out some apples for pears? Your experiences and ideas not only inspire me but also create a wonderful community of fellow food lovers. Happy baking, and enjoy every single delightful moment!
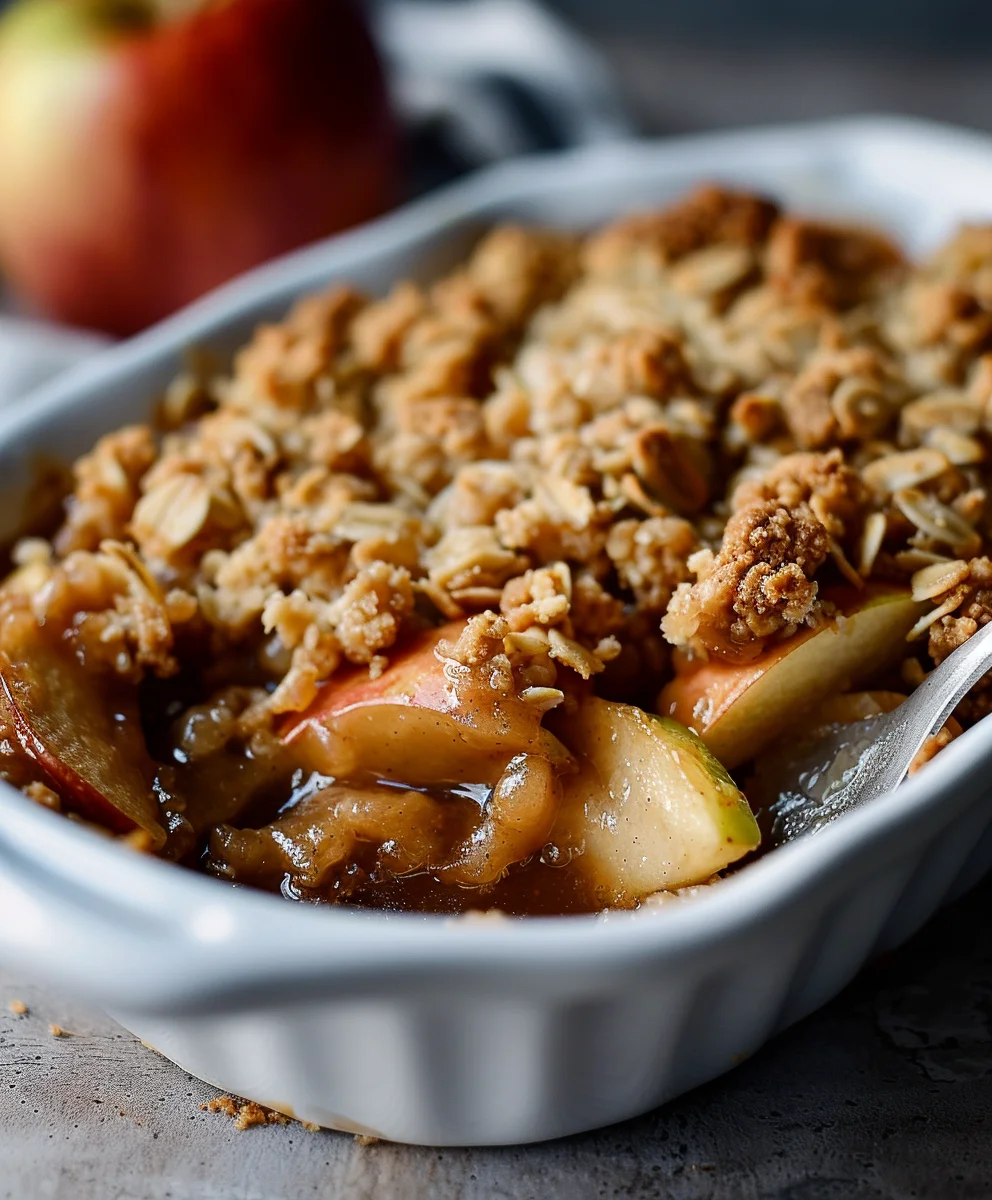
Pioneer Woman Apple Crisp Recipe: The Ultimate Comfort Food
This Pioneer Woman Apple Crisp Recipe offers the ultimate comfort food experience. Sweet, tender apples mingle with warm spices, crowned by a thick, crunchy oat topping. It’s a forgiving, easy-to-prepare dessert that fills your home with an irresistible aroma and promises delightful satisfaction.
Ingredients
-
8 medium apples, peeled + chopped
-
½ cup brown sugar
-
¼ cup flour
-
1 tsp vanilla extract
-
1 tsp cinnamon
-
½ tsp nutmeg
-
¼ tsp salt
-
¾ cup flour
-
¾ cup brown sugar
-
1 tsp cinnamon
-
½ cup cold butter, cubed
-
1 cup rolled oats
Instructions
-
Step 1
Preheat oven to 375°F (190°C). Lightly grease a 9×13-inch baking dish. -
Step 2
In a large bowl, combine chopped apples, ½ cup brown sugar, ¼ cup flour, 1 tsp vanilla extract, 1 tsp cinnamon, ½ tsp nutmeg, and ¼ tsp salt. Toss until apples are evenly coated. -
Step 3
In a separate bowl, whisk together ¾ cup flour, ¾ cup brown sugar, 1 tsp cinnamon, and 1 cup rolled oats. Add ½ cup cold, cubed butter and cut it into the dry mixture using a pastry blender, two knives, or fingertips until coarse crumbs form. Do not overmix. -
Step 4
Pour the apple mixture into the prepared baking dish, spreading evenly. Sprinkle the crisp topping over the apples, ensuring good coverage. -
Step 5
Place the dish on a rimmed baking sheet. Bake at 375°F (190°C) for 45-60 minutes. For the first 30 minutes, you can loosely cover with aluminum foil. Remove foil and continue baking until the topping is golden brown, the filling is bubbling, and apples are tender. (If using foil, adjust timing to ensure topping browns well in the last 15-30 minutes). -
Step 6
Remove from oven and let cool on a wire rack for at least 20-30 minutes for the filling to set. Serve warm, optionally with vanilla ice cream or whipped cream.
Important Information
Nutrition Facts (Per Serving)
It is important to consider this information as approximate and not to use it as definitive health advice.
Allergy Information
Please check ingredients for potential allergens and consult a health professional if in doubt.
Leave a Comment