
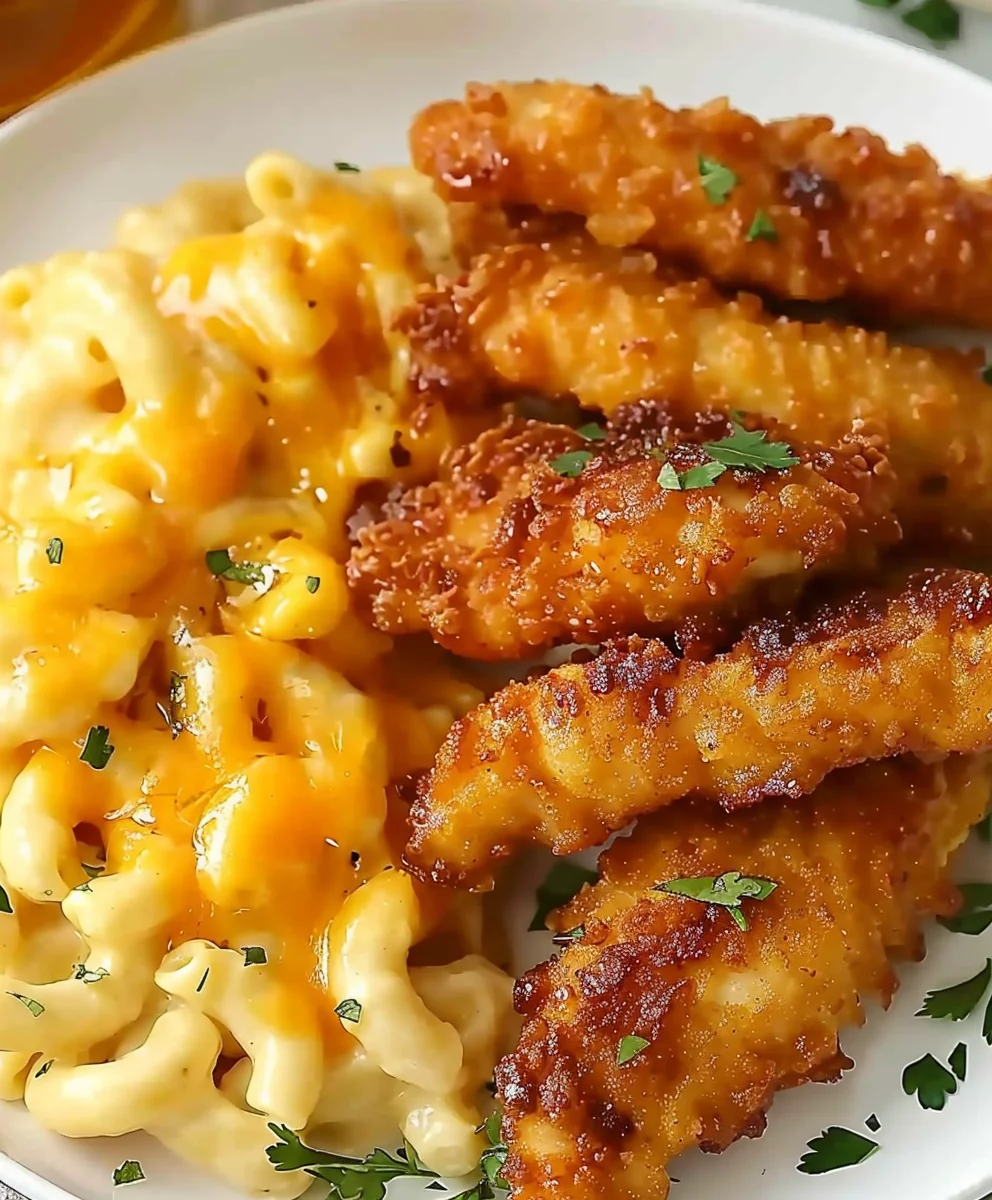
Hot Honey Chicken Tenders With Baked Mac And Cheese – prepare yourself for an extraordinary culinary experience that perfectly marries comfort with a captivating kick! I am incredibly excited to share a dish that has become a firm favorite in my own kitchen, offering a delightful twist on two universally adored classics. This isn’t just a meal; it’s an event, a celebration of flavors and textures that promises to satisfy every craving.
From the crispy, juicy chicken tenders coated in a tantalizing sweet and spicy hot honey glaze, to the rich, creamy, and gloriously golden baked mac and cheese, every bite is pure bliss. While individually these dishes hold a cherished spot in countless hearts as quintessential American comfort foods, bringing them together creates a symphony of taste that is both nostalgic and excitingly new. People adore this combination for its incredible balance: the fiery sweetness of the hot honey perfectly complements the ultimate comfort of the gooey, cheesy pasta, making it an irresistible choice for family dinners, game nights, or simply when you need a hug in a bowl. My recipe for Hot Honey Chicken Tenders With Baked Mac And Cheese truly elevates these beloved staples, transforming them into a show-stopping meal that’s surprisingly easy to achieve.
Ingredients:
- For the Hot Honey Chicken Tenders:
- 2 lbs (approx. 900g) boneless, skinless chicken breast tenders (or chicken breasts cut into 1-inch thick strips) – I always prefer to use pre-cut tenders if I can find them, it saves a lot of time!
- 2 cups (approx. 480ml) buttermilk – This is our secret for incredibly tender and juicy chicken, and it helps the breading stick beautifully.
- 2 tablespoons (approx. 30ml) your favorite hot sauce (like Frank’s RedHot) – For that foundational kick in the marinade.
- 1 teaspoon salt
- ½ teaspoon black pepper
- 2 cups (approx. 240g) all-purpose flour – The base for our crispy coating.
- ½ cup (approx. 60g) cornstarch – This addition is crucial for achieving an extra-crispy, almost shattering crust on our tenders. Don’t skip it!
- 2 teaspoons smoked paprika – Adds a lovely depth and color.
- 1 teaspoon garlic powder
- 1 teaspoon onion powder
- ½ teaspoon cayenne pepper (adjust to your spice preference) – A little extra heat never hurt anyone, especially with hot honey!
- ½ teaspoon black pepper
- 2 large eggs
- 1 tablespoon water or a splash of buttermilk – To thin out our egg wash slightly.
- 4-5 cups vegetable oil, peanut oil, or canola oil, for frying – You’ll need enough to submerge the tenders partially, so ensure your pot is deep enough.
- For the Hot Honey Sauce:
- ½ cup (approx. 120ml) honey – The star of our sweet and spicy sauce.
- 2 tablespoons (approx. 30g) unsalted butter
- 1-2 tablespoons (approx. 15-30ml) apple cider vinegar – This provides a vital tang to balance the sweetness and heat.
- 1-2 teaspoons red pepper flakes (adjust to your heat preference) – For visible flecks of heat and an extra punch.
- Pinch of salt
- For the Baked Mac and Cheese:
- 1 lb (approx. 450g) elbow macaroni or other small pasta shapes (shells, cavatappi work wonderfully too!) – Elbows are classic for a reason, they hold the sauce perfectly.
- ½ cup (approx. 113g) unsalted butter – The foundation of our rich cheese sauce.
- ½ cup (approx. 60g) all-purpose flour – For our roux, which thickens the sauce beautifully.
- 5 cups (approx. 1.2 liters) whole milk, warmed – Warming the milk helps prevent lumps when whisking into the roux.
- 1 teaspoon dry mustard powder – Don’t worry, it won’t make your mac and cheese taste like mustard! It’s a secret ingredient that truly enhances the cheesy flavor.
- ½ teaspoon freshly grated nutmeg – Another secret weapon for depth and warmth in cheese sauces.
- 1 teaspoon salt (or to taste)
- ½ teaspoon black pepper (or to taste)
- 4 cups (approx. 450g) shredded sharp cheddar cheese – For that classic, robust mac and cheese flavor.
- 2 cups (approx. 225g) shredded Gruyère cheese – Adds a sophisticated nuttiness and incredible melt.
- 1 cup (approx. 115g) shredded Monterey Jack cheese – For extra creaminess and a milder counterpoint to the sharp cheddar.
- ½ cup (approx. 50g) freshly grated Parmesan cheese – For a salty, umami kick.
- For the Topping:
- 1 ½ cups (approx. 100g) Panko breadcrumbs – These get incredibly crispy and provide the perfect textural contrast.
- 2 tablespoons (approx. 30g) unsalted butter, melted
Phase 1: Preparing the Hot Honey Chicken Tenders
Marinating the Chicken
- First things first, let’s get our chicken ready. If you’re using full chicken breasts, slice them lengthwise into approximately 1-inch thick tenders. We want uniform pieces so they cook evenly.
- In a large bowl or a resealable plastic bag, combine the buttermilk, 2 tablespoons of your favorite hot sauce, 1 teaspoon of salt, and ½ teaspoon of black pepper. Give it a good whisk to ensure everything is well combined.
- Add your chicken tenders to the buttermilk mixture, making sure each piece is fully submerged and coated. This buttermilk marinade is absolutely essential for creating incredibly juicy and tender chicken, and it also helps our breading adhere perfectly.
- Cover the bowl or seal the bag and refrigerate for at least 30 minutes. For the best flavor and tenderness, I recommend marinating for a minimum of 2 hours, or even up to 4 hours. You can prep this step ahead of time, which is a fantastic time-saver for busy weeknights!
Breading the Chicken
- While your chicken is marinating, let’s set up our dredging station. This is a critical step for achieving that wonderfully crispy crust on our Hot Honey Chicken Tenders. You’ll need two shallow dishes or pie plates.
- In the first shallow dish, whisk together the 2 cups of all-purpose flour, ½ cup of cornstarch, 2 teaspoons of smoked paprika, 1 teaspoon of garlic powder, 1 teaspoon of onion powder, ½ teaspoon of cayenne pepper, and ½ teaspoon of black pepper. The cornstarch here is key – it’s what gives our tenders that extra crunch and helps them stay crispy longer. Make sure all the spices are evenly distributed throughout the flour mixture.
- In the second shallow dish, crack the 2 large eggs and add 1 tablespoon of water or a splash of buttermilk. Whisk vigorously until the eggs are well beaten and frothy. This will be our egg wash.
- Once your chicken has finished marinating, remove it from the refrigerator. Working with one tender at a time, lift a piece of chicken from the buttermilk marinade, letting any excess drip off. You want some marinade clinging to it, as this is what helps the flour stick.
- First, dredge the chicken tender in the seasoned flour mixture, ensuring it’s completely coated. Gently shake off any excess flour.
- Next, dip the flour-coated tender into the egg wash, allowing any excess to drip back into the dish.
- Finally, return the chicken tender to the seasoned flour mixture for a second coating. Press the flour mixture onto the chicken firmly to ensure a thick, even crust. This double-dredging technique is what creates that gloriously thick and craggy fried chicken crust we all love.
- Place the breaded chicken tenders on a wire rack set over a baking sheet. Repeat this process for all remaining chicken tenders. Once all the chicken is breaded, let it rest on the wire rack for at least 15-20 minutes at room temperature. This resting period is important because it allows the breading to adhere firmly to the chicken, preventing it from falling off during frying.
Frying the Chicken
- Now it’s time to get our tenders golden and crispy! In a large, heavy-bottomed pot or a Dutch oven, pour in 4-5 cups of vegetable oil (or your chosen frying oil) until it reaches a depth of about 2-3 inches.
- Heat the oil over medium-high heat until it reaches a temperature of 350-375°F (175-190°C). Using a deep-fry thermometer is highly recommended here; maintaining the correct oil temperature is crucial for perfectly cooked chicken that is crispy on the outside and juicy on the inside, without being greasy. If the oil is too cool, the chicken will absorb too much oil; if it’s too hot, the outside will burn before the inside is cooked.
- Carefully lower a few breaded chicken tenders into the hot oil, making sure not to overcrowd the pot. Frying in batches is essential to maintain the oil temperature and ensure even cooking.
- Fry the tenders for about 6-8 minutes, flipping them halfway through, until they are deeply golden brown and cooked through. The internal temperature of the chicken should reach 165°F (74°C).
- Once cooked, use tongs to remove the chicken tenders from the oil and place them on a clean wire rack set over a baking sheet lined with paper towels. The wire rack allows air to circulate, keeping the chicken crispy while any excess oil drains off. Season lightly with a pinch of salt immediately after removing from the oil.
- Repeat this process with the remaining chicken tenders, ensuring the oil returns to the desired temperature between batches.
Making the Hot Honey Sauce
- While your chicken tenders are finishing up, let’s whip up that incredible Hot Honey Sauce that gives our dish its signature name. In a small saucepan, combine ½ cup of honey, 2 tablespoons of unsalted butter, 1-2 tablespoons of apple cider vinegar, 1-2 teaspoons of red pepper flakes, and a pinch of salt.
- Place the saucepan over medium-low heat. Stir occasionally until the butter is melted and all the ingredients are well combined. Bring the mixture to a gentle simmer.
- Let it simmer for about 3-5 minutes, stirring occasionally, until the sauce slightly thickens. The apple cider vinegar is really important here; it cuts through the sweetness of the honey and brightens up the flavors beautifully, creating a well-rounded sweet and spicy profile.
- Taste the sauce and adjust the red pepper flakes or apple cider vinegar if you desire more heat or tang. Remember, this sauce is the magic that elevates our crispy chicken tenders!
Coating the Tenders
- Once all your chicken tenders are fried and resting, it’s time for the grand finale! In a large bowl, pour about half of your freshly made hot honey sauce.
- Add the warm, crispy chicken tenders to the bowl. Using tongs, gently toss the tenders, making sure each piece is thoroughly coated in the glistening, sticky hot honey sauce. Add more sauce as needed until all the tenders are beautifully glazed.
- I love how the hot honey sauce clings to the nooks and crannies of the crispy breading. It’s truly a match made in heaven! Set these glorious Hot Honey Chicken Tenders aside while we finish up our Baked Mac and Cheese.
Phase 2: Preparing the Baked Mac and Cheese
Cooking the Pasta
- Preheat your oven to 375°F (190°C). Grease a 9×13-inch baking dish with butter or cooking spray.
- Bring a large pot of heavily salted water to a rolling boil. Remember, this is your only chance to season the pasta itself, so don’t be shy with the salt!
- Add the 1 pound of elbow macaroni to the boiling water and cook according to package directions, but aim for about 1-2 minutes less than the recommended cooking time. We want the pasta to be al dente (firm to the bite) because it will continue to cook in the oven later. If you overcook it now, you’ll end up with mushy mac and cheese, and nobody wants that!
- Once cooked al dente, drain the pasta thoroughly in a colander. Do not rinse the pasta! The starches clinging to the pasta help the cheese sauce adhere better.
Making the Cheese Sauce
- In a large, heavy-bottomed pot or Dutch oven, melt ½ cup of unsalted butter over medium heat.
- Once the butter is melted, sprinkle in ½ cup of all-purpose flour. Whisk continuously for about 1-2 minutes to create a roux. This cooks out the raw flour taste and will be the base for thickening our luscious cheese sauce. It should smell slightly nutty.
- Gradually whisk in the 5 cups of warm whole milk, about a cup at a time. Whisking slowly and continuously is crucial here to prevent lumps from forming. If your milk isn’t warm, that’s okay, but warm milk generally helps create a smoother sauce faster. Continue to whisk until the sauce is smooth and lump-free.
- Increase the heat to medium-high and bring the sauce to a gentle simmer, whisking frequently, until it thickens to a consistency similar to a thin gravy, about 5-7 minutes. It should coat the back of a spoon.
- Remove the pot from the heat. This is important because we don’t want the cheese to seize or become grainy from excessive heat.
- Stir in the 1 teaspoon of dry mustard powder, ½ teaspoon of freshly grated nutmeg, 1 teaspoon of salt, and ½ teaspoon of black pepper. The mustard powder and nutmeg are subtle but make a huge difference in the overall flavor profile of our Baked Mac and Cheese, adding a depth that will have everyone asking for your secret!
- Now for the best part – add your shredded cheeses! Gradually add the 4 cups of sharp cheddar, 2 cups of Gruyère, 1 cup of Monterey Jack, and ½ cup of Parmesan cheese, stirring constantly until all the cheese is completely melted and the sauce is smooth, creamy, and wonderfully shiny. Taste and adjust seasoning if needed. You might want a little more salt depending on the saltiness of your cheese.
Assembling and Baking
- Add the drained, al dente elbow macaroni directly into the glorious cheese sauce. Stir gently but thoroughly until every single piece of pasta is lovingly coated in that rich, creamy goodness.
- Pour the mac and cheese mixture into your prepared 9×13-inch baking dish, spreading it out evenly.
- For the Crispy Topping: In a small bowl, combine the 1 ½ cups of Panko breadcrumbs with the 2 tablespoons of melted unsalted butter. Toss with a fork until the breadcrumbs are evenly coated. Panko breadcrumbs are fantastic for this because they get incredibly crispy and don’t clump together like regular breadcrumbs.
- Sprinkle the buttered Panko breadcrumbs evenly over the top of the mac and cheese. This topping is going to give us that irresistible golden, crunchy crust that contrasts so beautifully with the creamy interior.
- Place the baking dish in your preheated oven and bake for 25-30 minutes, or until the mac and cheese is bubbly around the edges and the breadcrumb topping is beautifully golden brown and crispy.
- Once baked, carefully remove the Baked Mac and Cheese from the oven. Allow it to rest for about 5-10 minutes before serving. This brief resting period allows the sauce to set slightly, making for easier, cleaner serving.
Phase 3: Serving Suggestions
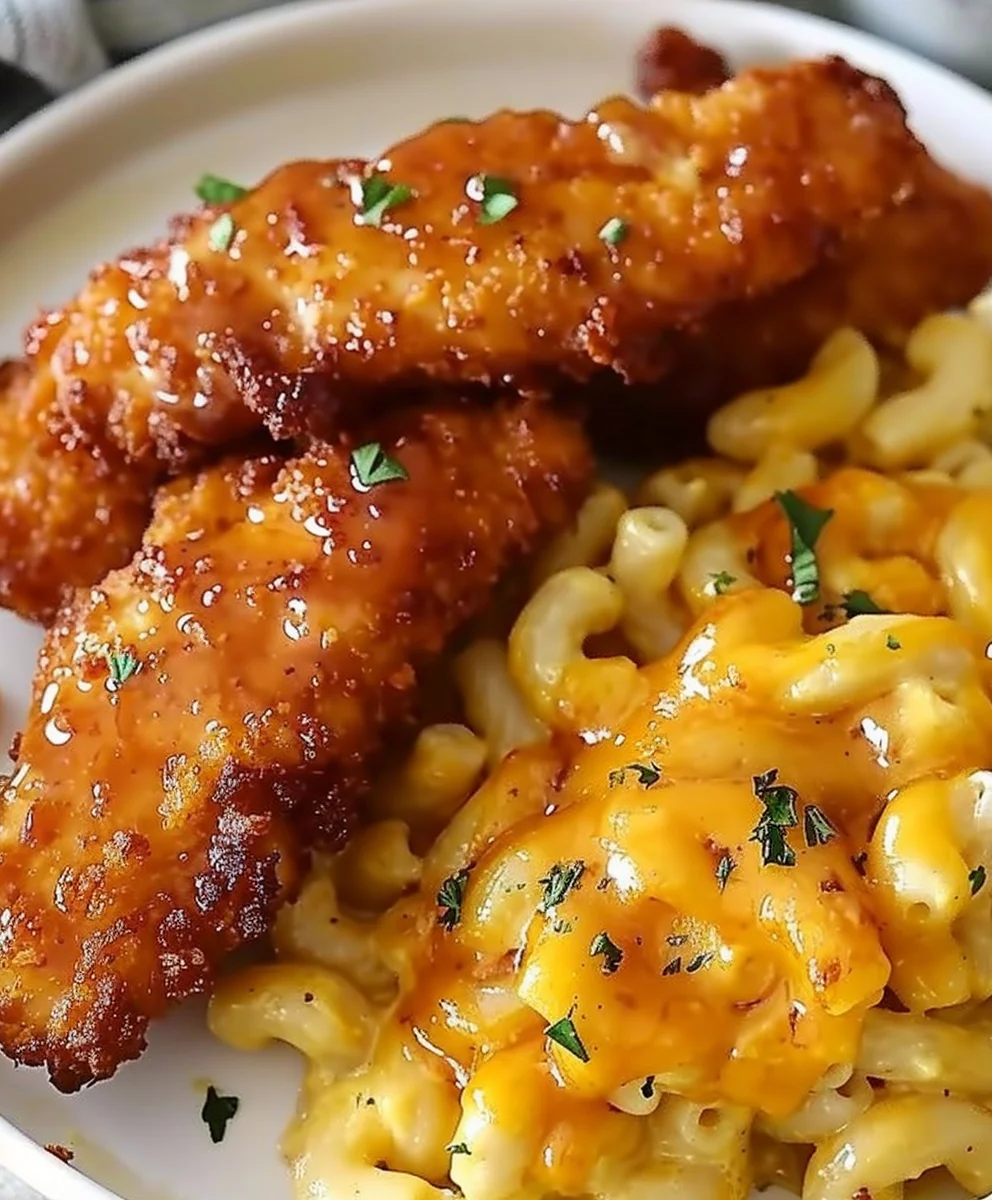
- Now for the grand moment! Scoop generous portions of the hot, creamy Baked Mac and Cheese onto plates.
- Carefully place a few of your magnificent Hot Honey Chicken Tenders right on top or alongside the mac and cheese. The contrast of the sweet and spicy, crispy chicken with the rich, cheesy pasta is truly something special. This dish is a flavor explosion!
- If you want to add a fresh touch, a sprinkle of finely chopped fresh chives or parsley over the mac and cheese or tenders always looks lovely and adds a burst of freshness.
- This “Hot Honey Chicken Tenders With Baked Mac And Cheese” is a complete meal in itself, but if you’re feeling extra, a simple side salad with a light vinaigrette or some steamed green beans would complement it beautifully, cutting through the richness just a bit.
- Leftovers (if you have any!): Store any leftover chicken tenders and mac and cheese separately in airtight containers in the refrigerator for up to 3 days. Reheat the chicken tenders in an air fryer or oven for best crispness, and the mac and cheese in the microwave or oven, perhaps with a splash of milk to bring back its creaminess.
- Enjoy every single bite of this utterly delicious, comforting, and exciting meal! It’s truly a showstopper.
Conclusion:
So there you have it, friends! We’ve journeyed together through the delightful process of creating a truly unforgettable meal that hits all the right notes. I genuinely believe that this recipe for
Hot Honey Chicken Tenders With Baked Mac And Cheese is more than just food; it’s a celebration of comfort, flavor, and culinary creativity. It’s the kind of dish that brings people together, sparks joy, and leaves everyone feeling utterly satisfied, from the first crispy bite of the tender to the last spoonful of gooey, cheesy pasta.
What makes this particular combination a must-try, you ask? Well, it’s the masterful symphony of textures and tastes working in perfect harmony. You get the glorious crunch of perfectly fried (or baked, for a lighter touch!) chicken tenders, coated in that irresistible sticky-sweet and subtly spicy hot honey glaze. This isn’t just any sweet and spicy; it’s a balanced, addictive kick that teases your palate without overwhelming it. Then, to round out this phenomenal experience, we have the ultimate comfort food classic: a rich, creamy, and gloriously golden baked mac and cheese. It’s the ultimate counterpoint to the vibrant tenders, offering a soothing, savory hug that makes every single mouthful an absolute dream. I’ve meticulously crafted this recipe to ensure that both components shine independently while elevating each other to an entirely new level when paired together. It’s a guaranteed crowd-pleaser, perfect for a cozy family dinner, a fun game night with friends, or even a special weekend treat. Forget about choosing between savory and sweet, or crispy and creamy; with this dish, you get to have it all, and it’s spectacular.
Elevating Your Experience: Serving Suggestions & Creative Variations
While the combination of our Hot Honey Chicken Tenders With Baked Mac And Cheese is undoubtedly magnificent on its own, there are so many wonderful ways to serve and adapt this recipe to truly make it your own. For a classic, well-rounded meal, I love serving this with a crisp, vibrant green salad. Think mixed greens, cherry tomatoes, and a light vinaigrette – the fresh acidity beautifully cuts through the richness of the main dish, creating a balanced and refreshing contrast. Steamed green beans or roasted asparagus also make excellent companions, adding a touch of healthy green goodness to your plate.
Feeling adventurous? For those who crave an extra punch of heat, a little extra drizzle of hot honey on top of the tenders just before serving is always a winner, or a sprinkle of finely chopped fresh chili peppers like jalapeños or serranos can really kick things up a notch. On the flip side, if you’re serving a more sensitive palate, consider offering the hot honey as a dipping sauce on the side, allowing everyone to customize their spice level. The beauty of this dish is its inherent flexibility.
When it comes to the baked mac and cheese, the possibilities for variations are virtually endless. Imagine stirring in some crispy bacon bits or caramelized onions for an extra layer of savory depth. A handful of roasted jalapeños can add a lovely smoky heat, while a sprinkle of fresh herbs like chives or parsley brightens up the entire dish. Don’t be afraid to experiment with your cheese blend too! While cheddar is a classic, combining it with smoked gouda for a deeper, nuttier flavor, or fontina for extra creaminess, can transform the mac and cheese into something truly bespoke. For an even more textural experience, consider topping your mac and cheese with a Panko breadcrumb mixture toasted with a little butter and garlic powder before baking, providing an incredibly satisfying crunch with every spoonful.
And let’s not forget our glorious chicken tenders! Beyond just serving them with the mac and cheese, they make fantastic sliders on soft brioche buns with a few pickle slices, or chopped up and tossed into a fresh salad for a satisfying main course. Leftovers (if you’re lucky enough to have any!) can be repurposed into incredible wraps the next day, perhaps with some crisp lettuce and a creamy ranch dressing. For a slightly different take on the tenders themselves, consider using an air fryer for an extra-crispy finish with less oil, or even breading them with seasoned Panko for a lighter, flakier crust.
Your Culinary Adventure Awaits!
Now that you have all the tips, tricks, and inspiration, it’s your turn to step into the kitchen and bring this incredible recipe to life. I promise you, the effort is minimal compared to the incredible reward of those perfectly balanced flavors. This isn’t just about following a recipe; it’s about creating memories, sharing deliciousness, and perhaps discovering a new family favorite. Don’t hesitate to personalize it, experiment with the variations I’ve suggested, or even invent your own unique twists. The kitchen is your canvas, and this recipe is your masterpiece waiting to happen!
I am genuinely excited for you to try this dish. Once you’ve whipped up your batch of Hot Honey Chicken Tenders With Baked Mac And Cheese, I would absolutely love to hear about your experience. Did you add anything special? What was your favorite part? Please share your culinary adventures in the comments below, or snap a photo and share it! Your feedback and creativity inspire me and our entire cooking community. Happy cooking, and get ready to indulge in something truly extraordinary!
Hot Honey Chicken Tenders With Baked Mac And Cheese
Prepare yourself for an extraordinary culinary experience that perfectly marries comfort with a captivating kick! Crispy, juicy chicken tenders coated in a tantalizing sweet and spicy hot honey glaze, served with a rich, creamy baked macaroni dish. This combination offers an incredible balance, making it an irresistible choice for any occasion.
Ingredients
-
1 lb chicken tenders
-
1 cup buttermilk
-
1 cup all-purpose flour
-
1 tsp paprika
-
1 tsp garlic powder
-
1/2 tsp salt
-
1/2 tsp black pepper
-
Oil, for frying
-
1/4 cup honey
-
2 tbsp hot sauce
-
1 tbsp butter, melted
-
2 cups elbow macaroni, cooked & drained
-
2 tbsp butter
-
2 tbsp all-purpose flour
-
2 cups milk
Instructions
-
Step 1
{‘@type’: ‘HowToStep’, ‘name’: ‘Prepare Hot Honey Chicken Tenders’, ‘itemListElement’: [{‘@type’: ‘HowToStep’, ‘text’: ‘Marinate 1 lb chicken tenders in 1 cup buttermilk for at least 30 minutes in the refrigerator.’}, {‘@type’: ‘HowToStep’, ‘text’: ‘In a shallow dish, whisk together 1 cup all-purpose flour, 1 tsp paprika, 1 tsp garlic powder, 1/2 tsp salt, and 1/2 tsp black pepper.’}, {‘@type’: ‘HowToStep’, ‘text’: ‘Dredge marinated chicken in the seasoned flour, pressing to coat well. Place on a wire rack and let rest for 15-20 minutes.’}, {‘@type’: ‘HowToStep’, ‘text’: ‘Heat 2-3 inches of oil in a large pot to 350-375°F (175-190°C). Fry chicken tenders in batches for 6-8 minutes, flipping halfway, until golden brown and cooked through (internal temperature 165°F/74°C). Drain on a wire rack lined with paper towels, seasoning lightly with salt immediately after frying.’}, {‘@type’: ‘HowToStep’, ‘text’: ‘For the Hot Honey Sauce: In a small saucepan, combine 1/4 cup honey, 2 tbsp hot sauce, and 1 tbsp melted butter. Bring to a gentle simmer, stirring, for 3-5 minutes until slightly thickened.’}, {‘@type’: ‘HowToStep’, ‘text’: ‘Toss the fried chicken tenders with the hot honey sauce until each piece is thoroughly coated.’}]} -
Step 2
{‘@type’: ‘HowToStep’, ‘name’: ‘Prepare Baked Macaroni’, ‘itemListElement’: [{‘@type’: ‘HowToStep’, ‘text’: ‘Preheat oven to 375°F (190°C). Grease a 9×13-inch baking dish.’}, {‘@type’: ‘HowToStep’, ‘text’: ‘Cook 2 cups elbow macaroni in heavily salted boiling water until al dente. Drain thoroughly; do not rinse.’}, {‘@type’: ‘HowToStep’, ‘text’: ‘In a large pot, melt 2 tbsp butter over medium heat. Whisk in 2 tbsp all-purpose flour for 1-2 minutes to create a roux.’}, {‘@type’: ‘HowToStep’, ‘text’: ‘Gradually whisk in 2 cups warm milk until the sauce is smooth and thickens to a thin gravy consistency, about 5-7 minutes. Remove from heat.’}, {‘@type’: ‘HowToStep’, ‘text’: ‘Combine the cooked macaroni with the white sauce, stirring until every piece is coated.’}, {‘@type’: ‘HowToStep’, ‘text’: ‘Pour the macaroni mixture into the prepared baking dish, spreading it out evenly.’}, {‘@type’: ‘HowToStep’, ‘text’: ‘Bake for 25-30 minutes, or until bubbly around the edges.’}, {‘@type’: ‘HowToStep’, ‘text’: ‘Carefully remove from the oven and allow to rest for 5-10 minutes before serving.’}]} -
Step 3
Scoop generous portions of baked macaroni onto plates. Place a few hot honey chicken tenders right on top or alongside. Enjoy every bite!
Important Information
Nutrition Facts (Per Serving)
It is important to consider this information as approximate and not to use it as definitive health advice.
Allergy Information
Please check ingredients for potential allergens and consult a health professional if in doubt.
Leave a Comment