
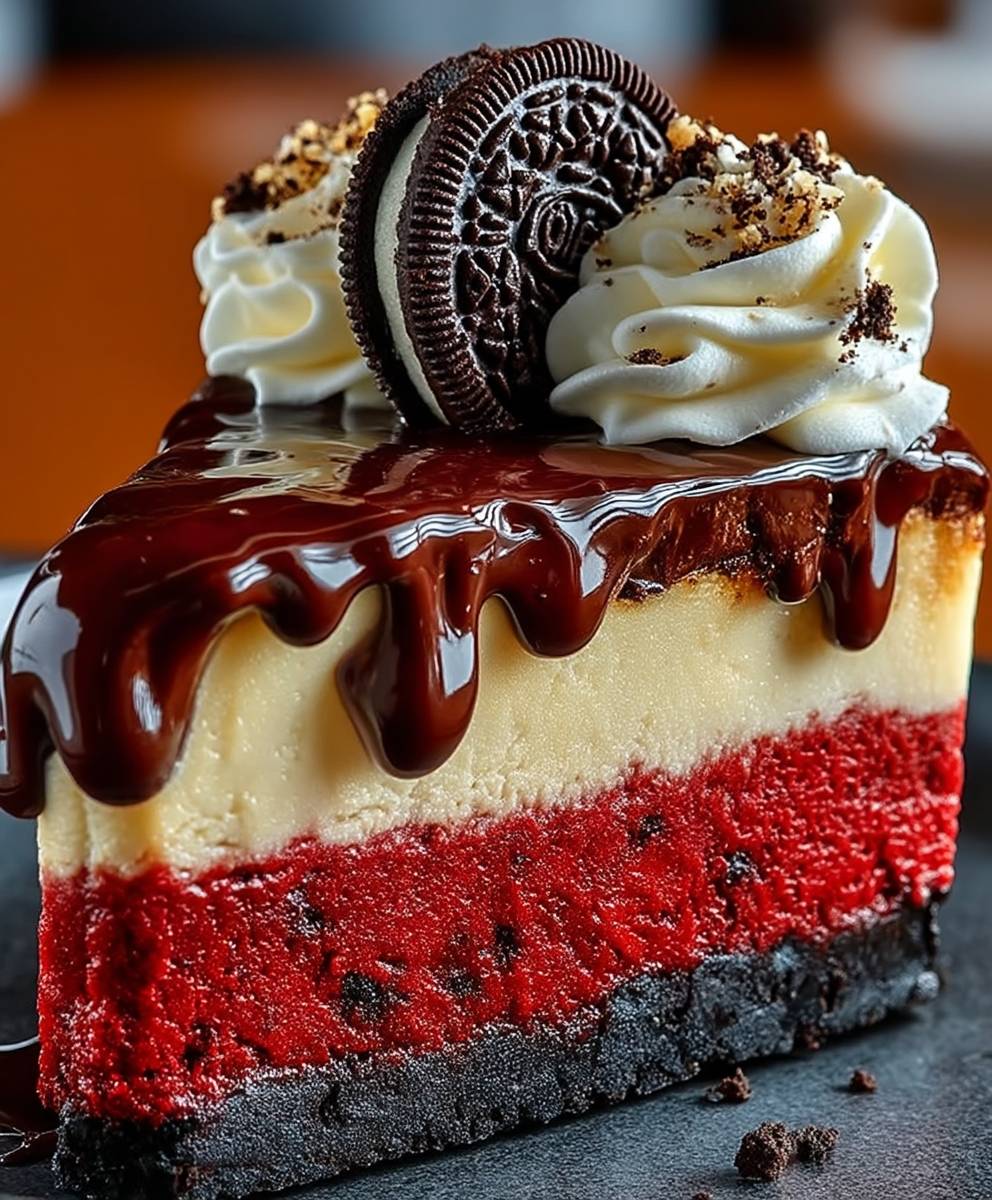
Red Velvet Oreo Cheesecake: Prepare to be utterly captivated by a dessert that’s as visually stunning as it is delicious! Imagine the classic, tangy allure of red velvet cake swirled into a creamy, decadent cheesecake, all resting upon a foundation of everyone’s favorite chocolate sandwich cookie. This isn’t just a dessert; it’s an experience.
While the exact origins of red velvet cake are debated, its popularity soared in the mid-20th century, becoming a symbol of Southern elegance and indulgence. The vibrant red hue, traditionally achieved through a chemical reaction between cocoa and acidic ingredients, adds a touch of drama to any occasion. Combining this iconic cake with the universally loved Oreo cookie and the rich creaminess of cheesecake creates a symphony of flavors and textures that’s simply irresistible.
People adore this Red Velvet Oreo Cheesecake because it’s the perfect balance of sweet and tangy, rich and comforting. The slightly bitter chocolate notes of the Oreo crust complement the sweet, velvety cheesecake filling, while the red velvet swirl adds a subtle tang that keeps you coming back for more. It’s a showstopper dessert that’s surprisingly easy to make, making it ideal for impressing guests or simply treating yourself. Trust me, one bite of this Red Velvet Oreo Cheesecake, and you’ll understand why it’s a crowd-pleaser!
Ingredients:
- For the Oreo Crust:
- 24 Oreo cookies, finely crushed (about 2 cups)
- 6 tablespoons (3 ounces) unsalted butter, melted
- For the Red Velvet Cheesecake Filling:
- 32 ounces (4 packages) cream cheese, softened to room temperature
- 1 3/4 cups granulated sugar
- 1/4 cup sour cream
- 2 large eggs
- 1 teaspoon vanilla extract
- 1 tablespoon unsweetened cocoa powder
- 2 tablespoons red food coloring
- 1/2 teaspoon white vinegar
- 1/2 teaspoon baking soda
- For the Oreo Cheesecake Topping:
- 1 cup heavy cream
- 2 tablespoons powdered sugar
- 6 Oreo cookies, coarsely chopped
Preparing the Oreo Crust:
- Crush the Oreos: The first step is to get those Oreos crushed! You can use a food processor for this, pulsing until you have fine crumbs. Alternatively, place the Oreos in a large zip-top bag, seal it tightly, and use a rolling pin to crush them into crumbs. Make sure there are no large chunks remaining.
- Combine with Butter: In a medium bowl, combine the crushed Oreo crumbs with the melted butter. Mix well until the crumbs are evenly moistened. The mixture should resemble wet sand.
- Press into Pan: Press the Oreo crumb mixture firmly into the bottom of a 9-inch springform pan. Use the bottom of a measuring cup or your fingers to create an even and compact crust. This will prevent the crust from crumbling when you slice the cheesecake.
- Pre-bake the Crust (Optional): For a sturdier crust, you can pre-bake it. Bake the crust in a preheated oven at 350°F (175°C) for 8-10 minutes. This helps to set the crust and prevent it from becoming soggy. Let the crust cool completely before adding the filling.
Making the Red Velvet Cheesecake Filling:
- Cream the Cream Cheese: In a large bowl (or the bowl of a stand mixer), beat the softened cream cheese with an electric mixer until smooth and creamy. This is a crucial step, so make sure there are no lumps. Scrape down the sides of the bowl as needed.
- Add Sugar and Sour Cream: Gradually add the granulated sugar to the creamed cheese, beating until well combined and smooth. Then, add the sour cream and mix until just incorporated. Don’t overmix at this stage, as it can introduce air into the batter, which can cause cracks during baking.
- Incorporate Eggs: Add the eggs one at a time, beating well after each addition. Again, avoid overmixing. Just mix until the eggs are fully incorporated.
- Add Vanilla and Cocoa Powder: Stir in the vanilla extract and cocoa powder. Mix until evenly distributed. The cocoa powder will give the cheesecake that subtle chocolate flavor characteristic of red velvet.
- Prepare the Red Velvet Reaction: In a small bowl, combine the red food coloring, white vinegar, and baking soda. The mixture will fizz up – this is normal! This reaction helps to create the signature red velvet color and adds a slight tang to the cheesecake.
- Combine Wet Ingredients: Gently fold the red food coloring mixture into the cheesecake batter until evenly colored. Be careful not to overmix, as this can toughen the cheesecake.
Baking the Red Velvet Oreo Cheesecake:
- Pour Filling into Crust: Pour the red velvet cheesecake filling over the prepared Oreo crust in the springform pan. Spread the filling evenly.
- Water Bath (Recommended): A water bath is highly recommended for baking cheesecake. It helps to create a moist and creamy texture and prevents the cheesecake from cracking. To create a water bath, wrap the bottom of the springform pan tightly with heavy-duty aluminum foil (double layer is best) to prevent water from seeping in. Place the wrapped springform pan inside a larger roasting pan.
- Add Hot Water: Carefully pour hot water into the roasting pan, reaching about halfway up the sides of the springform pan.
- Bake: Bake in a preheated oven at 325°F (160°C) for 65-75 minutes, or until the edges of the cheesecake are set but the center still has a slight jiggle. The jiggle should be very slight, almost like a pudding.
- Turn Off Oven and Let Cool: Turn off the oven and crack the oven door slightly. Let the cheesecake cool in the oven for 1 hour. This gradual cooling process helps to prevent cracking.
- Refrigerate: After cooling in the oven, remove the cheesecake from the water bath and let it cool completely on a wire rack. Then, cover the cheesecake with plastic wrap and refrigerate for at least 6 hours, or preferably overnight. This allows the cheesecake to fully set and develop its flavor.
Preparing the Oreo Cheesecake Topping:
- Whip the Cream: In a chilled bowl, whip the heavy cream with an electric mixer until soft peaks form.
- Add Powdered Sugar: Gradually add the powdered sugar and continue whipping until stiff peaks form. Be careful not to overwhip, as this can turn the cream into butter.
- Frost the Cheesecake: Once the cheesecake is completely chilled and set, remove it from the springform pan. Spread the whipped cream evenly over the top of the cheesecake.
- Garnish with Oreos: Sprinkle the coarsely chopped Oreo cookies over the whipped cream topping.
- Serve: Slice and serve the Red Velvet Oreo Cheesecake. Enjoy!
Tips for Success:
- Room Temperature Ingredients: Using room temperature cream cheese and eggs is crucial for a smooth and creamy cheesecake. If the ingredients are too cold, they won’t blend properly, resulting in a lumpy cheesecake.
- Don’t Overmix: Overmixing the cheesecake batter can incorporate too much air, which can cause the cheesecake to crack during baking. Mix just until the ingredients are combined.
- Water Bath: A water bath is highly recommended for baking cheesecake. It helps to create a moist and creamy texture and prevents the cheesecake from cracking.
- Cooling Process: The cooling process is just as important as the baking process. Letting the cheesecake cool gradually in the oven and then in the refrigerator helps to prevent cracking and ensures that the cheesecake sets properly.
- Variations: Feel free to experiment with different variations of this recipe. You can add chocolate chips to the cheesecake filling, use different types of cookies for the crust, or top the cheesecake with a chocolate ganache.
Storage Instructions:
Store leftover Red Velvet Oreo Cheesecake in the refrigerator for up to 5 days. Cover the cheesecake tightly with plastic wrap or store it in an airtight container to prevent it from drying out.
Conclusion:
This Red Velvet Oreo Cheesecake isn’t just a dessert; it’s an experience. The vibrant red velvet, the creamy cheesecake filling, and the satisfying crunch of the Oreo cookies create a symphony of textures and flavors that will leave you craving more. I truly believe this recipe is a must-try because it’s surprisingly easy to make, yet delivers a show-stopping dessert that’s perfect for any occasion. Whether you’re celebrating a birthday, hosting a holiday gathering, or simply want to treat yourself, this cheesecake will undoubtedly impress.
But the best part? It’s incredibly versatile! For a truly decadent experience, try serving it with a dollop of freshly whipped cream and a sprinkle of red velvet cake crumbs. Or, if you’re feeling adventurous, drizzle it with melted white chocolate or a tangy cream cheese glaze. You could even add a layer of chocolate ganache on top for an extra rich and indulgent treat. For a festive touch during the holidays, consider decorating it with edible glitter or festive sprinkles.
If you’re looking for variations, consider swapping out the Oreo cookies for other flavors. Golden Oreos would create a beautiful contrast with the red velvet, while chocolate Oreos would amplify the chocolatey goodness. You could even use peanut butter Oreos for a unique and delicious twist. Another fun variation is to add a swirl of raspberry jam to the cheesecake batter for a burst of fruity flavor. And for those who prefer a lighter dessert, you can use reduced-fat cream cheese and Greek yogurt to create a healthier version without sacrificing the creamy texture.
I’ve poured my heart into perfecting this recipe, and I’m confident that you’ll love it as much as I do. The combination of the moist red velvet cake, the rich cheesecake filling, and the crunchy Oreo crust is simply irresistible. It’s a guaranteed crowd-pleaser that will have everyone asking for seconds.
So, what are you waiting for? Gather your ingredients, preheat your oven, and get ready to embark on a baking adventure. I promise you won’t regret it! This Red Velvet Oreo Cheesecake is more than just a recipe; it’s a chance to create something truly special and share it with the people you love.
I’m so excited for you to try this recipe and experience the magic of this incredible dessert. Once you’ve made it, please come back and share your experience in the comments below. I’d love to hear about your variations, your serving suggestions, and any tips or tricks you discovered along the way. Did you add a special topping? Did you use a different type of Oreo? Did you make it for a special occasion? I’m eager to learn from your experiences and see how you made this recipe your own.
Don’t forget to take pictures of your beautiful cheesecake and share them on social media using the hashtag #RedVelvetOreoCheesecake. I can’t wait to see your creations! Happy baking!
Red Velvet Oreo Cheesecake: The Ultimate Dessert Recipe
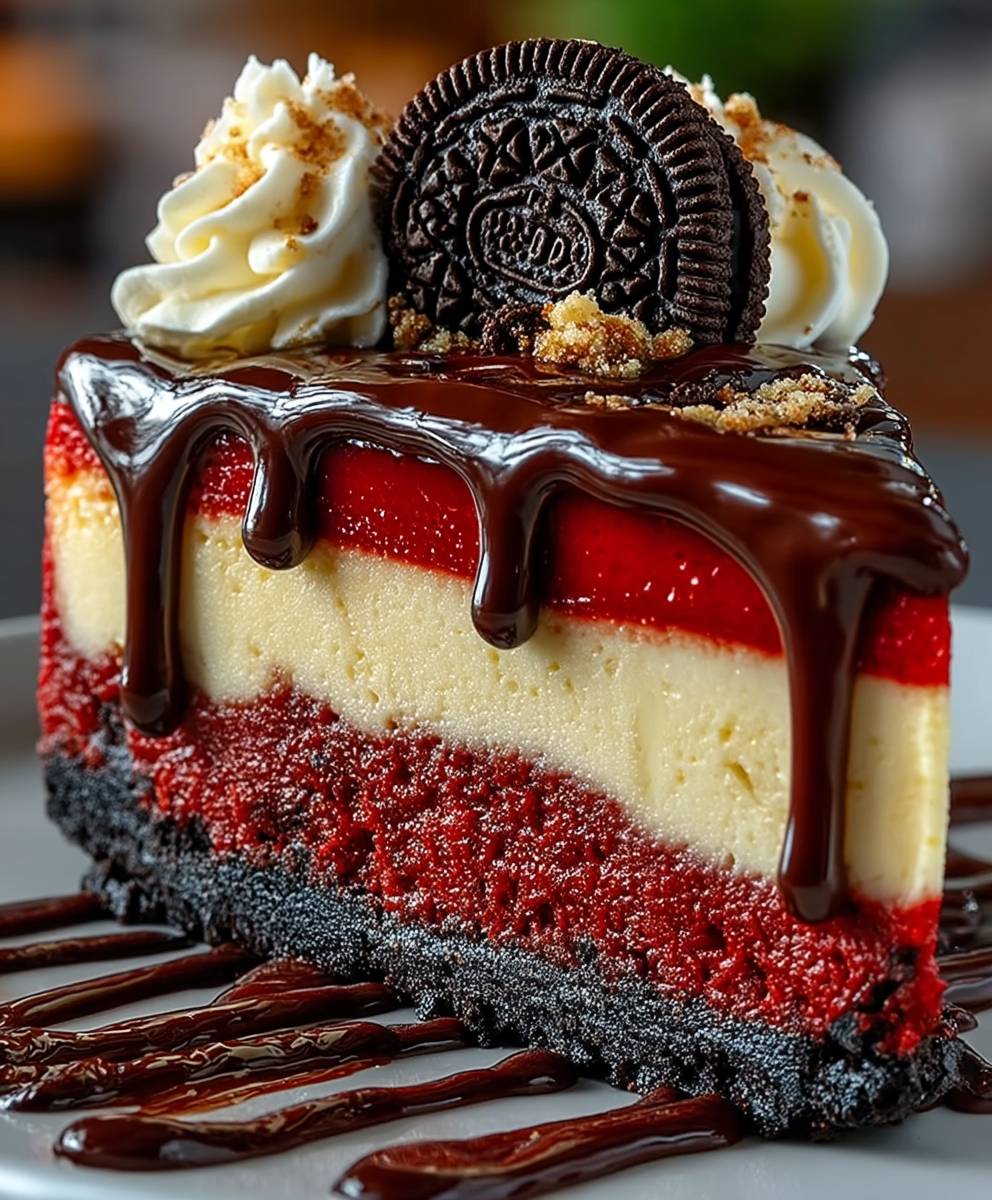
Decadent Red Velvet Oreo Cheesecake with creamy red velvet filling, Oreo cookie crust, and whipped cream topping.
Ingredients
Instructions
Recipe Notes
- Using room temperature cream cheese and eggs is crucial for a smooth and creamy cheesecake.
- Don’t overmix the cheesecake batter.
- A water bath is highly recommended for baking cheesecake.
- Letting the cheesecake cool gradually in the oven and then in the refrigerator helps to prevent cracking and ensures that the cheesecake sets properly.
- Store leftover Red Velvet Oreo Cheesecake in the refrigerator for up to 5 days. Cover the cheesecake tightly with plastic wrap or store it in an airtight container to prevent it from drying out.
- Feel free to experiment with different variations of this recipe. You can add chocolate chips to the cheesecake filling, use different types of cookies for the crust, or top the cheesecake with a chocolate ganache.
Leave a Comment